Managing Element Templates in Team Environment
If your team is using VPository.com or Teamwork Server as collaborative modeling solution, you can share element templates among team members with the built-in management and synchronization features. Doing so allows the entire team to compose document based on a common set of element templates. Besides, this ensures the completeness of document when being viewed in any member's environment because all members have access to the same and most updated templates needed by the documents.
In server, element templates are stored in repository based. This means that all of your projects managed under the same repository have access to the same set of element templates. In this page, you will learn how to manage those element templates and share them among team members.
Managing element templates
Manage element templates is the process to create, edit or delete element templates stored in repository. Once you have made the desired changes in Visual Paradigm locally, you can synchronize the changes to server. Teammates can get the updated templates by synchronizing changes to server as well.
As said earlier, element templates are stored in repository based. Therefore, no matter which project you have opened, you are managing the same set of element templates.
To manage element templates:
- In Visual Paradigm, select Tools > Doc. Composer > Manage Template XMLs... from the toolbar. In order to access the management function, make sure you are opening a team project managed under either VPository.com or Teamwork Server. Besides, make sure you are a team member and have been granted the right to Change document template in server. You may need to contact your server administrator to confirm the permission settings made in server.
- Now, you can manage element templates in the Manage Template XML window. Read the next section for details about what you can do in the Manage Template XML window.
Overview of Manage Template XML window
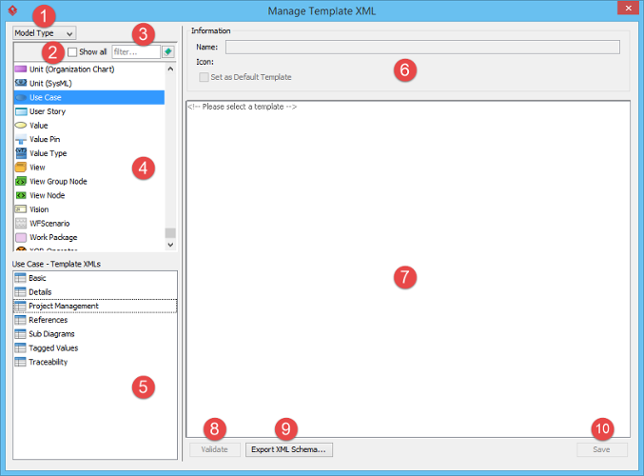 |
| Overview of Manage Template XML window |
|
|||||||||||||||||||||||||||||||||
| Description of Manage Template XML window |
Creating a template
To simplify the programming of template, you are suggested to duplicate an existing template and start editing it, rather than do everything from scratch. Target on a template that gives the closest outcome to what you want to show in document. If you want to start from an empty document, select any templates.
- Select the type of element to create template. For example, select Use Case Diagram if you want to create a template to list specific shapes in use case diagram. You can select project / diagram type / model element type.
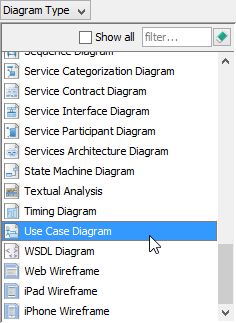
Selecting a use case diagram - Right click on an element template and select Duplicate... from the popup menu.
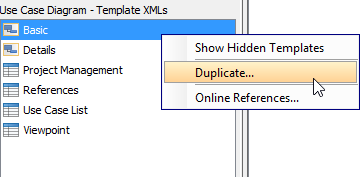
Duplicate a template - Enter the name of the new template.

Naming a template - Choose an icon that represents the presentation of content output with your template.
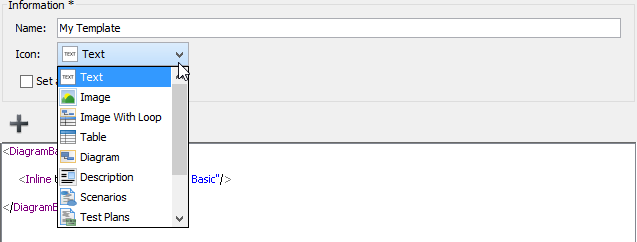
Choosing an icon for a template - Check Set as Default Template if you want Doc. Composer to apply this template automatically when dragging elements directly from Diagram Navigator / Model Explorer onto document.
- Compose the template in XML editor. If part of your template references content written in another element template, you can click + to add a reference to that template. Click here for details about template referencing.

Editing a template in XML editor - Click Save when finished editing. Now, you can use the new template in your document. You can also share it with teammates.
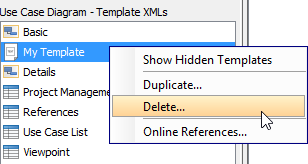
Deleting a template
Right click on an element template and select Delete... from the popup menu to remove it. Note that this action cannot be undone. Moreover, documents that used a deleted template in content will have the missing parts be replaced by <empty> tag(s). This may severely affect the completeness of your document so think twice before you delete a template. Make sure the template is not currently in-used by any document, or the documents that use the templates are not important anymore.
 |
| To delete a template |
| NOTE: | You can only delete a user-defined template. |
Modifying a template
Click on the template in the list of template list and then modify it in XML editor. Click Save when finished editing. When finished, you can refresh your document to apply the changes.
Synchronizing element templates
Once you have finished editing element templates, you can synchronize the changes to server. Teammates can get the updated templates by synchronizing changes to server as well.
To synchronize changes to server manually, select Tools > Doc. Composer > Sync. to VPository/VP Teamwork Server from the toolbar.
Note that your changes will be synchronized automatically when you perform commit.
Related Resources
The following resources may help you to learn more about the topic discussed in this page.
| 18. Exporting a document | Table of Contents | 20. Managing Styles in Team Environment |