How to Use Textual Analysis's Candidate Pane?
Textual analysis can be divided into two views: problem statement view and candidate pane view. While you can edit problem statement and format text in problem statement view, you can edit and organize candidate objects in candidate pane view. The main characteristic of candidate pane view is that you can visualize candidate objects as boxes on candidate pane for easy arrangement.
To switch to candidate pane view:
Click Candidate Pane View button.
 |
| Click Candidate Pane View button |
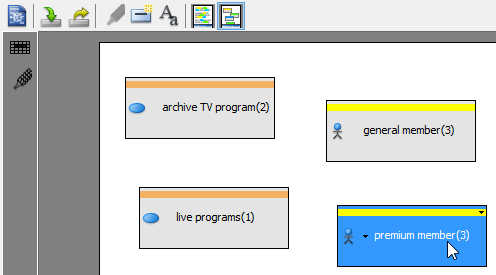
The overview of candidate pane view
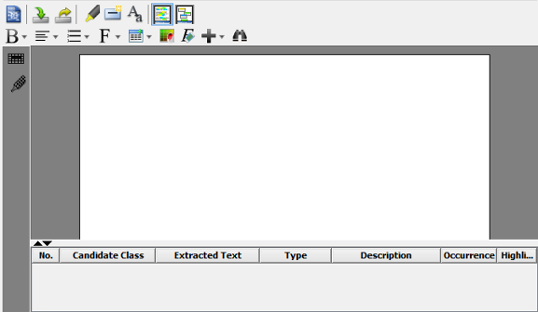 |
| Candidate pane view |
Editing candidate objects
Candidate pane view is similar to problem statement view where you can rename candidate objects, enter their description, change their highlight color and type. Except editing in the grid at the bottom, you can also edit through candidate object's box on candidate pane.
To change the model element type of a candidate object, move the mouse over the target candidate object's box. Click the inverted triangle next to the model element's icon when it reveals. Select a model element type from the pop-up menu.
 |
| Change model element type |
To change the highlight color of a candidate object, move the mouse over the target candidate object's box. Click the inverted triangle on its top-right corner when it reveals. Select a color from the pop-up menu.
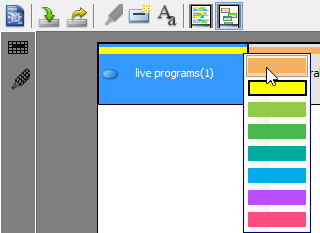 |
| Change highlight color |
Filtering candidate objects
To filter specific model element of candidate objects, click Model Filter button. Check the target model element(s) from the pop-up menu that you want to view on candidate pane.
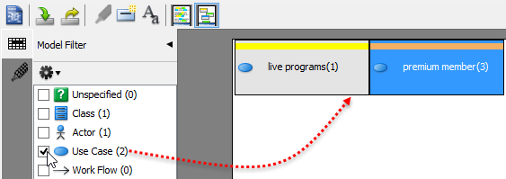 |
| Check Use Case |
To filter specific highlight of candidate objects, click Highlight Filter button. Check the target highlight from the pop-up menu that you want to view on candidate pane.
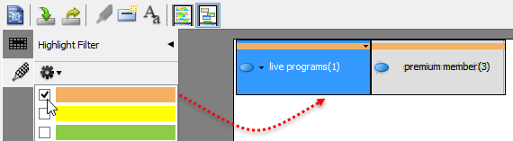 |
| Check yellow |
Freely moving candidate objects
To move candidate object's box, just press the target box and drag it to your preferred location.
 |
| Press and drag Premium Member |
Selecting candidate objects
When you click a specific candidate object in the grid at the bottom of candidate pane, the corresponding candidate object's box will be selected on candidate pane, and vice versa.
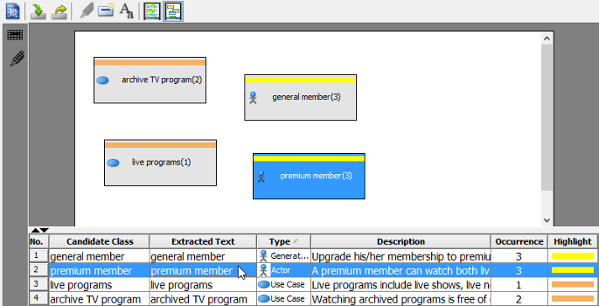 |
| Click candidate object in grid |
Setting tile layout
Tile layout refers to the selected objects are arranged in horizontal row.
To set tile layout for all candidate object's boxes on candidate pane :
Right click on candidate pane's background and select Tile Layout from the pop-up menu.
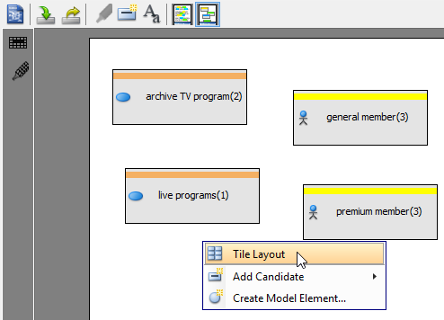 |
| Set tile layout |
As a result, all candidate objects are arranged in tile layout.
 |
| Tile layout |
Related Resources
The following resources may help you to learn more about the topic discussed in this page.
| 4. Forming diagram from candidate objects | Table of Contents | Chapter 16. CRC card diagram |