Upgrading to new version
When Visual Paradigm has released a new version, you may want to upgrade to it. For users of Teamwork Server, do not forget to upgrade also the VP Server. Otherwise, you will not be able to perform team operations in the upgraded client products due to compatibility issues. In this page, server administrator will learn how to manage and execute the upgrade process of Teamwork Server.
Upgrading from VP Server 5.3 or Any Higher Version
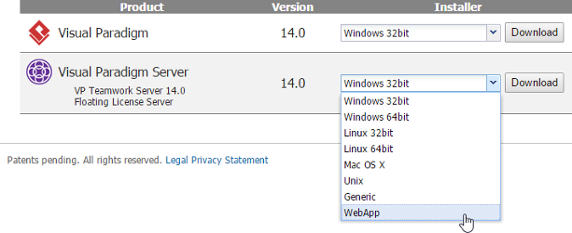
- Get ready for the license keys and WebApp of the latest version of Teamwork Server. You can download them from your customer account by logging into our Customer Service Center. To download WebApp, make sure Web Application is selected for downloading.
Download WebApp of VP Server - Open a Web browser. Login to the VP Server as administrator.
- Select Server Update from the menu on the left.
- Click Choose File and select the WebApp package you downloaded.
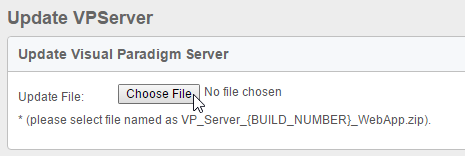
To select the WebApp package of VP Server - Once you selected the file, system will show up the build you use currently as well as the build you are going to update to. Click Yes to proceed. **Note that the server will be out of services for 10 to 15 seconds when upgrading.
- Update completed message will be shown once the update is done. And now the server is back to service. This completes the upgrade process. All the team members can resume working with the clients after upgrading.
Upgrading from VP Server 5.2 or Any Earlier Version
- Get ready for the license keys and installers of the latest version of Teamwork Server. You can download them from your customer account by logging into our Customer Service Center.
- Stop VP Server by running %VP_Server_Dir%\scripts\shutdown.bat (shutdown.sh for Linux and Mac OS X). If Teamwork Server was installed as a Windows service (for Windows users), run %VP_Server_Dir%\scripts\remove_service.bat.
- Zip the %VP_Server_Dir%. Rename the zip file by appending the current date to filename.
- Having downloaded the new version of VP Server server program to the server machine, extract it to the folder where you want the new VP Server to install to.
- Run the command console. Change the current directory to the scripts sub-folder of the extracted folder.
- Run the script migrate.bat with the parameter -path by specifying the old server folder:
migrate.bat -path <old-server-dir>
(E.g.: migrate -path "C:\VPServer 8.2") - Answer the math question and press Enter to produce the migration package. Depending on the size of the old VP Server, this process may take a while to complete. During the process, the existing VP Server will be stopped.
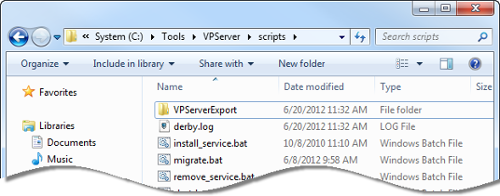
- When finished, you should see the folder VPServerExport created under the scripts folder of the new VP Server.
- Move the VPServerExport folder to %New_VP_Server_Dir%\webserver\webapps\ROOT\WEB-INF .
- Start up the new server by running the scripts\startup.bat (startup.sh for Linux and Mac OS X). You may see a command console appear. Do NOT close it or else the server will be stopped.
- Open a Web browser. Visit the server URL (e.g. http://127.0.0.1:1999 ).
- You should see the message that a file called vpserver.tar.gz is found. Click Next to continue. If you do not see this message, please review the steps above and try again.
- Follow the instructions to finish up the configuration of database and installed modules. When everything is done, you will be prompted to restart the server. After that you can start using the new server.
Upgrading from Teamwork Server 4.2 or Any Earlier Version
- Get ready for the license keys and installers of the latest version of both Teamwork Server. You can download them from your customer account by logging into our Customer Service Center.
- Stop the Teamwork Server by running %Teamwork_Server_Dir%\bin\ShutdownTeamworkServer.exe (.sh for Linux and Mac OS X). If Teamwork Server was installed as a Windows service (for Windows users), please remove the service first.
- Zip the %Teamwork_Server_Dir%. Rename the zip file by appending the current date to filename.
- Having downloaded the new version of VP Server server program to the server machine, extract it to the folder where you want the new Teamwork Server to install to.
- Run the command console. Change the current directory to the scripts sub-folder of the extracted folder.
- Run the script migrate.bat with the parameter -path by specifying the old server folder.

Running migrate script - Open a Web browser. Visit the server URL (e.g. http://127.0.0.1:1999 ).
- Once the script is running, the old server will be disabled. The repository, user accounts and license key will be exported from the old server during the process. So for safety, enter result of summation to confirm the execution.
- When finish, a folder VPServerExport will be created in the scripts folder.
Caption Here - Move the VPServerExport folder to %SERVER_DIR%\webserver\webapps\ROOT\WEB-INF .
- Start up the new server by running the scripts\startup.bat (startup.sh for Linux and Mac OS X). You may see a command console appear. Do NOT close it or else the server will be stopped.
- Open a Web browser. Login to the VP Server as administrator.
- Enter your organization name and password. Click Next at bottom right to continue.

Enter organization name and password - In the Select Module page, keep Teamwork Module selected and optionally select the other module(s) you need to activate.
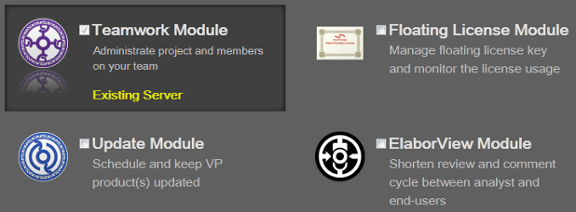
Select Teamwork Module NOTE: You can select more than one module. In this user's guide only the Teamwork Module will be covered. If you want to know the details about the other supported modules, please check from their user's guides. - Click Configure Database/Module at bottom right. The Configure Database page appears.
- There is data that VP Server needs to make persistent, such as your login name, password, server repository path, etc. All these have to be stored in a database. You need to prepare such database and fill in the connection information in this page. First, select your database management system from the Database drop down menu.

Database setting NOTE: If you do not have a database available and if you just want to run Teamwork Server for evaluation, you may select Embedded DB as database, which is a ready-to-use database management system built into the server. In other words, no additional database setup has to be made by choosing Embedded DB. However, it is NOT recommended to use Embedded DB for production purpose as it is a bit limited in database size. - Click Configure Module at bottom right. Specify the folder path of repository. Repository is where the project files will be stored. If you are uncertain, just leave it unchanged.

Enter repository folder - Click the Browse button in the License Key section and import the license key of the new Teamwork Server. Click Configure Teamwork Module at bottom right.
- The users added and defined in old Teamwork Server is listed here. Enter their Email addresses and new passwords.
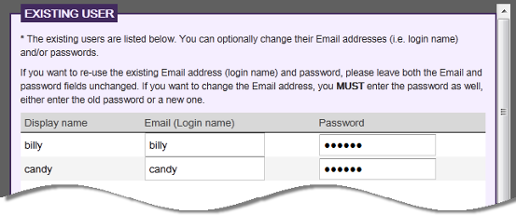
Migrate users - Click Finish at bottom right to complete the installation.
Related Resources
The following resources may help you learn more about the topic discussed in this page.
| Chapter 6. Upgrading to new version | Table of Contents | Part IV. Client operations |