Developing workflows is a process of capturing all relevant information that goes into the process:
- who is involved,
- what they’re responsible for,
- how tasks are handed off,
- which tasks are manual and which are automated.
BPMN is hard to learn?
Many critics of BPMN 2.0 complain that BPMN is too complicated to learn, in particular to many notations to be memorized. What the critics failed to mention is that most processes do not require the modeler to know the entire specification. In fact, most models don’t use more than a handful of the most common process elements. In fact, BPMN consists of only 3 basic types of elements plus flow connector element:
- Events
- Activities
- Gateways
- Flow
Yes that’s it! There are just only three types of elements in BPMN and the fourth element – flow element is used to connect the other three – the Sequence Flow (the black lines with arrows that connect everything together).
In fact, each of these four elements has a set of it own variants making the BPMN notation more complicated.
Let’s see how to draw business process diagram with Visual Paradigm.
Drawing a business process diagram
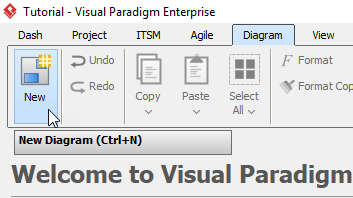
- Select Diagram > New form the toolbar.
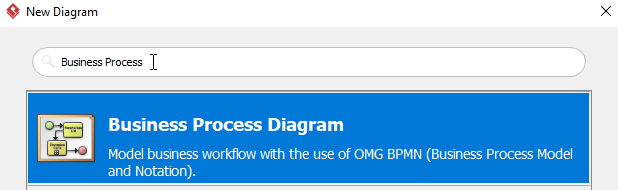
- In the New Diagram window, select Business Process Diagram, then click Next. You can use the Search bar above to filter results.
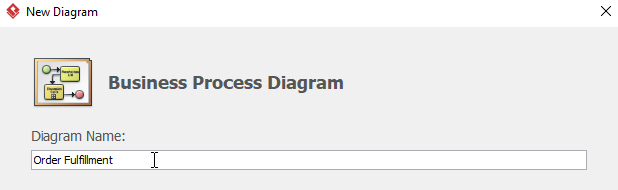
- Name the diagram then click OK. In this tutorial, we will name the diagram Order Fulfillment.
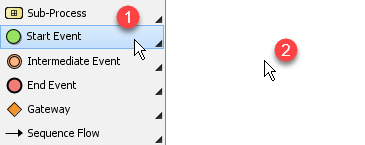
- To create a start event, select Start Event, then click the location where you want the start event to be placed.
- However, we want a message start event instead of a start event. We can right click the start event > Trigger > Message Trigger to make it Message Start Event.
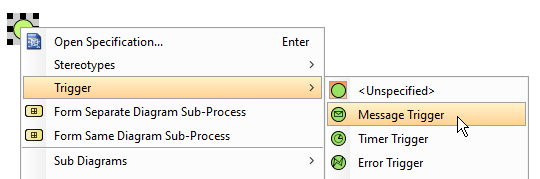
Don’t forget name the message start event by double clicking the message start event. We will name the message start event Order Received.
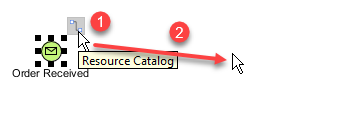
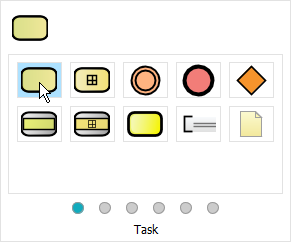
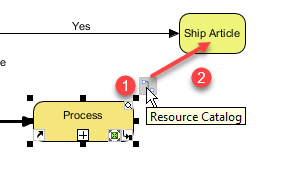
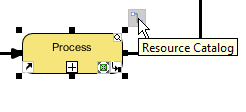
- To create a task after Order Received, select Order Received, click and hold the resource button Resource Catalog, then drag the cursor to the desire location and release. In the popup window, select Task. You can double click the task to rename it. We will name this task Check Availability.
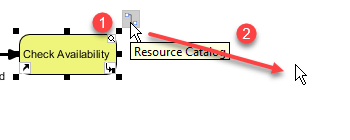
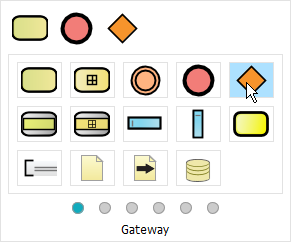
- We would like to have a gateway after Check Availability. Select Check Availability, click and hold the resource button Resource Catalog, drag the cursor to the desire location and release. Select Gateway form the popup window. Name the gateway Article Available.
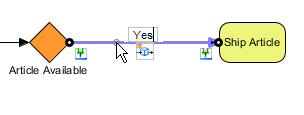
- Create a task named Ship Article after Article Available using method similar to step 6. Double click the sequence flow between Article Available and Ship Article and rename to Yes.
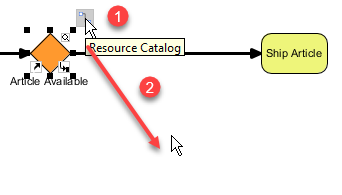
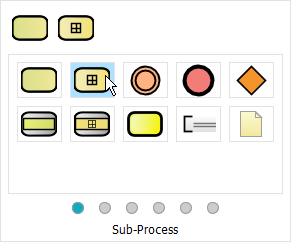
- Create a sub-process named Procurement after Article Available with the sequence flow called No. Click Article Available, click and hold Resource Catalog, drag to desire location and release. Select Sub-Process from the popup window, double click the sub-process to rename to Procurement. Name the sequence flow between No.
- Select Procurement, click and hold Resource Catalog, drag to Ship Article and release to create a flow between Procurement and Ship Article.
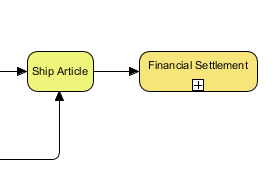
- Create a sub-process after Ship Article named Financial Settlement using step 9.
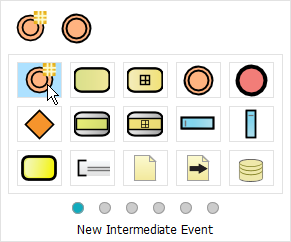
- We would like to create an error intermediate event named Deliverable on Procurement. Click Procurement > Resource Catalog, then select New Intermediate Event from the popup window.
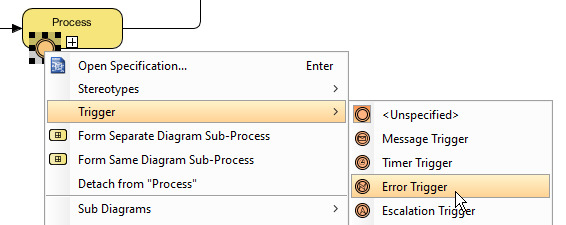
- Right click the newly created intermediate event > Trigger > Error Trigger. Name the error intermediate event Deliverable.
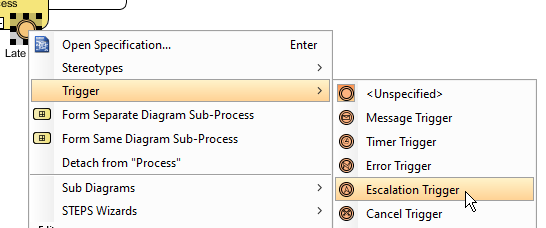
- Create an escalated intermediate event called Late Delivery using the same method on step 12 and 13. However, when repeating step 13, select Escalation Trigger instead.
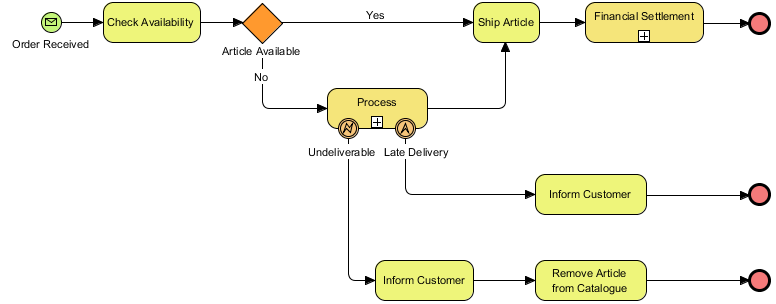
- You can create more tasks using step 6. You should see something like this after creating more tasks:
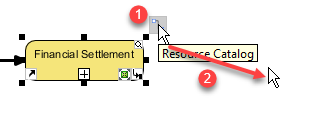
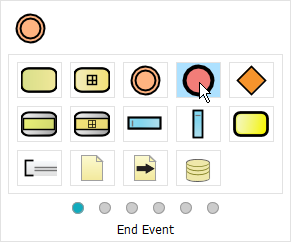
- Now we can create an end event after Financial Settlement. Select Financial Settlement, click and hold Resource Catalog, drag to desire location and release, then select End Event from the popup window.
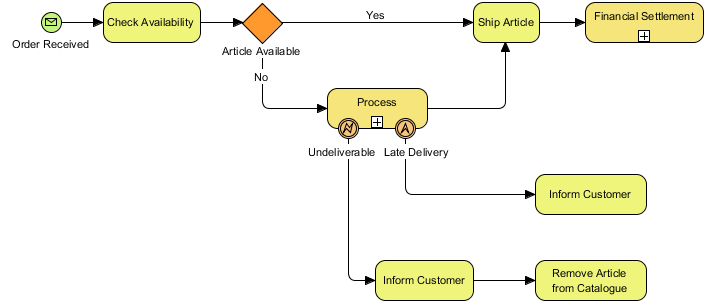
- Create two more end events, one after both Inform Customer and Remove Article from Catalogue, repeating step 16.
- You should now see a diagram similar to this: