What is a sprint review?
At the end of each Sprint, the scrum core team and relevant stakeholders participate in a sprint review meeting in which the sprint deliverables are demonstrated to the product owner, sponsor, customer, and users.
During the sprint review, the Product Owner reviews the new functionality and/or new products against acceptance criteria defined in user stories and either accepts or rejects the completed user stories.
Scrum Process Canvas allows you to document the entire scrum review meeting, from the beginning until the end.
Perform the steps below to manage your sprint review meeting. You may try the steps interactively by visiting the interactive product tour.
Step 1: Prepare for a sprint review meeting
- In the Scrum Process Canvas, click on the work item Sprint Review Meeting to open it.

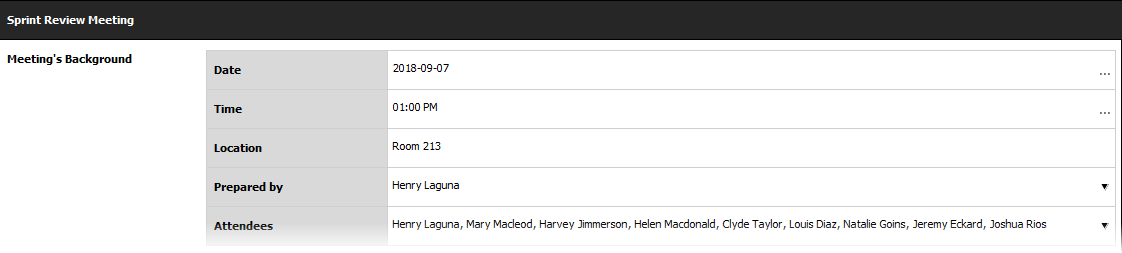
- As the first step, you are required to prepare the sprint review meeting by deciding the date and time, the attendee and the agenda of the meeting. Click on the action artifact Sprint Review Meeting.
- Fill-in the meeting form to complete this step. First, specify the background of the meeting by entering the date, time, location of the meeting. Besides, select the members who will attend the meeting.
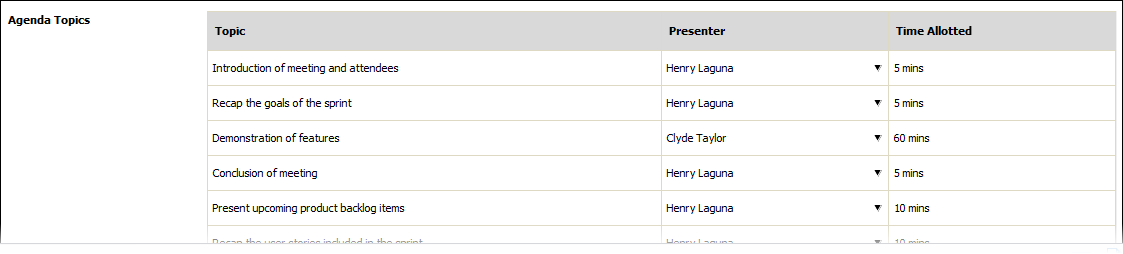
- List the topics to be discussed in the meeting as agenda topics. Press Enter to create a new topic.
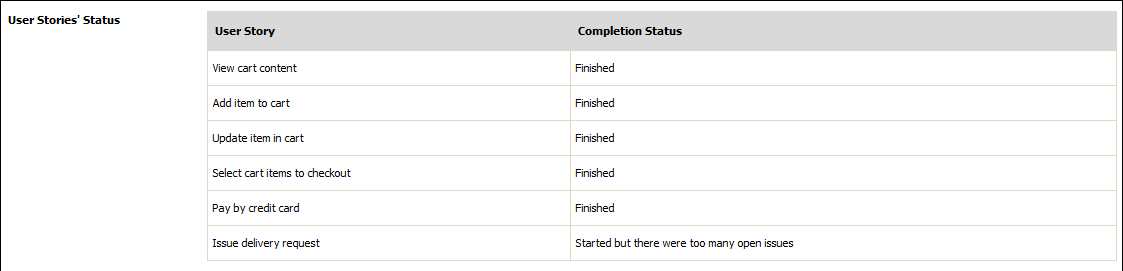
- Describe the status of user stories’ completion. This allows people a chance to see what will be demonstrated and what will not. Mostly this is whether the stories were finished or not, but include anything else that is important to note.
- Enter other information such as the observers and resources required.

- When finished, go back to the work item page via the breadcrumb.
- When you are done, you can move on to the next step. To do this, click on Complete Step at the bottom right corner, and then select Complete from the popup menu.
Step 2: Demonstrate new functionality and document the result of acceptance
You are now on step 2, the heart of the sprint review meeting.
Recording user acceptance
In this step, The scrum team demonstrates the new functionality and/or new products created. The product owner and stakeholder(s) inspect what has been completed against acceptance criteria defined in user stories and either accept or reject the completed user stories.
- To document the result of user acceptance, click on the action artifact User Acceptance.

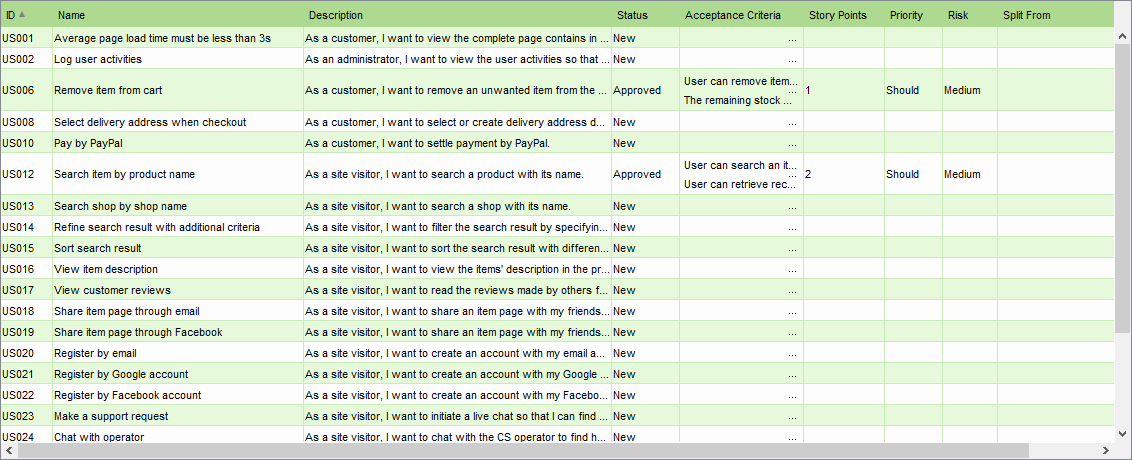
- This opens a table that lists the User Stories agreed to complete in this sprint. Walk through the stories and demonstrate the new functionality. Let’s say we want to demonstrate how this user story works. Select it now.
- Browse its acceptance criteria by clicking ….
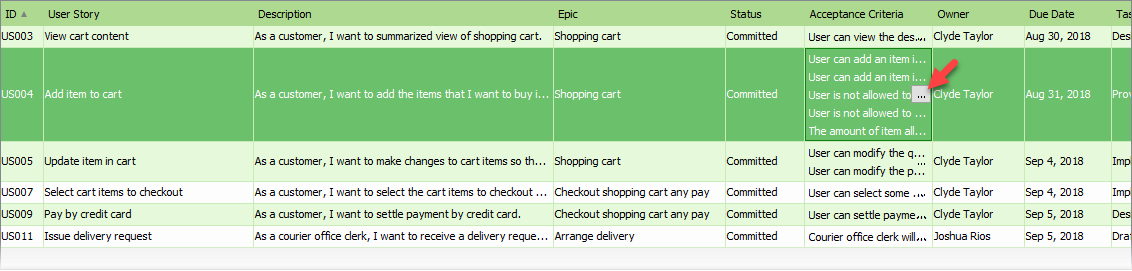
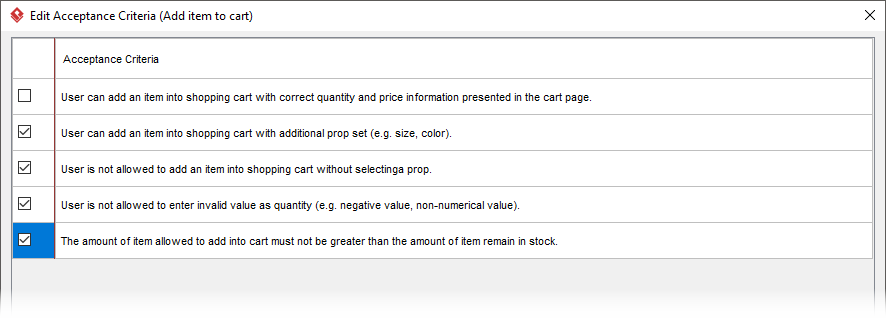
- These are the acceptance criteria defined when developing product backlog. Walk through the items with stakeholder. Place a check mark on item that is confirmed done.
- Click Close to return to the table.
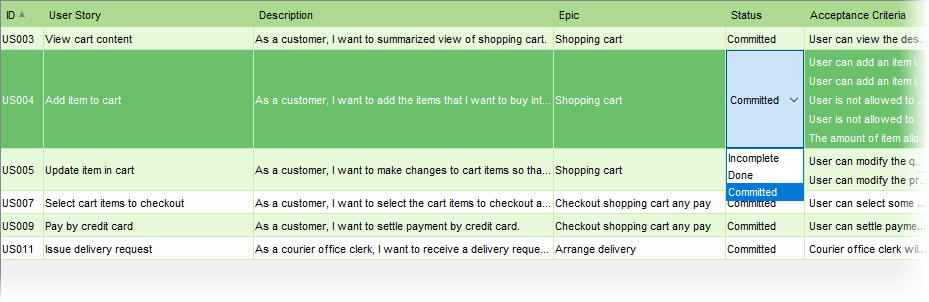
- Update the status of demonstrated Story. If a user story is accepted by the product owner and the stakeholders, set the status to Done. If a user story is not fully accepted, set it to Incomplete.
Splitting and extending user stories
It is not uncommon that new requirements are found during the demonstration session. Those requirements should be captured as new user stories for further reviewing and approval, eventually be implemented in future sprint(s).
To manage this, use the split and extend function to create a new set of user stories from an existing one.
- Click on the … button in the Split / Extend User Stories cell.
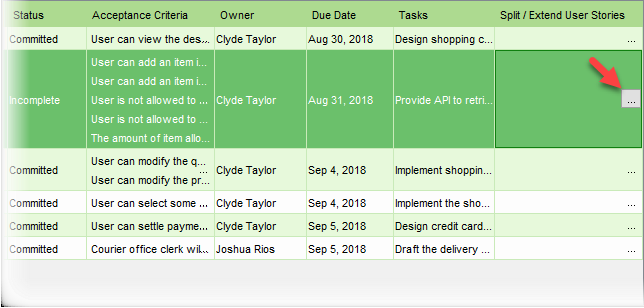
- This opens a window for creating split / extended User Stories. Create new user stories for each of the new and updated requirements. You can also use this function to capture the additional work required to get an incomplete user story done, which typically includes bug fixes, minor enhancements, support of missing functions, etc.
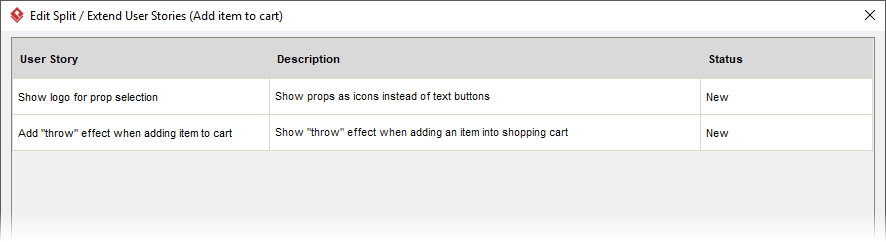
- Click Close to return to the table.
- Walk through all the User Stories in this sprint backlog. Demonstrate the new functionality and document their result of acceptance.
- When finished, go back to the work item via the breadcrumb.
Updating sprint deliverables’ status
Besides User Stories, you also need to update the status of sprint deliverables.
- To do this, click on the action artifact Sprint Deliverables.
- This shows a list of sprint deliverables. Update the Status of each sprint deliverable.
- If certain deliverable is rejected, explain why and state if any follow-up action will be taken in the Notes field.

- Go back to the work item.
- When you are done, complete this step.
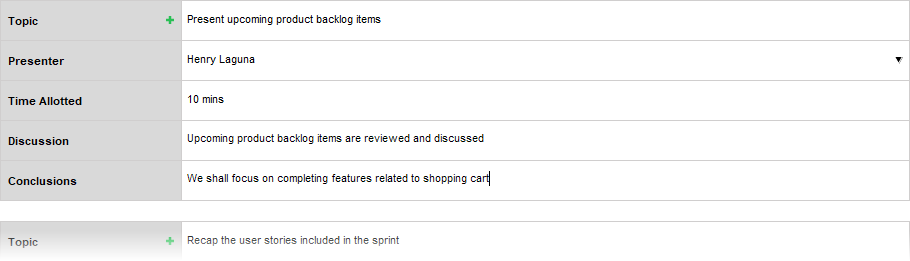
Step 3: Present upcoming product backlog items
The final step of the sprint review meeting involves a discussion of potential items to be done in the next sprint. Throughout the current sprint review, feedback on the work of the current sprint is acquired, this will often influence the planning of subsequent sprints.
- Click on the action artifact Product Backlog.

- Present and discuss the upcoming product backlog items with stakeholders.
- Go back to the work item.
- Click on Discussion Notes to records the comments collected during the sprint review meeting.

- Fill-in the form to complete this step
- Record the discussion.

- You may optionally select the User Stories being discussed. Click … to edit.
- In the popup window, select the User Stories associated with the discussion.

- Click OK to confirm.
- When finished, go back to the work item.
- When you are done, complete this step.
Step 4: Wrap up the meeting
In step 4 of the work item, you have to conclude the meeting by entering the discussions and conclusions, and creating tasks for any follow-up actions required.
- Click on the action artifact Sprint Review Meeting.
- Complete the meeting form.
- Describe the discussion and conclusion for each agenda topic.
- When finished, go back to the work item.
- Complete this step.
Step 5: Update the status of project deliverables
- As some features are done and delivered, update the completion status of project deliverables. Click on the action artifact Project Deliverables.

- This opens the table of project deliverables. Update the status of their completion.

- Describe the progress in the Notes field. Double click on it.
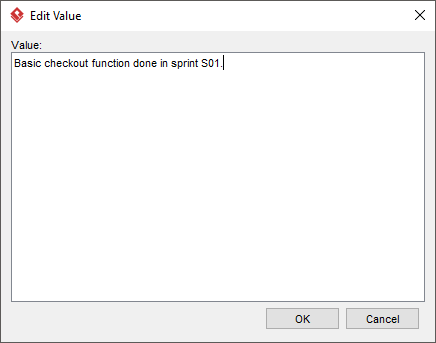
- Enter the description and click OK to confirm.
- When finished, go back to the work item.
- Complete this step.