Implementing plugin
Configuring development environment
The plugin API is in %Visual-Paradigm-Install-Dir%/lib/openapi.jar. In order to program a plugin, developer must import the jar into the development classpaths.
Beginning of plugin.xml
plugin.xml is the base of a plugin, to develop a plugin, you should start from writing the plugin.xml. The basic directory structure is "Visual-Paradigm-Install-DIR/plugins/YOUR_PLUGIN_ID/plugin.xml"
For improving the variability of the plugin.xml, a properties file (plugin.properties) can be used for storing the value of the xml. Developer can assign the value of the attributes in xml starts with '%', then the value will be read from the properties file. For example
In plugin.xml: <plugin id="sample.plugin name="%plugin.name" .../>
In plugin.properties: plugin.name=sample.plugin
Sample on XML:
id="sample.plugin"</plugin>
name="Sample Plugin"
description="Sample Plugin"
provider="Visual Paradigm"
class="sample.plugin.SamplePlugin">
<runtime><library path="lib/sampleplugin.jar" relativePath="true"/></runtime>
<!-- to be continued -->
Table shows the description of elements in the plugin.xml.
|
|||||||||||||||||||||
| plugin.xml element description |
Description on Code:
VPPlugin (com.vp.plugin.VPPlugin)
This class must be implemented and ref on <plugin class="xxx"... Otherwise, the plugin will not be loaded completely. In fact, the class can do nothing on it.
The following is the sample code:
public class SamplePlugin implements com.vp.plugin.VPPlugin {
// make sure there is a constructor without any parameters}
public void loaded(com.vp.plugin.VPPluginInfo info) {// called when the plugin is loaded}
// developer can get the current plugin's id and the
// current plugin directory (default: %Visual-Paradigm%/plugins)of Visual-Paradigm from the VPPluginInfo.
public void unloaded() {// called when the plugin is unloaded (when Visual Paradigm will be exited)}
Implementing custom action
There are 2 main components for an Action: Action and Action Controller. Action represents the outlook, Action Controller responses to work as function call. In order to create custom action, developer needs to define the Action on xml, and implement the Action Controller on code.
Sample on XML:
<actionSets></plugin><!-- to be continued --></actionSets>
<!-- to be continued -->
Table shows the description of elements in the above XML.
|
||||||
| XML sample for custom action |
There are differences on xml definition and code implementation of the 3 kinds of Actions (menu/toolbar, popup menu, diagram toolbar).
Custom action on menu/Toolbar
Developer can define the menu, menu item, toolbar, toolbar button and etc... on the plugin.xml. In order to trigger the menu item and toolbar button's function call, Action Controller is required to be implemented and added into the Action. The Action Controller class on menu/toolbar actions is com.vp.plugin.action.VPActionController.
There are 2 important attributes used on menu, action and separator: menuPath and toolbarPath.
menuPath is the path specified where is the item placed on menu, toolbarPath is the path specified where is the item placed on toolbar. The path is formed by a set of 'name'. The 'name' is similar with the caption of the menu items (caption in English, ignores the "..." and remind the 'space'). '/' is used as delimiter of the path. '#' is used to represent the front of the menu. Here, 4 examples will be given:
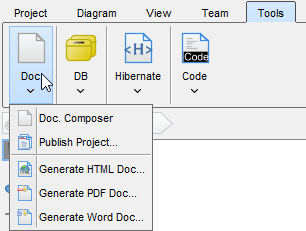 |
| Custom Action on MenuBar |
Below is the menupaths required for implementing the menus shown in the above images.
|
||||||||||||||||||||
| Different menupaths settings |
Sample on XML:
<toolbar</actionSet>id="sample.plugin.actions.Toolbar1"<menu
orientation="north"
index="last"/>id="sample.plugin.actions.Menu1"<action
label="Sample Menu 1"
mnemonic="M"
menuPath="Tools/Document"/>id="sample.plugin.actions.Action1"</action>
actionType="generalAction"
label="Sample Action 1"
tooltip="Sample Action 1"
icon="icons/red.png"
style="normal"
menuPath="Tools/Document"
toolbarPath="sample.plugin.actions.Toolbar1/#">
<actionController class="sample.plugin.actions.ActionController"/>
<separatorid="sample.plugin.actions.Separator1"
menuPath="Tools/sample.plugin.actions.Action1"
toolbarPath="sample.plugin.actions.Toolbar1/sample.plugin.action.Action1"/>
The table shows the description of elements in the above XML.
|
|||||||||||||||||||||||||||||||||
| XML sample for menus and toolbars |
Description on Code:
VPActionController (com.vp.plugin.action.VPActionController)
This class is used to perform the function call when the action is clicked. One Action Controller class refers to multi Actions is allowed.
Sample:
public class ActionController implements com.vp.plugin.action.VPActionController {
// make sure there is an constructor without any parameters}
public void performAction(com.vp.plugin.action.VPAction action) {// called when the button is clicked, the parameter action represents the Action which be clicked.}
// developer also can set the properties of the action
public void update(com.vp.plugin.action.VPAction action) {// *for the actions located on menu bar only}
// when the parent menu is selected, this will be called,
// developer can set the properties of the action before it is shown (e.g. enable/disable the menu item)
Custom action on popup menu (context sensitive)
Developer can define the menu, menu item and separator on the popup menu shown on the diagram. The popup menu on diagram is context sensitive which based on what diagram element or diagram is selected. In order to make the menu item trigger the function call, Action Controller is required to be implemented. For popup menu, com.vp.plugin.action.VPContextActionController is the interface required developer to implement.
Same as Action on Menu/Toolbar, menuPath is used to specify the location of the action (menu/menu item on popup menu).
Sample on XML:
<contextTypes all="false"></contextSensitiveActionSet><include type="Class"/></contextTypes>
<!-- ignored when contextTypes.all = true -->
<exclude type="Package"/>
<!-- ignored when contextTypes.all = false -->
<actionid="sample.plugin.actions.ContextAction1"</action>
label="Sample Action [1]"
icon="icons/blue.png"
style="toggle"
menuPath="OpenSpecification">
<actionController class="sample.plugin.actions.ContextActionController"/>
Table shows the description of elements in the above XML.
|
||||||||||||||||||||||||||||||
| XML sample for popup menu |
Description on Code:
VPContextActionController (com.vp.plugin.action.VPContextActionController)
This class is used to perform the function call when the action is clicked. One Action Controller class refers to multi Actions is allowed.
Sample:
import java.awt.event.ActionEvent;
public class ContextActionController implements com.vp.plugin.action.VPContextActionController {
// make sure there is an constructor without any parameters}
public void performAction(com.vp.plugin.action.VPAction action,) {
com.vp.plugin.action.VPContext context,
ActionEvent e// called when the button is clicked}
public void update(com.vp.plugin.action.VPAction action,) {
com.vp.plugin.action.VPContext context// when the popup menu is selected, this will be called,}
// developer can set the properties of the action before it is shown (e.g. enable/disable the menu item)
VPContext (com.vp.plugin.action.VPContext)
Context will be passed into the Action Controller when the popup menu is shown or action is triggered. It is what the user selected on the diagram, can be model, diagram element or/and diagram.
A diagram may contain many diagram elements, when user right-click on the diagram element or the diagram, a popup menu will be shown. So, the context may be diagram element or diagram. However, the diagram element must be contained by diagram, then if popup menu is shown on a diagram element, the context must contain both diagram element and diagram. And the diagram element always represents for a model, so that is possible the context contains model, diagram element and diagram as same time. However, sometime, the popup menu is shown for a model only (e.g. select on an attribute of a class, because there is no diagram element for the attribute, the class's diagram element will be contained in the context).
Custom diagram element (shape and connector)
Developer can define the shape to connect on the specified diagram. But it is not allowed to develop a custom model. ActionSet and Action are used on definition of custom diagram element.
Sample on XML:
<action</actionSet>id="sample.plugin.actions.ShapeAction1"</action>
actionType="shapeAction"
label="Sample Action {1}"
tooltip="Sample Action {1}"
icon="icons/yellow.png"
editorToolbarPath="com.vp.diagram.ClassDiagram/Class">
<shapeCreatorInfoshapeType="sample.plugin.shape.Shape1"
defaultWidth="30"
defaultHeight="30"
controllerClass="sample.plugin.actions.ShapeController1"
multilineCaption="false"
captionStyle="north"
resizable="true"/>
<actionid="sample.plugin.actions.ConnectorAction1"</action>
actionType="connectorAction"
label="Sample Action {2}"
tooltip="Sample Action {2}"
icon="icons/green.png"
editorToolbarPath="com.vp.diagram.ClassDiagram/sample.plugin.actions.ShapeAction1">
<connectorCreatorInfoshapeType="sample.plugin.connector.Connector1"</connectorCreatorInfo>
fromArrowHeadStyle="Arrow1"
toArrowHeadStyle="Arrow2"
fromArrowHeadSize="verySmall"
toArrowHeadSize="large"
dashes="7,10"
lineWeight="3"
connectorStyle="rectilinear">
<connectionRules><connectionRule</connectionRules>fromShapeType="sample.plugin.shape.Shape1"<connectionRule
toShapeType="sample.plugin.shape.Shape1"
bidirection="true"/>fromShapeType="Class"<connectionRule
toShapeType="sample.plugin.shape.Shape1"
bidirection="true"/>fromShapeType="Package"
toShapeType="sample.plugin.shape.Shape1"
bidirection="true"/>
Table shows the description of elements in the above XML.
|
|||||||||||||||||||||||||||||||||||||||||||||||||||||||||
| XML sample for diagram element |
Description on Code:
VPShapeController (com.vp.plugin.diagram.VPShapeController)
It responses to handle the outlook of the shape on the diagram.
Sample:
// import the necessaries
public class ShapeController implements com.vp.plugin.diagram.VPShapeController {
public void drawShape(}Graphics2D g, Paint lineColor, Paint fillColor, Stoke stroke,){
Com.vp.plugin.diagram.VPShapeInfo shapeInfo// draw the shape by the graphics}
// shapeInfo contains the information of the shape, e.g. the bounds of the shape.
public boolean contains(int x, int y, com.vp.plugin.diagram.VPShapeInfo shapeInfo) {// check whether the x, y is inside the shape,}
// it is used to checking what is selected by the user
Working with models
Plugin Support provides interface for the developer to create, retrieve update and delete the models in Visual Paradigm. The base class of the model is com.vp.plugin.model.IModelElement. All models are contained in the project (com.vp.plugin.model.IProject). Each model has a model type to access all the model type, please refer to the class com.vp.plugin.model.IModelElementFactory, it is the class to create the models.
Creating model
Developer can use the model element factory (com.vp.plugin.model.IModelElementFactory) to create the model. Or based on a parent model (com.vp.plugin.model.IModelElementParent) to create a child model.
IModelElementFactory can be accessed by IModelElementFactory.instance(). It provides the functions to create all the models.
IModelElementParent is the subclass of IModelElement. It provides the function to create the child into it. If the parent class is more specified, it may support a more details function to create the child. For example, IClass is subclass of IModelElementParent, it provides createOperation() to create an operation into it.
Sample on Code:
* create model by IModelElementFactory
* result of the 2 methods: "class model is created and added into the project"
*/
// assume in a code segment
IClass classModel1 = IModelElementFactory.instance().createClass();
IClass classModel2 = (IClass) IModelElementFactory.instance().create(IModelElementFactory.MODEL_TYPE_CLASS);
/*
* create model by IModelElementParent
* result of the first 2 methods, "operation model is created and added into the class model"
* result of the last method, "actor model is created and added into project", because actor cannot be the child of class model
*/
// assume in a code segment
IOperation operationModel1 = classModel1.createOperation();
IOperation operationModel2 = (IOperation) classModel1.createChild(IModelElementFactory.MODEL_TYPE_OPERATION);
IActor actorModel1 = (IActor) classModel1.createChild(IModelElementFactory.MODEL_TYPE_ACTOR);
Retrieving model
Developer can use the project (com.vp.plugin.model.IProject) or the context (com.vp.plugin.action.VPContext) from ActionController to retrieve the models.
IProject is the project of Visual Paradigm. The project contains all models, diagram and diagram elements. It provides function (modelElementIterator()) for the developer to iterate the models.
VPContext is the context of a popup menu. Developer can access the context by popup menu's action controller (com.vp.plugin.action.VPContextActionController). Context may contain a model element if the popup menu is shown on a diagram element or model.
Sample on Code:
* retrieve model by IProject
*/
// assume in a code segment
IProject project = ApplicationManager.instance().getProjectManager().getProject();
Iterator iter = project.modelElementIterator();
while (iter.hasNext()) {
IModelElement modelElement = (IModelElement) iter.next();}
// model element retrieved
/*
*retrieve model by VPContext
*/
// assume on a sub-class of com.vp.plugin.action.VPContextActionController
public void update(VPAction action, VPContext context) {
IModelElement modelElement = context.getModelElement();}
// model element retrieved, but please take care,
// context.getModelElement() may return null if the popup menu is shown for the diagram
// or the selected diagram element doesn't refer to a model element.
/*
* retrieve relationship model from a class model
* there are 2 kinds of relationships: IRelationship and IEndRelationship
*/
// assume in a code segment
IClass classModel = ...; // retrieved the class model from somewhere
// retrieve a generalization (IRelationship)
Iterator genIter = classModel.fromRelationshipIterator();
while (genIter.hasNext()) {
IRelationship relationship = (IRelationship) genIter.next();}
// found out the another side's model of the relationship
IModelElement otherModel = relationship.getTo();
// retrieve am association (IEndRelationship)
Iterator assoIter = classModel.fromRelationshipEndIterator();
while (assoIter.hasNext()) {
IRelationshipEnd relationshipEnd = (IRelationshipEnd) assoIter.next();}
IModelElement otherModel = relationshipEnd.getEndRelationship().getToEnd().getModelElement();
Updating model
Developer can call a set of get/set methods on a model. Different model type has different properties. For setting and getting the model's property, cast the IModelElement into its sub-class is necessary. For example, developer gets the IModelElement from the popup menu's context. Developer checks whether the model is a IClass, then developer casts the IModelElement into IClass, and call the function IClass.setVisibility(xxx).
Sample on Code:
* update a class model
*/
// assume in a code segment
IModelElement model = ...; // model is retrieved from somewhere
If (IModelElementFactory.MODEL_TYPE_CLASS.equals(model.getModelType()) ) {
IClass classModel = (IClass) model;}
// set the class to be 'private'
classModel.setVisibility(IClass.VISIBILITY_PRIVATE);
// set super class
IClass superClassModel = ...; // another class model is retrieved, it will be set to be the previous model's super class
IGeneralization generalizationModel = IModelElementFactory.instance().createGeneralization();
generalizationModel.setFrom(superClassModel);
generalizationModel.setTo(classModel);
// get all "setName" operation from the class and set to be "protected final"
Iterator operationIter = classModel.operationIterator();
while (operationIter.hasNext()) {IOperation operation = (IOperation) operationIter.next();}
if ("setName".equals(operation.getName()) ) {if (operation.getJavaDetail() == null ) {}operation.setJavaDetail(IModelElementFactory.instance().createJavaOperationCodeDetail());}
operation.getJavaDetail().setJavaFinal(true);
operation.setVisibility(IOperation.VISIBILITY_PROTECTED);
Deleting model
Developer can delete the model by simple way, just call the IModelElement.delete().
Working with diagrams/Diagram elements
Plugin Support provides interface for the developer to create, retrieve update and delete the diagrams or diagram elements in Visual Paradigm. The base class of the diagram is com.vp.plugin.diagram.IDiagramUIModel. The base class of the diagram element is com.vp.plugin.diagram.DiagramElement. All diagrams are contained in the project (com.vp.plugin.model.IProject). And the diagram elements can be found in the diagrams. The diagram elements can be contained by the diagrams.
Creating diagrams/Diagram elements
Developer can create the diagram or diagram element by com.vp.plugin.DiagramManager. DiagramManager can be accessed by ApplicationManager.instance().getDiagramManager().
Sample on Code:
DiagramManager diagramManager = ApplicationManager.instance().getDiagramManager();
/*
* create diagram
*/
IDiagramUIModel diagram = diagramManager.createDiagram(DiagramManager.DIAGRAM_TYPE_CLASS_DIAGRAM);
/*
* create diagram element with exists models
*/
IModelElement classModel1 = ...; // retrieved a class model from somewhere
IModelElement packageModel1 = classModel1.getParent(); // assume the class model is contained by a package
IDiagramElement packageDiagramElement1 = diagramManager.createDiagramElement(diagram, packageModel1);
IDiagramElement classDiagramElement1 = diagramManager.createDiagramElement(diagram, classModel1);
// class's diagram element should be a shape, not a connector
packageDiagramElement1.addChild((IShapeUIModel) classDiagramElement1);
/*
* create diagram element without models (the model will be created automatically)
*/
IDiagramElement newClassDiagramElement =
diagramManager.createDiagramElement(diagram, IClassDiagramUIModel.SHAPETYPE_CLASS);
IModelElement newClassModel = newClassDiagramElement.getModelElement();
/*
* open the created diagram
*/
diagramManager.openDiagram(diagram);
Retrieving diagrams/Diagram elements
Developer can use the project (com.vp.plugin.model.IProject) to retrieve the diagrams. Use a diagram (com.vp.plugin.diagram.IDiagramUIModel) to retrieve the contained diagram elements. Or use the context (com.vp.plugin.action.VPContext) from ActionController to retrieve the diagram and/or diagram element.
IProject is the project of Visual Paradigm. The project contains all models, diagram and diagram elements. It provides function (diagramIterator()) for the developer to iterate the diagrams.
IDiagramUIModel is a diagram, which may contain many diagram elements.
VPContext is the context of a popup menu. Developer can access the context by popup menu's action controller (com.vp.plugin.action.VPContextActionController). Context may contain a diagram and/or diagram elements.
Sample on Code:
* retrieve diagram from IProject
*/
// assume in a code segment
IProject project = ApplicationManager.instance().getProjectManager().getProject();
Iterator diagramIter = project.diagramIterator();
while (diagramIter.hasNext()) {
IDiagramUIModel diagram = (IDiagramUIModel) diagramIter.next();}
/*
* retrieve diagram element from IDiagramUIModel
*/
Iterator diagramElementIter = diagram.diagramElementIterator();
while (diagramElementIter.hasNext()) {IDiagramElement diagramElement = (IDiagramElement) diagramElementIter.next();}
/*
* retrieve diagram and diagram element from VPContext
*/
// assume on a sub-class of com.vp.plugin.action.VPContextActionController
public void update(VPAction action, VPContext context) {
IDiagramUIModel diagram = context.getDiagram();}
IDiagramElement diagramElement = context.getDiagramElement();
// diagramElement may be null, if the popup menu shown for the diagram
/*
* retrieve connected connector from a shape
* because a connector can connected with both Shape and Connector, please check the
* both getToShape() and getToConnector() or getFromShape() and getFromConnector()
*/
// assume in a code segment
IShapeUIModel shape = ...; // retrieved the shape from somewhere
IConnectorUIModel[] connectors = shape.toFromConnectorArray();
int count = connectors == null ? 0 : connectors.length;
for (int i = 0; i < count; i++) {
IDiagramElement toDiagramElement = connectors[i].getToShape();}
if (toDiagramElement == null) {toDiagramElement = connectors[i].getToConnector();}
Updateing diagrams/Diagram elements
IDiagramUIModel provides the functions to set the diagram outlook (size, background, etc...).
IDiagramElement is the super class of IShapeUIModel and IConnectorUIModel. Because there is a difference between shape and connector, the IShapeUIModel and IConnectorUIModel provide different set of functions to update them.
Sample Code:
* update a shape's size and set a connector's connector style
*/
// assume in a code segment
IShapeUIModel shape = ...; // retrieved the shape from somewhere
shape.setBounds(20, 20, 400, 400);
IConnector connector = ...; // retrieved the connector from somewhere
connector.setConnectorStyle(IConnectorUIModel.CS_CURVE);
Deleting diagrams/Diagram elements
Developer can delete the diagram and diagram element by simple way, just call the IDiagramUIModel.delete() and IDiagramElement.delete().
Showing dialog on Visual Paradigm
Since Visual Paradigm may be integrated with different platforms which may not support Swing (e.g. Eclipse, Visual Studio). That may make the process to be hung on if using the Swing dialog technology (e.g. JOptionPane and JDialog). So, it is necessary to use a special method to show the dialog with Swing technology.
com.vp.plugin.ViewManager is an interface provides function for developer to show the dialog as same as show dialog by JOptionPane. Besides that, Viewmanager supports developer to show message on Visual Paradigm's message pane and show custom dialog by implementing an interface (com.vp.plugin.view.IDialogHandler).
Same as JOptionPane, to show a dialog, it is better to have a component as the invoker/parent component. To get the component in Visual Paradigm, just call ViewManager.getRootFrame().
Showing message on message pane
ViewManager provides function showMessage(msg:String, msgTabId:String) to show the message on Message Pane. The parameter msg is the content of the message, msgTabId is the id to identify the tab on Message Pane, which can be defined by developer.
 |
| Message in Message Pane |
Sample on Code:
ViewManager viewManager = ApplicationManager.instance().getViewManager();
viewManager.showMessage("Thank you for reading Visual Paradigm Plugin Support User's Guide. >=)", "sample.plugin");
Showing simple message dialog
In Swing, we may use the javax.swing.JOptionPane to show a message dialog (e.g. JOptionPane.showMessageDialog(...)). ViewrManager provides the functions which simulate the JOptionPane. ViewManger provides a set of showXXXXDialog(...) functions for showing the dialog. The signature of the functions are same with the JOptionPane. Developer need not feel strange on calling the showXXXXDialog(...) functions.
Showing custom dialog
In Swing, we may implement the javax.swing.JDialog and add our component on the dialog's content pane. But in plugin, developer is required to implement an interface com.vp.plugin.view.IDialogHandler to work for the dialog.
IDialogHandler specify the behaviors of a dialog. There are 4 functions need to be implemented.
It is called once before the dialog is shown. Developer should return the content of the dialog (similar to the content pane).
It is called after the getComponent(). A dialog is created on Visual Paradigm internally (it still not shown out). Developer can set the outlook of the dialog on prepare(), such as title, bounds and modal, etc... For your convenience, the dialog will be shown on the screen center as default. If developer don't want change the location, there is no necessary to call the setLocation() function.
It is called when the dialog is shown. Developer may need to do something when the dialog is shown, such as checking something before user to input data on the dialog.
It is called when the dialog is closed by the user clicking on the close button of the frame. Developer may not allow the user to close the dialog (e.g. failed on validation check), then please return 'false' on canClosed().
Sample on Code:
// assume imported necessary classes
public class CustomDialogHandler implements IDialogHandler {
private IDialog _dialog;}
private Component _component;
private JTextField _inputField1, _inputField2, _answerField;
public Component getComponent() {this._inputField1 = new JTextField(10);}
this._inputField2 = new JTextField(10);
this._answerField = new JTextField(10);
JLabel addLabel = new JLabel(" + "); JLabel equalLabel = new JLabel(" = ");
JButton okButton = new JButton("Apply");
okButton.addActionListener( new ActionListener() {
public void actionPerformed(ActionEvent e) { ok();}
} );
JPanel pane = new JPanel();
pane.add(this._inputField1); pane.add(addLabel); pane.add(this._inputField2);
pane.add(equalLabel); pane.add(this._answerField); pane.add(okButton);
this._component = pane;
return pane;
public void prepare(IDialog dialog) {this._dialog = dialog;}
dialog.setModal(true);
dialog.setTitle("Maths Test");
dialog.setResizable( false ); dialog.pack();
this._inputField1.setText(String.valueOf((int)(Math.random()*10000)));
this._inputField2.setText(String.valueOf((int)(Math.random()*10000)));
public void shown() {ApplicationManager.instance().getViewManager().showMessageDialog(}
this._component, "Maths Test is started, you have an half hour to finish this test.",
"Maths Test", JOptionPane.INFORMATION_MESSAGE
);
public boolean canClosed() {if (this.checkAnswer()) { return true; }}
else {ApplicationManager.instance().getViewManager().showMessageDialog(}this._component, "Incorrect",);
"Maths Test", JOptionPane.ERROR_MESSAGE
return false;
private void ok() {if ( this.checkAnswer() ) { this._dialog.close(); }}
else {ApplicationManager.instance().getViewManager().showMessageDialog(}this._component, "Incorrect",);
"Maths Test", JOptionPane.ERROR_MESSAGE
private boolean checkAnswer() {try {}int a = Integer.parseInt(this._inputField1.getText());}
int b = Integer.parseInt(this._inputField2.getText());
int c = Integer.parseInt(this._answerField.getText());
return (a+b == c);
catch (Exception ex) { return false; }
| Chapter 2. Implementing Plug-in | Table of Contents | Chapter 3. Installing Plug-in |