Creating and editing task
You create a task when you want someone, including you, to do something. In Tasifier, you can create tasks in two places - in My Tasks pane or in Task Pool.
Creating task in My Tasks page
Usually, you create tasks in My Tasks page when you want to add a note to yourself, to remind yourself to do something.
Tasks created in My Tasks page do not belong to any Task Pool, although you can move them to a Task Pool later on.
To create task in My Tasks page:
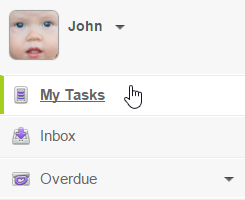
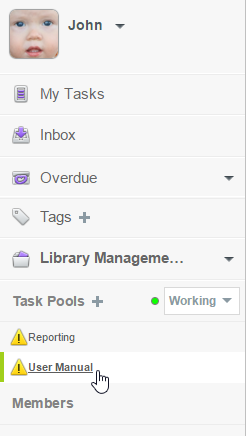
- Select My Tasks from the Left Pane.
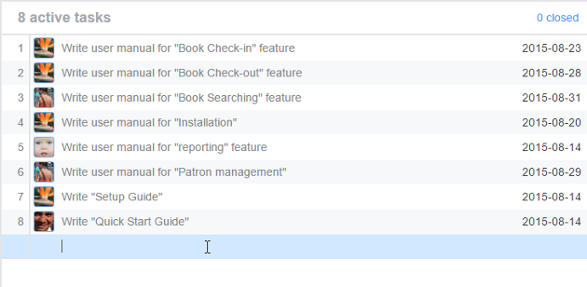
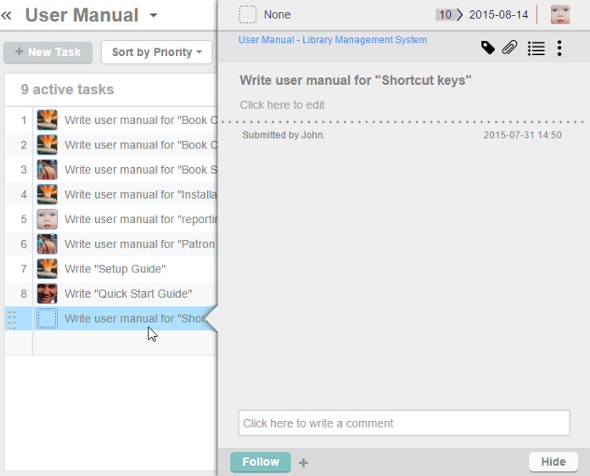
Open My Tasks - There are three lists in the Main Pane. The To do list is for listing tasks that should be tackled within a short period of time. The New list is for listing tasks you recently received. The Pending list is for listing tasks that will be tackled later on. Choose the list that best suit the status of the task you want to create. Click inside the last and empty row under the list.
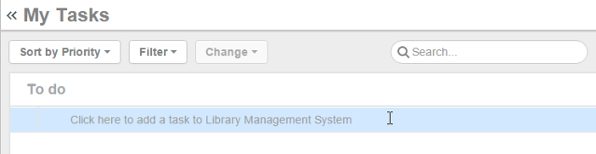
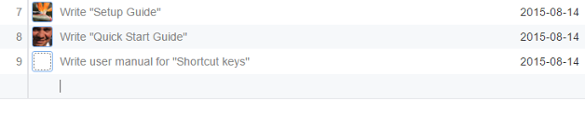
To create a task - Enter the subject of your task, which is a summary of the things you need to do, under this particular task. (You will fill in the task details later on)

Enter the subject of task - Press Enter to confirm. You are now on a new row and you can start entering the subject of another new task, if any. If you have finished entering all tasks, just leave the last row empty.

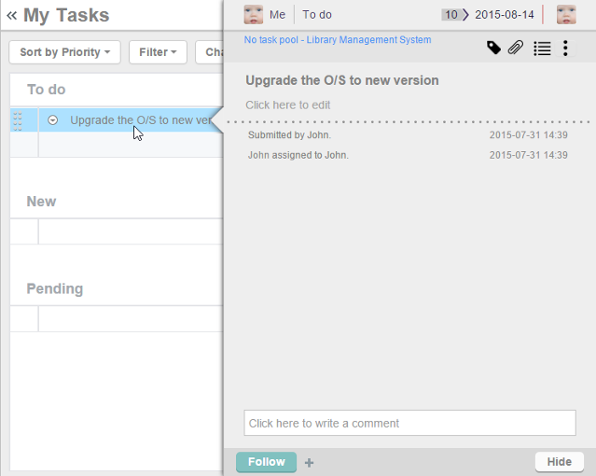
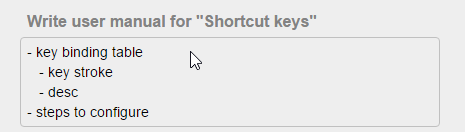
Task created - Now, you can optionally enter the task description. If the subject is clear enough, this step can be skipped. If you want to enter the details of task, click on a task you created. This shows the Task Pane.
Select a task to edit its task description - Click below the subject of task to enter the edit mode of task description.

To enter task description - Enter the task details. You can add a new line by pressing Enter. To confirm editing, press Ctrl-Enter, or click on the region outside the description field.

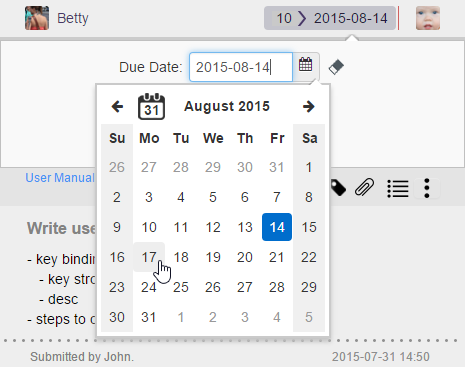
Task description entered - You may optionally change the Due Date at the top right corner in the Task Pane. Due date is the date by which you should complete the task. Click here to learn more about setting due date.
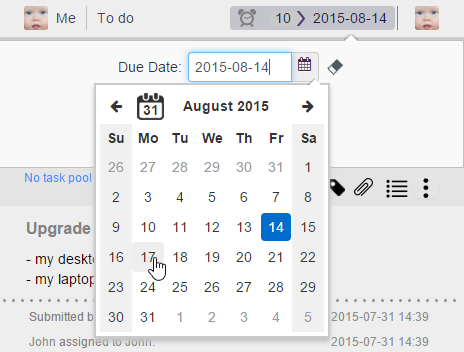
Pick up a due date - Next to Due Date, you may set a team member to verify your work. When you complete the task, that member will see the task listed in his/her My Tasks page, pending for his verification. If you do not specify a team member here, once you complete the task it will be closed immediately.
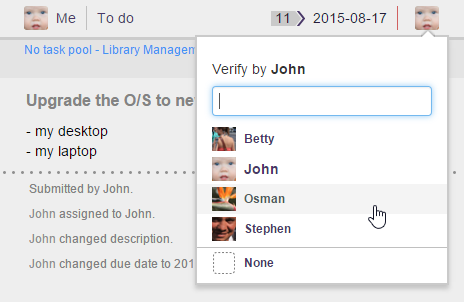
Select a team member to verify your work
Creating task in Task Pool
You create tasks in a Task Pool when the tasks are related to the goal of the Task Pool. For example, you create a task "Prepare screen design for registration page" under the task pool "Screen Design".
To create task in a Task Pool:
- Select the Task Pool from the Left Pane. Note that you need to open the right project in order to find your Task Pool. Besides, make sure you are viewing Task Pools in either Planning or Working state. You cannot create task in closed Task Pools.
Select a Task Pool - Tasks of the Task Pool, if any, are listed in the Main Pane, row by row. Click on the last and empty row.
To create a task - Enter the subject of your task, which is a summary of the things you need to do, under this particular task. (You will fill in the task details later on)

Enter the subject of task - Press Enter to confirm. You are now on a new row and you can start entering the subject of another new task, if any. If you have finished entering all tasks, just leave the last row empty.
Task created - Now, you can optionally enter the task description. If the subject is clear enough, this step can be skipped. If you want to enter the details of task, click on a task you created. This shows the Task Pane.
Select a task to edit its task description - Click below the subject of task to enter the edit mode of task description.

To enter task description - Enter the task details. You can add a new line by pressing Enter. To confirm editing, press Ctrl-Enter, or click on the region outside the description field.
Task description entered - Set the assignee at the top left of the Task Pane. Assignee is the team member who is responsible to perform the task. Click on the assignee icon and select the assignee from the drop down menu. You can enter his/her name to locate him/her in quick.
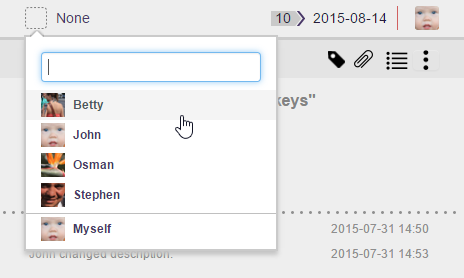
Select an assignee - Optionally change the Due Date at the top right corner in the Task Pane. Due date is the date by which you should complete the task. Although due date is optionally, setting a due date enables the assignee to manage their time more effectively by determining which task to do first, and which task to do next. Click here to learn more about setting due date.
Pick up a due date - Next to Due Date, you may set a team member to verify the work. Although in most cases, you, as the submitter of task, is the one who verify the completeness of the task, it's not always the case. If someone else is responsible to verify the task, set him/her to the person to verify this task. When the assignee has completed the task, the one who responsible to verify it will see the task listed in the My Tasks page, pending for verification. If you do not specify a team member here, once the task is completed it will be closed automatically.

Select a team member to verify work
Quick task assignment
If you want to assign a task to another team member, choose any of the methods below.
Method 1 - Via the Task Pane
- Open the details of the task in Task Pane. If the task is inside a Task Pool, open the Task Pool from the Left Pane and select the task from the tasks list. You can also find from tag, based on their due status, etc.
- At the top of the Task Pane, click on the profile photo of the current assignee.
- Select the new assignee.
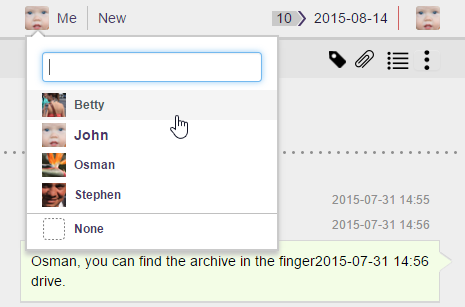
Changing the assignee of a task
Method 2 - Via drag-and-drop
This method allows you to re-assign one or mutliple tasks to another assignee. Select the task(s) to move in the Main Pane. You can press the Shift or Ctrl key to perform a multiple selection. Then, drag the selection to the profile photo of the desired member at the bottom of the Left Pane.
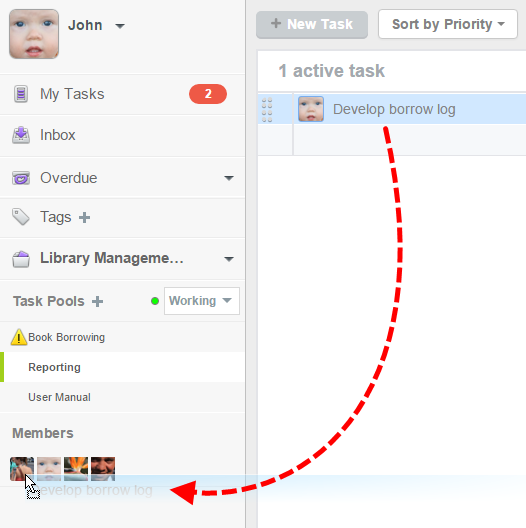 |
| Re-assign a task to another member |
Moving a task to another Task Pool
If you want to move a task from one Task Pool to another, choose any of the methods below.
Method 1 - Via the Task Pane
- Open the details of the task in Task Pane. If the task is inside a Task Pool, open the Task Pool from the Left Pane and select the task from the tasks list. You can also find from tag, based on their due status, etc.
- At the top of the Task Pane, click on the arrow that appear next to the name of the Task Pool.
- Select the Task Pool to move the task to. If you want to move the task to a Task Pool in another project, choose Change project.
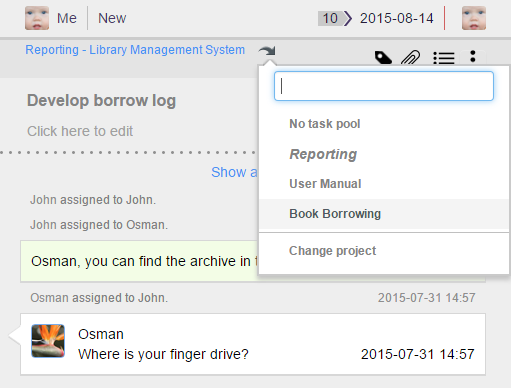
Moving a task to another Task Pool
Method 2 - Via drag-and-drop
This method allows you to move one or mutliple tasks to another Task Pool. Select the task(s) to move in the Main Pane. You can press the Shift or Ctrl key to perform a multiple selection. Then, drag the selection to the desired Task Pool on the Left Pane.
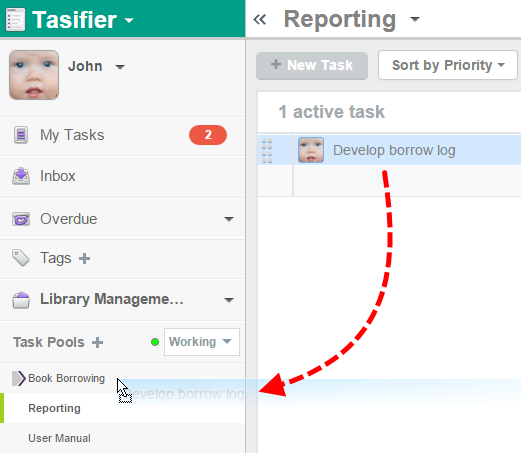 |
| Moving task to another Task Pool |
Related Resources
The following resources may help you learn more about the topic discussed in this page.
| 1. What is a task | Table of Contents | 3. Duplicatng task |