Visual Paradigm Description Pane
Description Pane enables you to document project data such as model elements, shapes or diagrams either in written or verbal form. For written content, it can be a plain text or HTML text with formattings like bold, italic, font color, etc.
Opening and closing the Description Pane
Description Pane can be opened by clicking on Description button at the bottom right corner of the status bar. To close it, either click the same button again or press the X button at the top right corner of the Description Pane.
 |
| Show Description Pane |
Overview of Description Pane
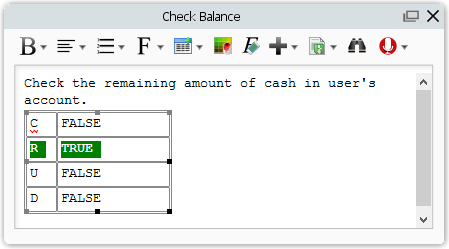 |
| Description Pane |
|
||||||||||||||||||||||||||||||||||||
| Description of Description Pane |
| NOTE: | The formatting toolbar is by default hidden for description pane shown in specification window. In order to show the formatting toolbar, simply click on the editor. |
Floating mode
The Description Pane has a fixed position and size by default, which means that you cannot move it nor to resize it. However, you can change it to Floating mode so that the Description Pane can be moved and resized. You can even move it out of the application window.
To change the Description Pane to Floating mode, click Float in the title bar of the Description Pane. Or you can simply drag the title bar of the pane to change it to Floating mode.
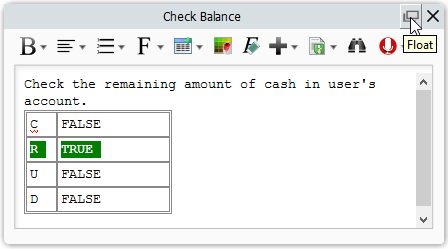 |
| Change the Description Pane to Floating mode |
Adding model element link
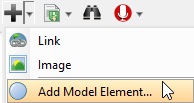
- Click Add Model Element button on the editor's toolbar after decided a place for inserting a model element.
Click Add Model Element button - In Select Model Element window, select an existing model element on the list. If you want to modify the selected model element, you can click Open Specification... button.

Click Add Model Element button - Finally, click OK button to confirm.
- Consequently, the name of inserted model element will be shown on the description pane with underline. If you want to preview the inserted model element, you can right click on its name and select Show View... from the pop-up menu. After the Show View window pops out, you can preview it in the Preview window. If you want to view the actual model element on the diagram, you can click Go to View button.
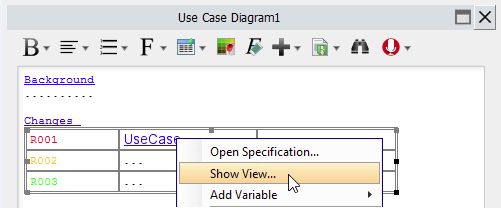
Click Show View... from the pop-up menu
Voice description
In addition to textual description for your model elements, you can record voice description or embbed audio files.
Recording voice
- On top of the Description Pane, click on
 .
. - In the Record Voice window, click the Record button to start recording.
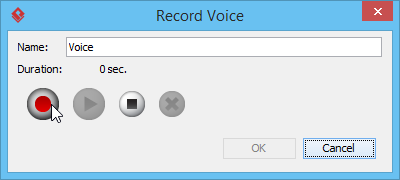
Start recording NOTE: Make sure your audio input device is active before operate voice description. - Click the Stop button when you want to end the recording.
NOTE: Play the recorded voice by pressing the Play button; record again by pressing the Clear button and rerun the previous steps. - Enter the name for recorded voice clip in the text field of Name.
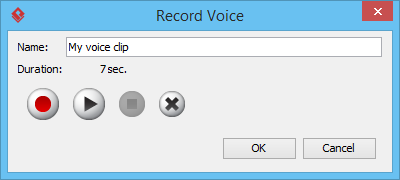
Name voice clip - Click OK button to confirm recording.
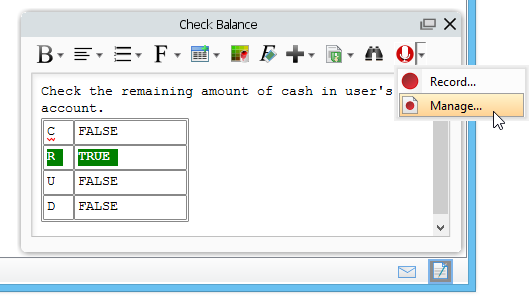
Managing audio clips
- On top of the Description Pane, click on the down arrow next to .Then, select Manage... from the drop down menu.
Select the Manage... menu - In the Manage Voice window, click the Add button, and choose either Embedded or Link to File.
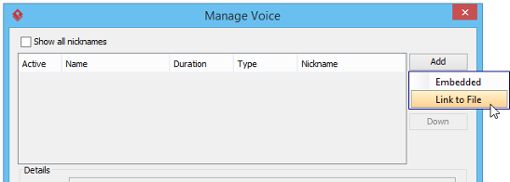
Try to add a link to an audio file - If you choose Embedded, record a voice clip when the Record Voice window pops out; if you choose Link to File, select an audio file when the Open dialog box pops out.
- The voice clip can be renamed in the text field of Name.
- You can also select an added audio clip and click Delete to remove it.
- Click OK button to confirm the changes.
Defining a glossary item
A word or a lexis can be defined as a glossary item for explication.
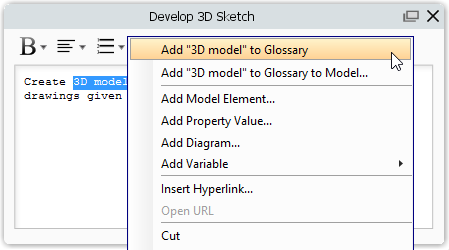
- Highlight the word or the lexis you would like to be defined and then right click on it. Select Add "[highlighted term]" to Glossary from the pop-up menu to switch to Glossary Grid.
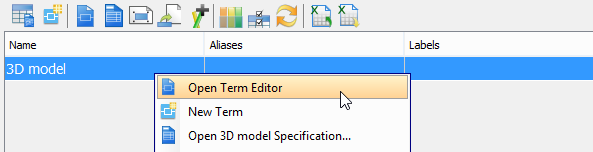
Select Add "premium" to Glossary from the pop-up menu - In Glossary Grid, click Open Term Editor from the pop-up menu in order to fill more details about the new item. Alternatively, right click on the term and select Open Term Editor from the pop-up menu.
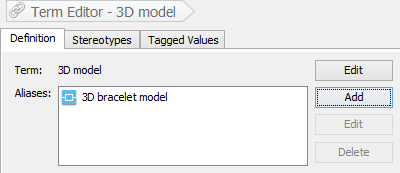
Click Open Term Editor from the pop-up menu - In Term Editor page, click Add button to type the alias(es) for the new item.
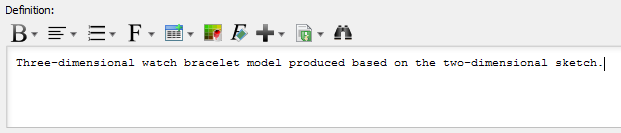
Type an alias for the new item - Further information about the new item can be given by typing in the space under Definition.
Enter term definition
| NOTE: | In Glossary Grid, you can jump to the source from which a term was defined by right clicking on the term and selecting Transit From > %SOURCE_ELEMENT_NAME% from the popup menu. |
Spell checking
When you type an incorrect word carelessly, Description Pane can offer you a help.
For correction, right click on the incorrect word with a red curved line and select one out of the suggested words from the pop-up menu.
 |
| Select a correct word from the pop-up menu |
Moreover, you can add a new word to the dictionary if the word you typed is a rare word or a new created word. Right click the new word and select Add to dictionary from the pop-up menu. When you type the word next time, it won't be marked as an incorrect word again.
Related Resources
The following resources may help you learn more about the topic discussed in this page.
| 3. Diagram editor | Table of Contents | 5. Message pane |