How to Write Effective Use Cases?
The fundamental goal of each software project is to build and deliver the right product for target users.
But: What is a 'right product'?
The right product is a product that the customers want, need, and desire. Unfortunately, no one knows upfront what they want and need, including the customers themselves.
In this tutorial, we will introduce a systematic approach that helps you identify customers' needs. It involves an upfront recognition of business goals to be satisfied and a gradual discovery of requirements based around those goals.
Let's start with use cases - a tool proven to be effective in use case management.
Use Case and Use Case Diagram
What is a Use Case?
A use case describes a specific business goal to be satisfied by the system to be built. Graphically, it is an oval with a name, which looks simple but is the most commonly used tool for managing business or project goals.
What is a Use Case Diagram?
A use case diagram is a kind of Unified Modeling Language (UML) diagram created for requirements elicitation. A use case diagram provides a graphical overview of goals (modeled by use cases) that users (represented by actors) want to achieve by using the system. Use cases in a use case diagram can be organized and arranged according to their relevance, level of abstraction, and impact on users. They can be connected to show their dependency, inclusion, and extension relationships.
The main purpose of modeling use cases with a use case diagram is to establish a solid foundation for the system by identifying what the users want. Based on the result, you can move forward to study how to fulfill those user needs.
In the next section, we will talk about user stories, a tool widely used in managing requirements.
What is a User Story?
Anyone who has experience in software development has probably suffered from communication issues with stakeholders. A user story is a great way of opening a discussion with stakeholders to ensure the development team knows what stakeholders want. User stories created by the product owner capture the "who", "what", and "why" of a requirement simply and concisely, and are typically written in natural language in a non-technical format. Agile development has entered the mainstream of development approaches hand-in-hand with user stories for requirement discovery.
Discovering User Stories with Use Cases
It is important to note that use cases alone represent goals but not the actual requirements to be supported. Nevertheless, use cases provide a great starting point for the discovery of requirements. Here are the benefits:
- Use cases provide a clear project scope. The chance of identifying requirements beyond the project scope can be reduced.
- Requirements derived from use cases are guaranteed to be aligned with the business vision and goals.
- Traceability between use cases and requirements helps clarify the rationale of requirements at any moment of a software project.
To summarize: Use cases can be effective when you use them as a tool for requirements discovery and management.
Drawing a Use Case Diagram in Visual Paradigm
In the coming sections, we will demonstrate how you can develop a use case model and write user stories with Visual Paradigm. We will use a hotel reservation system as an example.
Let's start by drawing a use case diagram.
- Create a new project in Visual Paradigm by selecting Project > New from the toolbar. In the New Project window, name the project Hotel Reservation System and click Create Blank Project at the bottom.

- To create a Use Case Diagram, select Diagram > New from the toolbar. In the New Diagram window, select Use Case Diagram and click Next. Keep "Blank" selected and click Next. Enter System Use Cases as the diagram name and click OK.

- Press on Actor in the diagram toolbar. Drag it onto the diagram to create an actor and name it Customer.

- The system will let users make a reservation, which is a use case of the system. Let's create a use case for it. Move the mouse pointer over the Customer actor. Press on the Resource Catalog icon at the top-right and drag it out.

- Select Association -> Use Case in the Resource Catalog.

- Release the mouse button to create the use case. Name it Make Reservation. The association between an actor and a use case indicates that the actor will interact with the system to achieve the associated use case.

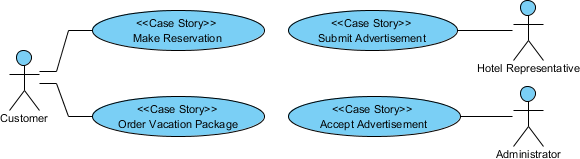
- Complete the design to make it look like this:

Writing User Stories
In this section, we will carry on by writing user stories within the use case 'Make Reservation'. We will use a user story map to manage our user stories.
Part I – Forming the 'Backbone' of a Story Map from Use Cases
A user story map provides a leveled structure for managing user stories. The top level is known as the backbone. It captures the high-level activities a user will accomplish.
Visual Paradigm bridges the gap from use cases to user stories through a feature called "send to". You can send use cases created in use case diagram(s) to a user story map to form the backbone. Let's try.
- Right-click on the Make Reservation use case and select Related Elements > Send to Product Backlog from the popup menu.

- Repeat this for the other use cases.
- Open the user story map by selecting Agile > User Story Map from the toolbar.

- There are three structures available. You can select the one that fits your project type and scale. For now, let's select the third one. Click Simplified 2 (3-level).

- User activities are created from the use cases and are kept under the Reserved list on the left of the story map. Let's form the backbone of the story map with them. Drag Make Reservation to the top tier of the map.

- Repeatedly drag the other user activities onto the story map.

Part II – Breaking Down User Activities into Epics
To facilitate the management of requirements and work, you can break down the user activities into epics. This can be done by splitting a user activity into multiple functional units. Let's try it.
- Move your mouse pointer over the Make Reservation user activity and click the + button below it to create an epic.

- Enter Search hotel as the name of the epic.

- Let's add one more epic under the Make Reservation user activity. Move your mouse pointer over Search hotel and click the + on the right to create a sibling.

- Name the epic Book a room.

- Create epics for the remaining user activities.

Part III – Writing User Stories
Create user stories to capture the requirements under each epic. Let's try.
- Let's create user stories for Search hotel. Similar to how you can create an epic from a user activity, this time, move your mouse pointer over Search hotel and click the + button below it to create a user story.

- Enter the name of the user story: Perform a hotel search.

- Press Enter to create the next user story: Keep the search settings within session.

- Let's say we want these two features to be available in the first release. Let's drag them to the Release 1 row.

- Create other user stories and move them into different release rows.

Detailing a User Story
User stories have to be detailed to a level that provides sufficient information for the software team to determine the tasks to perform to support users' needs and to perform an accurate estimation of time and effort. In this section, we will show you how to detail the behavior of a user story.
- Double-click on the user story Perform a hotel search to open it.

- Open the Scenario tab. The scenario editor is formed by rows, known as steps. Each step represents an actor input or a system response.

- Click on the first step and enter the first user input: Enter city, arrival, departure, room type and click Search.

- Press Enter to complete this step. Step 2 will be created for you.
- Step 2 is about how the system reacts to the user's input. You may start by writing "System...", but there is a better way to represent a system response. Right-click on the row and select Add Control > System Response from the popup menu to add a system response step.

- You can now enter the content of step 2: Display a list of hotels.

- Add two more steps.

Something More – Creating a Scenario-Based Wireframe
A wireframe is a sketch of a user interface. It helps you represent the screen and screen flow of the system to be developed, early in requirements gathering. You can associate wireframes with steps in a scenario. This section will show you how to use the wireframe tool to add a wireframe to a step.
- Click on the first step.

- Move your mouse pointer to the green triangle on the right-hand side. Then click on Define Wireframe.

- Do you see the gray pane that appears on the right-hand side? Click on it to select a kind of wireframe to create.

- In the popup window, select Website.

- Click New Website Wireframe. A new wireframe appears, with an empty browser window in it. It's where you can prepare a mockup for the website.
- Before we start adding different components into the Browser window, let's resize it to make it smaller. Click on the title of the Browser window.
- Once clicked, resize handlers will appear around the Browser window for you to adjust the window size manually. Let's try a more direct method. Right-click on the title of the Browser and select Browser Size (1024 x 768) > 800 x 600 from the popup menu.

- Use the wireframe tools listed in the diagram toolbar to create a wireframe like this:

-
Go back to the scenario editor by clicking the triangle button next to the step title.

When finished, you can see the thumbnail of your wireframe appear in the scenario editor.