Visual Paradigm Teamwork Server LDAP Authentication (Group)
Teamwork Server supports two ways of authentication - built-in authentication and directory server authentication. While the built-in authentication allows you to easily set up and manage member accounts completely inside Teamwork Server, active server authentication allows users to login to Teamwork Server and VP Server with credentials stored in and managed by a directory server.
In order for directory server authentication to work, administrator has to install a utility called DS Connector, and have it configured to connect both VP Server and the directory server. DS Connector acts as bridge between VP Server and directory server. It's capable to synchronize user listing from directory server to VP Server, and to manage the authentication from Visual Paradigm to directory server, through VP Server.
In this page, you will learn how to work with LDAP authentication from creating user groups in Apache Directory Studio to installing and configuring DS Connector. If you are interested in working with user instead of user group, please read Visual Paradigm Teamwork Server LDAP Authentication. If you are interested in Active Directory Authentication, please read Visual Paradigm Teamwork Server Active Directory Authentication (Groups).
There are series of steps you need to take in order to make LDAP authentication works. Please read through all the steps below without skipping any of them, even if you are familiar with LDAP and Apache Directory Studio.
Step 1 - Creating user account in ApacheDS
In this section you will learn how to create user account in ApacheDS using Apache Directory Studio. It's mainly written for people who are not familiar with ApacheDS. However, even if you are familiar with ApacheDS, be sure to read through the steps as some of the settings will influence the authentication process.
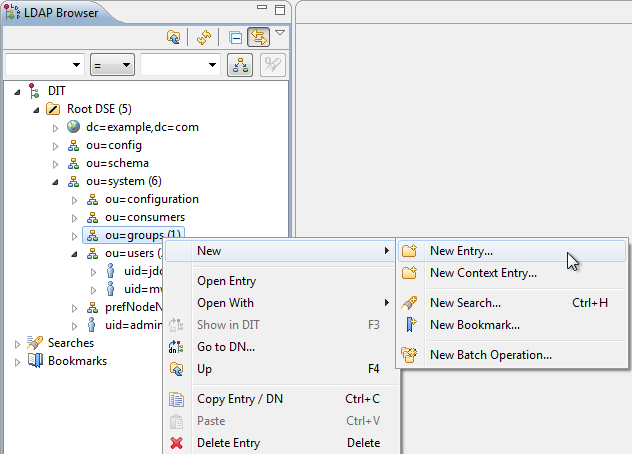
- In LDAP Browser, navigate to the ou=users node under DIT > Root DSE > ou=system.
- Right click on the ou=groups node in and select New Entry... from the popup menu.
Adding a new entry via LDAP Browser - In the New Entry window, keep Create entry from scratch selected and click Next.
- You are prompted to enter one structural object for creating the new user. Select groupOfUniqueNames as the object class
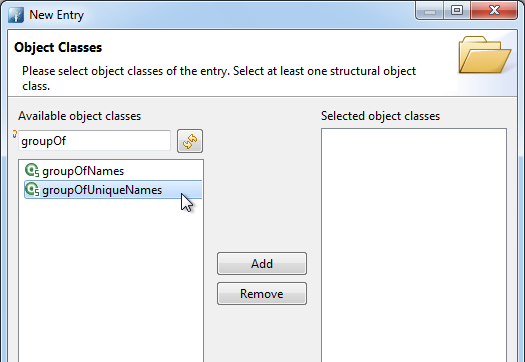
Selected groupOfUniqueNames - Click Add to add groupOfUniqueNames to the list of selected object classes. You will see a list the object classes from the groupOfUniqueNames object hierarchy are being added automatically.
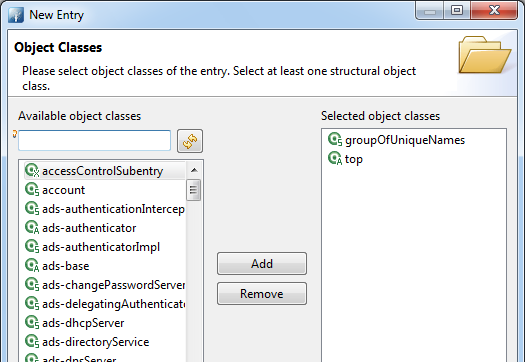
groupOfUniqueNames added to the list of selected object classes - Click Next.
- For RDN, enter cn=developer, where developer is the name of group and you should supply your own group name here - developer is just an example.
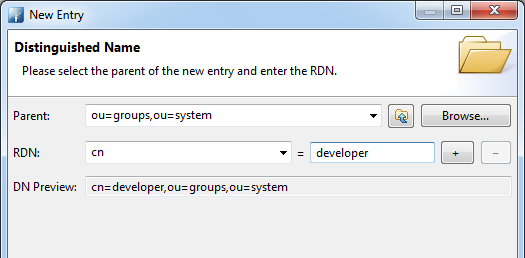
RDN entered - Click Next.
- Add users into this group by creating multiple uniqueMember attributes and entering the DN of those users as attribute values. A uniqueMember attribute is default created. Enter the first user's DN in the Value cell.
By the way, be sure to set password for users who will use Visual Paradigm. Users without password won't be able to access the Teamwork Server. To set a password for a user, select the user node under ou=users in LDAP Browser. Click on New Attribute... in the Entry Editor on the right hand side. In the New Attribute window, select userPassword to be the Attribute type. Click Finish, enter the password and click OK to confirm.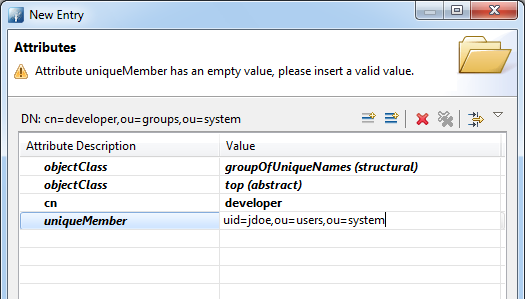
Entering the DN of a user - Add other users by creating more uniqueMember attributes. To do this, right click on any attribute row in the New Entry window and select New Attribute... from the popup menu. Then enter uniqueMember in the Attribute type field in the New Attribute window and click Finish. Finally, specify the DN of that user.
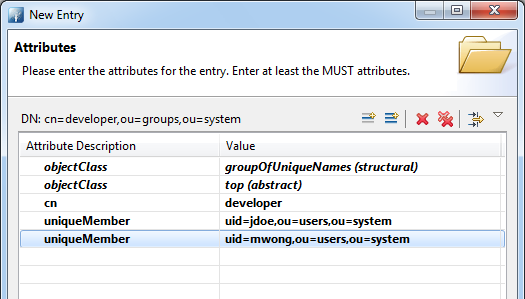
Users added to user group - Click Finish.
Step 2 - Downloading DS Connector from VP Server
DS Connector acts as a bridge between VP Server and directory server. In this section you will see how to download DS Connector from VP Server.
- Open a web browser.
- Visit the Teamwork Server URL and login as administrator. Note that the login ID of the default server administrator is Admin.
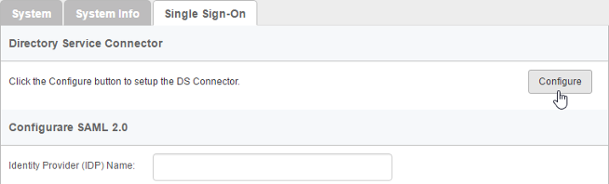
- Select System Tools from the menu on the left hand side.
- Open the tab Single Sign-On.
- Click on Configure under the section Directory Service Connector.
To configure directory service connector - Choose the operating system for the machine where ApacheDS is installed.
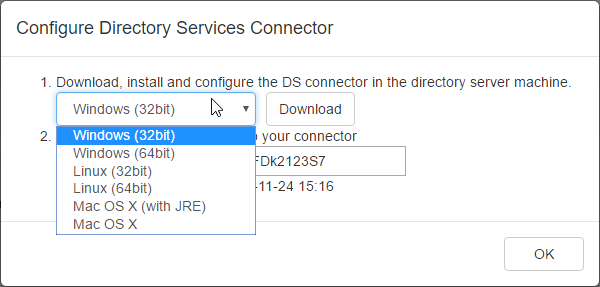
Choosing the right operating system - Click Download. Keep the dialog box opened as you will need to copy the key presented in the dialog box when you configure DS Connector in the next section.
Step 3 - Installing and configuring DS Connector
In this section you will install DS Connector, and configure it to make it connect to both VP Server and ApacheDS.
- Copy the downloaded zip file to the machine where ApacheDS is installed.
- Extract the zip file to a folder.
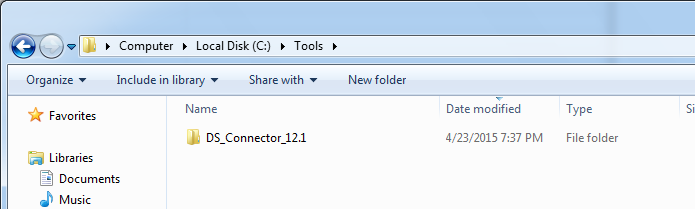
DS Connector (zip) extracted
- Open an elevated command prompt.
For Windows Server 2008 users, click the Start button, type cmd, and then right-click Command Prompt and select Run as administrator from the popup menu.
For Windows Server 2012 users, search cmd in the Apps screen, and then right-click Command Prompt and select Run as administrator at the bottom of the screen.
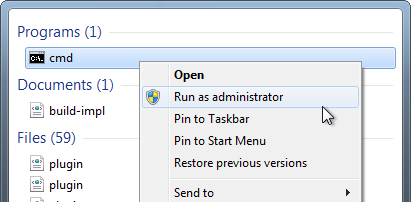 _
_Run elevated command prompt - Navigate to DS_Connector_12.1\service where DS_Connector_12.1 is the name of the folder extracted. Please run it as administrator to avoid any potential issues caused by insufficient write permission.
- Type the following command to install DS Connector as service:
install_service.bat
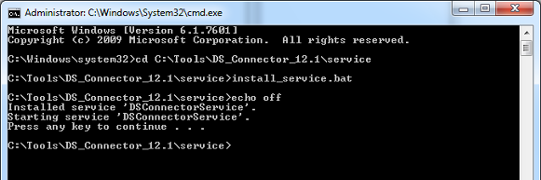
Installing DS Connector as system service - Run DS_Connector_12.1\DSConnectorUI.exe.
- When you run DS Connector the first time, you are prompted to configure the connection to VPository/Teamwork Server. In the Configure Server window, click Other and then select VP Server from the popup menu.
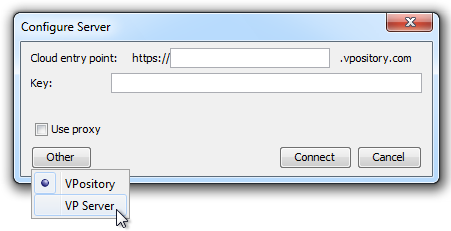
To configure connection to VP Server - Enter the host name and port of VP Server.
- Enter the key, which is the code you saw in the end of the previous section. If you have accidentally closed that dialog box, or if the key has expired, don't worry, just click Configure again (step 5 of the previous section) to obtain another key.
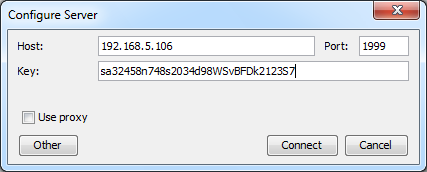
Entering key for server configuration - Click Connect. If succeed, you should see the message Server configuration succeed.
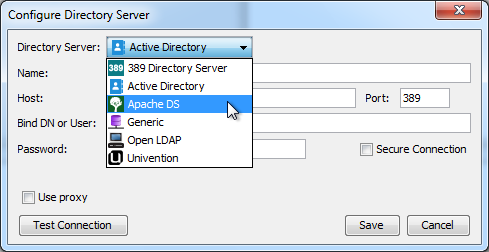
- DS Connector is now connected to VP Server. Now, you need to configure the connection to ApacheDS. On the left hand side of the DS Connector Console, click Add Directory Server.

To add a directory server - Select ApacheDS as Directory Server.
Selecting ApacheDS - Enter a name for this configuration.
- Enter the host name and port of the ApacheDS. As we suggested you to install DS Connector on the machine where ApacheDS is installed, your host name is pretty likely to be localhost or 127.0.0.1. Regarding the port, while the default port of ApacheDS is 10389, you may need to confirm it with your administrator in case it has been changed.
- Enter Bind DN or User. If you use Apache Directory Studio, you can obtain the required value by right clicking on the LDAP connection and selecting Properties from the popup menu. The Bind DN or user can be found under the Authentication tab.
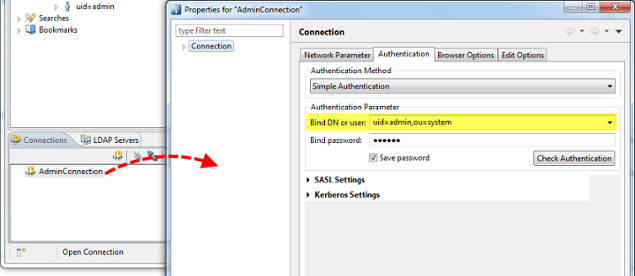
Obtaining the Bind DN or user from Apache Directory Studio - Enter the password for logging into ApacheDS.
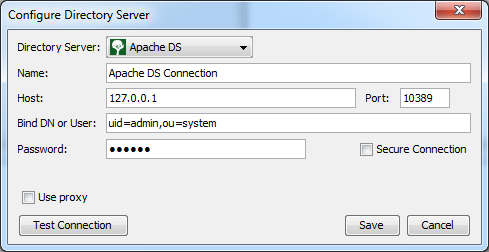
Configuring ApacheDS connection - Click Test Connection. If succeed, you should see the message Test connection succeed.
- Click Save in the Configure Directory Server window.
- The newly configured directory server is listed on the left hand side of the DS Connector Console. If necessary you can add more directory servers by repeating from step 11 until this step.

Directory server added
Step 4 - Synchronizing users to VP Server
In this section you will add users into DS Connector Console to let it synchronize the users to VP Server. When you finished this section, the chosen users can login Teamwork Server from Visual Paradigm, using the login details managed by ApacheDS.
- Select the directory server in DS Connector Console.
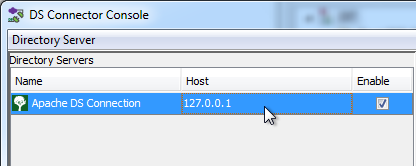
Selecting a directory server - On the right hand side, click Add.
- In the Add users/group window, select the user groups to be made available on Teamwork Server. The users in selected groups will become members of Teamwork server, and will have access to Visual Paradigm projects.
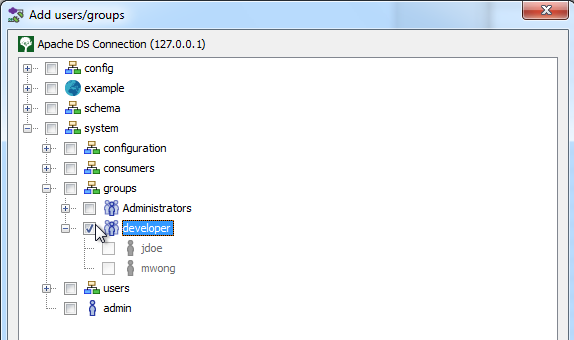
Select user groups to add to DS Connector Console - Click Add.
- That's it. You can see the selected user groups listed on the right hand side of the DS Connector Console.
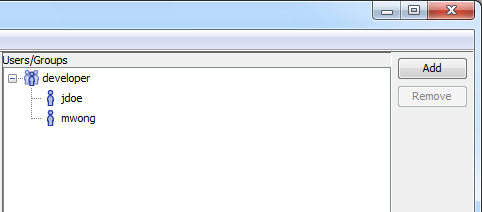
Users added to DS Connector Console
The user groups, along with the users will be synchronized to VP Server shortly (~1 minute). Once the synchronization has been completed, you will see the user groups available in the Members > Groups page of VP Server, like this:
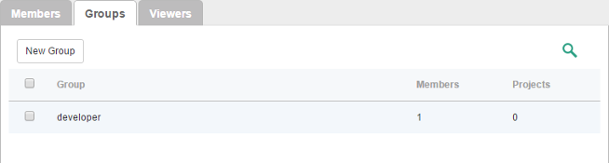
User group synchronized to VP Server
The users are available in the Members page of the Teamwork module of VP Server. Note that the synchronization will synchronize only the user name and login ID. It will not synchronize nor to process any password of any users in ApacheDS. Whenever a user tries to login to Teamwork Server from Visual Paradigm, Teamwork Server will communicate with ApacheDS for authentication.
So now, you assign the user groups to projects so that the users can open the project from Visual Paradigm and start working. If necessary you can also grant them admin permissions.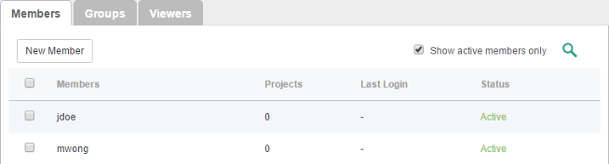
Users synchronized from ApacheDS
To login Teamwork Server from Visual Paradigm, please enter the Email (Login ID) of member as Email (not the display name), and the password stored in ApacheDS as Password.

Login from Visual Paradigm
Related Resources
The following resources may help you learn more about the topic discussed in this page.
| 6. Managing groups | Table of Contents | 8. Managing groups (Active Directory) |