Setting up member account
Members are people who can access Tasifier for task management. As Tasifier is a part of VPository and Visual Paradigm Teamwork Server, what you have to do to create a member is to invite or add him/her through VPository/Teamwork Server. Then, grant project access right to the member, to allow him or her to use Tasifier for that project.
For VPository users
- Open a web browser
- Visit and login your cloud entry point.
- Click on your logo at the top right of the page and then select Manage VPository from the drop down menu.
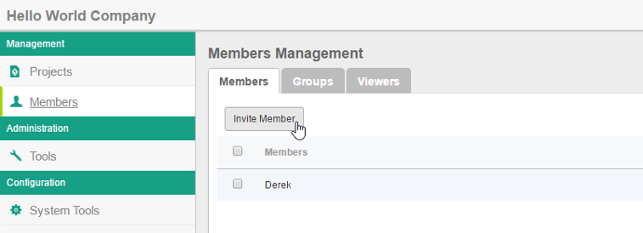
- Select Members from the menu on the left hand side.
- Under the Members tab, click on Invite Member.
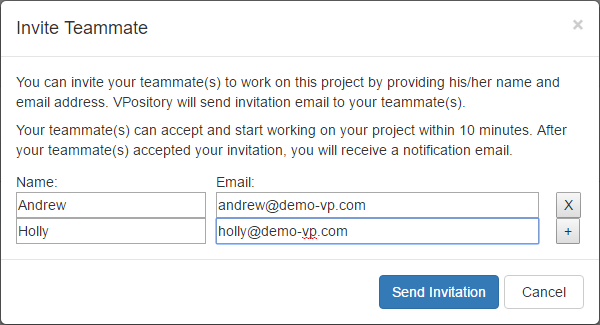
Invite member - In the Invite Teammate screen, enter the name(s) and email address(es) of your teammates and click Send Invitation. Your teammates will receive an invitation email that invites them to join VPository. If they accept the invitation (by clicking the confirmation link in the email), they will become the members of VPository.
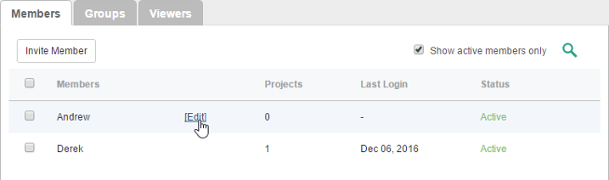
Invite teammate - After that, you can edit the members in VPository to grant them access right to projects. Assuming that your teammates have accepted the invitation, refresh the Members page of VPository to have them listed.
- Move your mouse pointer over the row of member to edit and then click Edit.
Edit a member - You may now edit the name, email and password of the member.
- Switch to the Permissions tab. You may adjust the various permissions granted to this member. This includes the administrator rights for creating/updating/deleting member and/or project, and the right to perform certain action in Visual Paradigm/ArchiMetric. The following table lists permissions you can set. Click here if you want to know more about the details of each permission setting.
- Open the Projects tab. Click Add Project and press + on the project(s) that the member will involve. Click Close.
- Decide whether he can read and/or commit changes made in the project. Read access enables opening the project from server and reading its content. Commit enables uploading project changes from client to server. This step is optional and you can assign member to project in project management page later on.
- Click Save. The member can now manage tasks for the projects selected in step 11, provided that the projects have Tasifier enabled.
For Visual Paradigm Teamwork Server users
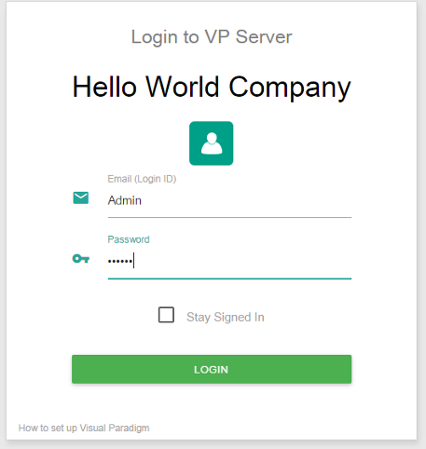
- Open a web browser.
- Visit and login VP Server.
Logging into VP Server as administrator - At the top right, click on your profile logo image and select Admin Repository from the drop down menu.
- Select Members from the menu on the left hand side.
- Under the Members tab, click on New Member.
- Enter the name, email address and password of the member to add.
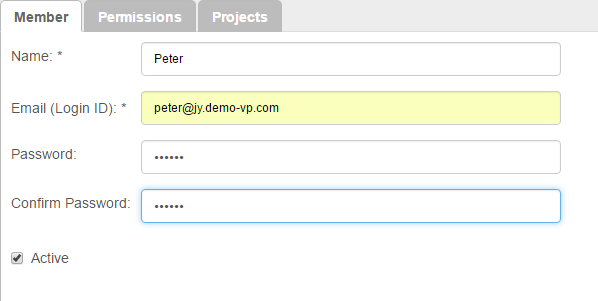
Entering member details
Option Description Name Name of member. It is used for display purpose within the administration tool. Email (Login ID) Email address of member. It is also the login ID member use to log into the server at client side. Password The password member need to log into his/her account. Confirm Password Re-enter the password for confirmation. Active Set if you want to reject the member from logging into the server. Very often you set it when the member is no longer with your team and is not expected to modify the project anymore. Options available when adding member - Switch to the Permissions tab. Grant him/her the administrator rights for creating/updating/deleting member and/or project. If you want to limit the member to perform certain action in Visual Paradigm/ArchiMetric, update the settings under the Access of features, Project configuration and Tag/Branch sections. Click here if you want to know more about the details of each permission setting.
- Click Save at the top right of page if you've modified the permission settings.
- Open the Projects tab. Click Add Project and press + on the project(s) that the member will involve. Click Close.
- Decide whether he can read and/or commit changes made in the project. Read access enables opening the project from server and reading its content. Commit enables uploading project changes from client to server. This step is optional and you can assign member to project in project management page later on.
- Click Save. The member can now manage tasks for the projects selected in step 9, provided that the projects have Tasifier enabled.
Related Resources
The following resources may help you learn more about the topic discussed in this page.
| Chapter 2. Account and Profile | Table of Contents | 2. Editing profile |