How to Create a Grid in Visual Paradigm?
The Grid Diagarm provides a convenient way to view specific type(s) of model element within your project. You can create a grid to list whatever model element type(s) you like and select the properties of model element being shown inside the grid.
To create a grid:
- Select Diagram > New from the application toolbar.
- In the New Diagram window, select Grid.
- Click Next.
- Enter the diagram name and description. The Location field enables you to select a model to store the diagram.
- Click OK.
- The Grid Diagram is opened. Select a model element type from the drop down menu of Model Element. Click More... to list all the available choices. If you want to list multiple model element types say, class and use case, click "+" to add more type row(s).
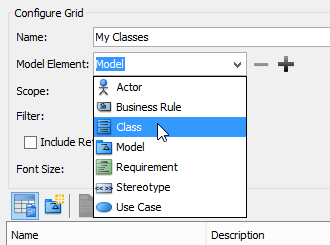
Select Class
The model element of selected type will then be shown on the grid.

The model element of selected type is shown
Related Resources
The following resources may help to you learn more about the topic discussed in this page.
| Chapter 2. Grid diagram | Table of Contents | 2. Creating element in grid |