Drawing mind mapping diagram
Mind mapping is a tool to help you in brainstorming and organizing ideas, concepts, words, tasks through a visual note-taking way. It sometimes helps to capture requirements and business process, too. Modelers can create and link model element (such as task, use case, classes) with mind mapping node. The traceability can be kept between initial idea (mind mapping node) and detail design elements (e.g. class).
Creating mind mapping diagram
- Select Diagram > New from the application toolbar.
- In the New Diagram window, select Mind Mapping Diagram.
- Click Next.
- Enter the diagram name and description. The Location field enables you to select a model to store the diagram.
- Click OK.
- This create a mind mapping diagram with a central idea node appears in it. Immediately name the central idea node and press Enter to confirm. You can then start drawing the diagram by branching nodes from the central idea nodes.

Naming central idea node
Creating branch with resource centric interface
Mind mapping is formed by nodes that represent ideas or concepts. They are connected with each other, showing the flow of thinking. To create a new branch of nodes from an existing node:
- Move the mouse pointer over a node. Press on the resource icon Branch -> Node.
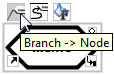
To create a node - Drag it out. Release the mouse button to create the node.

A node is created - Name the node and press Enter to confirm. Create the other nodes by repeating the same steps.

A mind mapping diagram is created
Collapsing/Expanding a branch
When reading a mind map, you may want to collapse some branches to make a diagram cleaner and easier to read. To collapse a branch:
- Move the mouse pointer over a node.
- Click on the resource icon Collapse.

To collapse a branch of node
Similarly, you can expand a collapsed branch by clicking on the Expand resource that appear when moving your mouse pointer over a collapsed node.
Identifying collapsed nodes
To locate the collapsed nodes on a mind map, simply turn on the Model Indicator by selecting View > Model Indicator from the toolbar. By doing so, those collapsed nodes will have the Expand resource appear above them.
Related Resources
The following resources may help you to learn more about the topic discussed in this page.
| Chapter 7. Mind mapping diagram | Table of Contents | 2. Formatting nodes |