Creating and editing Task Pool
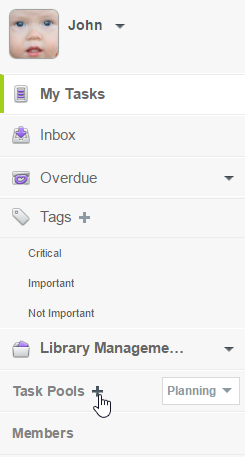
Task Pool can be created from the left pane of Tasifier. To create a Task Pool:
- Click on the add button next to the Task Pools caption.
Create a Task Pool - Enter the name of the Task Pool in the Main Pane and press Enter to confirm.
Name the Task Pool
Describe the Task Pool
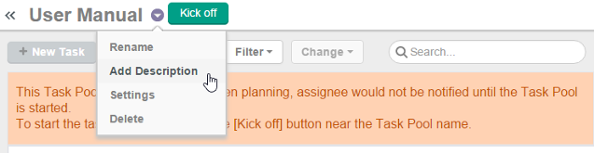
You can describe the goal of the Task Pool by adding a description. To add a description:
- Click on the down arrow next to the name of the Task Pool, from the Main Pane.
- Select Add Description from the drop-down menu.
Add a description to Task Pool - Enter the description. You can add a new line by pressing Enter. To confirm editing, press Ctrl-Enter, or click on the region outside the description field.
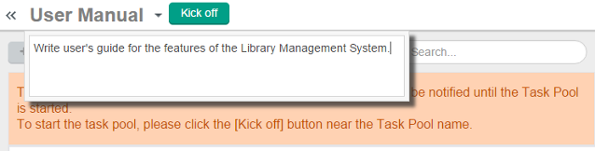
Enter Task Pool description
Edit Task Pool description
To edit the description of a Task Pool:
- Open the Task Pool from the Left Pane.
- Click on the down arrow next to the name of the Task Pool.
- Select Edit Description from the drop-down menu.
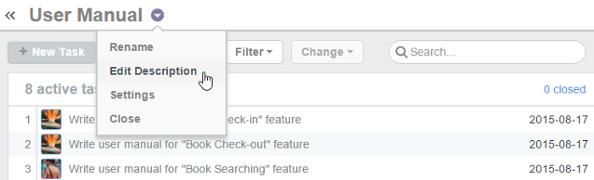
Edit Task Pool description - Modify the description.
- Press Ctrl-Enter to confirm editing.
Set a default due date for new tasks in a Task Pool
You can set a default due date for tasks to be created in a Task Pool.
To set a default due date for new tasks in a Task Pool:
- Open the Task Pool from the Left Pane.
- Click on the down arrow next to the name of the Task Pool.
- Select Settings from the drop-down menu.

Edit Task Pool settings - Choose an option:
Unspecified - Not to apply a default due date.
Duration - If you want to give team members a specific number of days to finish a task in this Task Pool, choose this option and enter the number of days in the text box. The due date of new tasks will be calculated based on their create date and the number of days specified here.
Date - A specific date.
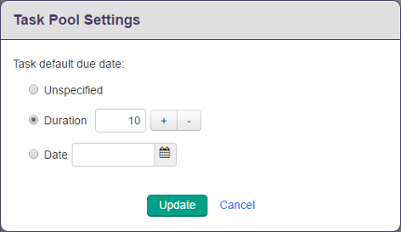
The various default due date options - Click Update to confirm the setting.
Kick-off the Task Pool
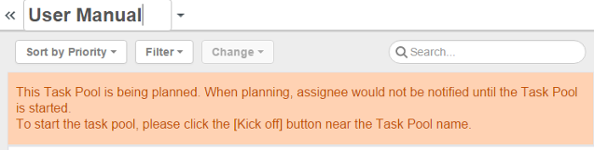
When you create a Task Pool, the Task Pool is in the Planning state. Assignees will not see the task in their My Tasks page, nor receive any notification about the new tasks, until the Task Pool is "kicked off".
When you have finished planning tasks, click the Kick off button next to the name of the Task Pool. Once you have done that, assignee will see the tasks appear on their My Tasks page. They can then begin working on the tasks.
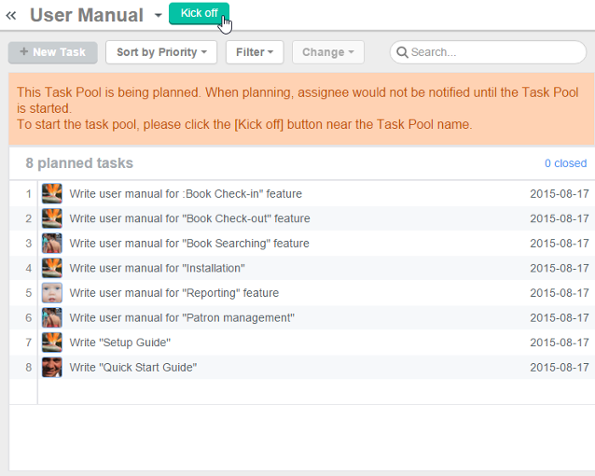 |
| Kick-off Task Pool |
Task Pool is changed to Working state once kicked off. You can find the Task Pool from the Left Pane by selecting Working, next to the Tasks Pools caption.
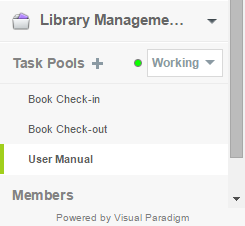 |
| "Working" Task Pools listed under Left Pane |
| NOTE: | Once a Task Pool has been kicked off, it cannot be changed back to the Planning state. Yet, you can always add new tasks to a Task Pool kicked off. |
Quick way to opening a Task Pool
If your project has many Task Pool, here is a quick way to open the Task Pool you want. Press the hot-key Shift-T. Then, choose the project from the popup list, and then the Task Pool to open.
Related Resources
The following resources may help you learn more about the topic discussed in this page.
| 1. What is a Task Pool? | Table of Contents | 3. Closing Task Pool |