Copy and paste
You can create a view of a model element by copying a view and pasting as view, while pasting as model creates a new model from the copied one.
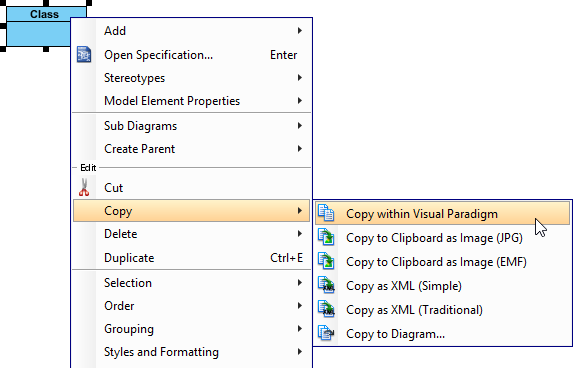
Copying within Visual Paradigm
- Right click on the selected shape(s), select Copy > Copy within Visual Paradigm from the pop-up menu.
Copy selected shapes with Visual Paradigm - After you switch to the destination diagram, right click on the diagram background and select either Paste View or Paste Model from the pop-up menu. The feature of Paste view refers to present the same model element in another view under a new context. The shape is pasted without creating model; while the feature of Paste Model refers to duplicate the shape and present it in a new view. The model will be copied and pasted on the diagram. The new model will be named with appending a sequential number.
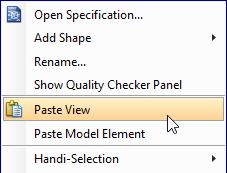
Paste the selected shape
Copying to clipboard as image (JPG)
- Right click on the selected shape(s) and select Copy > Copy to Clipboard as Image (JPG) from the pop-up menu.
- When the Copy as Image Option dialog box pops out, select an option from the drop-down menu of Copy type. Click Copy button to proceed.
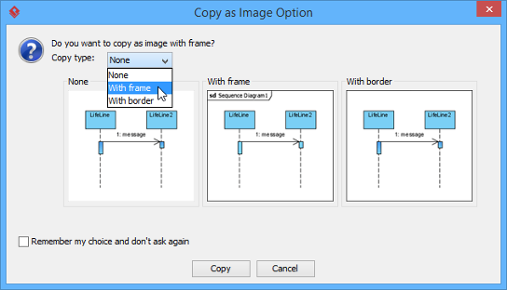
Select an option from the drop-down menu of Copy type - You should select a destination document (e.g. MS Word) for pasting the copied shape(s) to do further description. After you switch to the destination document, right click on the desired place and select Paste from the pop-up menu.
- As a result, your selected shape(s) will be pasted on the destination document.
Copying to clipboard as image (EMF)
- Right click on the selected shape(s) and select Copy > Copy to Clipboard as Image (EMF) from the pop-up menu.
- When the Copy as Image Option dialog box pops out, select an option from the drop-down menu of Copy type. Click Copy button to proceed.
- EMF is a kind of scalable image which can be pasted on a document for further description. After you switch to the destination document, right click on a desired place and select Paste from the pop-up menu.
- As a result, your selected shape(s) will be pasted on the destination document.
Copying as XML
You can convert selected shapes into XML which contain the data of selected shapes in XML format. The XML data can then be imported into another project.
- Right click on the selected shapes and select Copy > Copy as XML from the pop-up menu.
- Open a text editor and create a new text file. Paste the XML there and save it as an XML file.
- After that, the file can be imported to another project by selecting File > Import > XML.
- When Import XML dialog box pops out, select the xml file path. Finally, click OK button to proceed.
Copying to Diagram
You can also copy the selected shape(s) to either a new diagram or an existing diagram. To copy to a diagram:
- Right-click on the selected shapes, select Copy > Copy to Diagram... from the pop-up menu.
- When the Copy to Diagram dialog box pops out, check Create new diagram if you want to paste to a new diagram or check Select an existing diagram if you want to paste to an existing diagram.
- Click Copy to button. As a result, the selected shape(s) will be duplicated on the selected diagram.
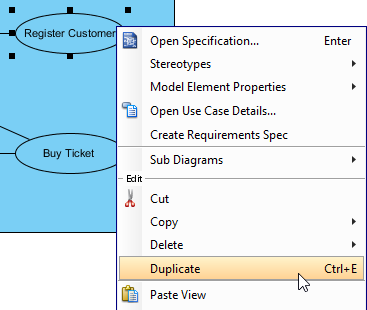
Duplicating
With the feature of duplicate, shapes can be duplicated on the same diagram instantly.
- Right click on the selected shape(s) and select Duplicate from the pop-up menu.
Duplicate a selected shape - As a result, the selected shape(s) will be duplicated.
The shape is duplicated
Related Resources
The following resources may help you to learn more about the topic discussed in this page.
| 3. Diagram Element Selection | Table of Contents | 5. Alignment guide |