Alignment guide
Alignment guide acts as a guide to help aligning shapes perfectly in the shortest period of time.
It is a dotted line that appears when you are moving the shape or resizing the shape within more than one shapes.
With the use of alignment guide, you can organize the diagram neatly with only little effort.
Arrange shapes in orderly arrangement
After dragging one shape from another shape, you will see a dotted line (the alignment guide) between the two shapes when you move either shape.
The Alignment Guide is here to help you to align the two shapes.
Take the following diagram as an example. If you move shape B vertically, you can see horizontal alignment guides appears on top, in the middle or at the bottom. You can choose to follow one of them depends on where you want to position shape B.
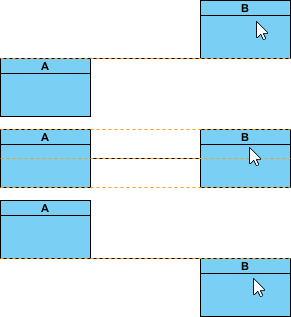 |
| Aligning classes horizontally |
Similarly, when you move shape B horizontally, you can see vertical alignment guides appears on the left, in the middle and at the right.
 |
| Aligning classes vertically |
With the help of alignment guide, you can produce a neat diagram with ease.
Other than moving the shape, alignment guide also appears when you resize the shape.
Let's take a look at the diagram below. If you want to resize shape B to produce equal height as shape A. The alignment guide can guide you to achieve this.
Evenly distribute the spacing among shapes
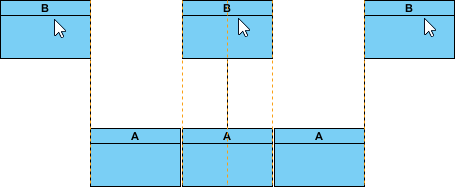
If you want the spacing among shape B and C equals to shape A and B, simply move shape C parallel to shape B, an additional dotted line at the bottom of the diagram (as pointed by red arrows) represents equal spacing among shape A and B as well as shape B and C.
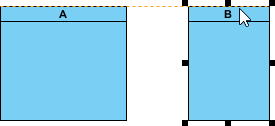 |
| Aligning classes during resize |
Therefore, this additional dotted line acts as a hint that help you to create equal spacing efficiently and precisely.
On the contrary, the additional dotted line will not appear if the spacing are not equal.
 |
| Aligning classes with equal spacing |
Layout generalization hierarchy with ease
Alignment guide is very useful in producing a neat layout of generalization hierarchy as well.
While it's nice to present super-class and its sub-classes in hierarchical form, it's uneasy to route the generalization connectors perfectly to make the hierarchy looks neat and tidy. Sometimes, the connectors are either partially overlapped or entirely detached from each other. All these affect the harmony of the design and may even reduce readability.
Alignment guide is here to help. By dragging on a generalization connector, you can make its turning point snap to a position that aligns with another generalization horizontally. Therefore, you can produce a neat hierarchy effortlessly with the aid of alignment guide.
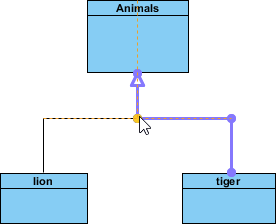 |
| Aligning generalization hierarchy |
Turn off the Alignment guide
In case users want to disable the Alignment guide function, here are some simple steps:
- Select Window > Application Options... from the toolbar.
- Enter guide in the search field of the Application Options window to locate the option.
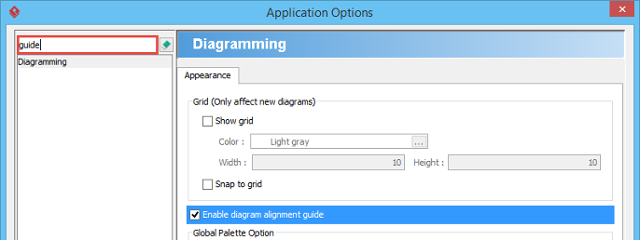
Entered 'guide' in search field - In the Appearance tab of the Diagramming page, uncheck Enable diagram alignment guide.
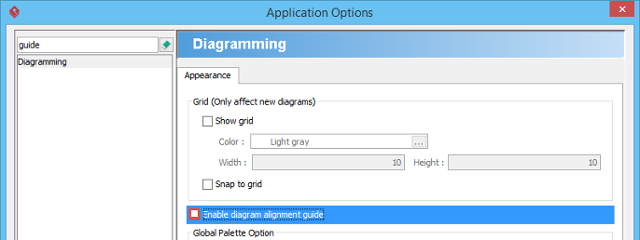
Uncheck "Enable diagram alignment guide." - Click OK to confirm the setting.
Related Resources
The following resources may help you to learn more about the topic discussed in this page.
| 4. Copy and paste | Table of Contents | 6. Reverse connector direction |