Adding storyboard to user stories
Storyboard is a useful technique in system analysis and design in that it represents the screens and screen flow under different scenarios and situations. Say, if you are designing an ATM system, you can design a storyboard to show the screens that involve in a cash withdraw process, starting from inserting card until cash dispensing and card ejection.
In Visual Paradigm, you can design storyboard for each of the user stories. This helps in explaining system design ideas and aids the confirmation of requirements when in requirements gathering phase.
To create a wireframe storyboard:
- Locate the user story first. Here are some of the typical ways to locate a story.
- If you own the URL of a user story, open the URL by selecting Diagram > Link from the toolbar. Paste the URL in breadcrumb in press Enter.
- To locate a user story in a particular use case, open the use case by selecting UeXceler > Use Case first. Find the story under the User Stories tab on the right hand side.
- To locate a user story in a sprint, open the sprint from the UeXceler > Sprint page and find the story there.
- You can also find a user story in the UeXceler > User Story page. Note that if your story was added into a sprint, you have to enable the In Sprint option in the Advanced Filter.
- Open the story by double clicking on it.
- Open the Stotyboard tab.

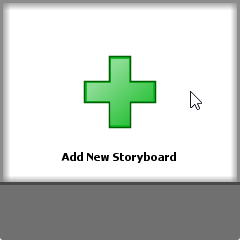
Open the Storyboard tab - Click Add New Storyboard.
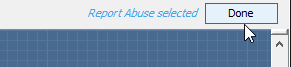
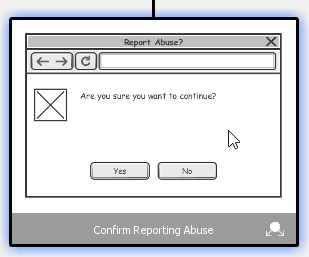
To add a storyboard - Input the storyboard name in the breadcrumb and press Enter. You can treat a storyboard as a story. So if you want to represent the screen flow of the 'Report abuse' function, you can name it Report Abuse.

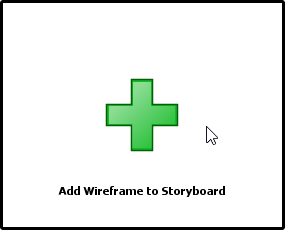
Entering storyboard name - Click Add Wireframe to Storyboard.
To add a wireframe to storyboard - If your project has no wireframe in it, you will be asked to create one. If the project contains a wireframe, you can now add an existing wireframe to the storyboard or just create a new wireframe. More about wireframe selection will be covered in the following sections.
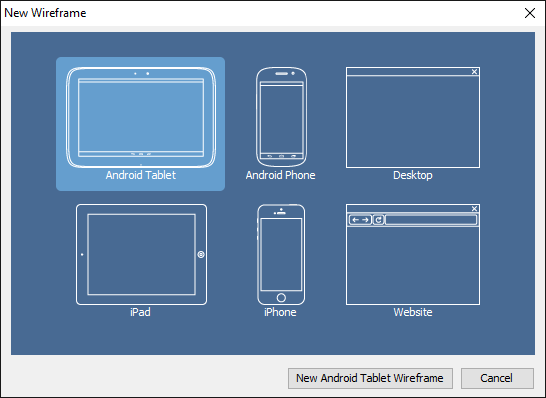
The New Wireframe window - Create/select a wireframe.
- Go back to the storyboard by clicking on the Done button on top of the wireframe.
Go back to the storyboard
Creating a wireframe in a storyboard
To create a new wireframe in a storyboard:
- Open the storyboard that you want to create a wireframe in it.
- Click Add Wireframe to Storyboard....
- your project has no wireframe in it, you will be asked to create one. Select the device/platform that suit your application/system. If your system will run on multiple devices/platforms, please consider creating multiple storyboards.
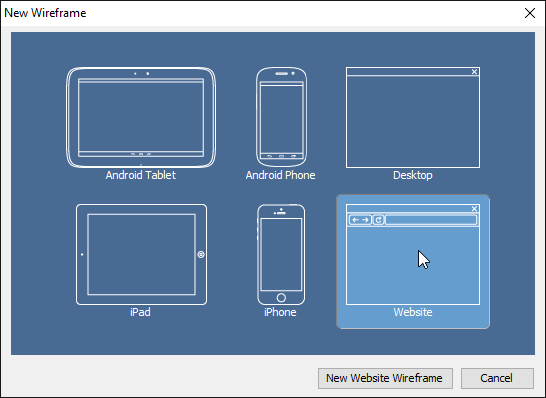
Select a type of wireframe to create - Click New %TYPE% Wireframe where %TYPE% is the type of device/platform you selected.
- A blank, new wireframe appear and you can now begin editing.
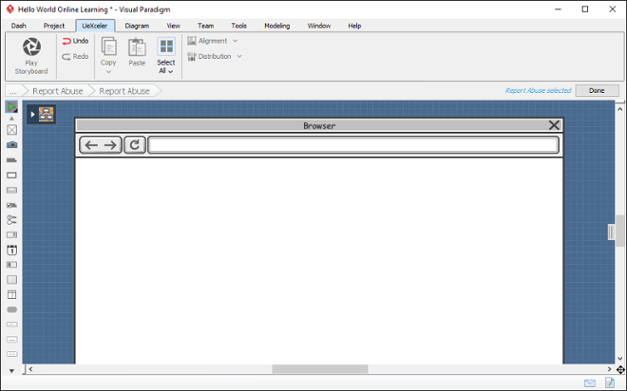
New wireframe created - When you finish editing, you can go back to the storyboard by clicking on the Done button on top of the wireframe.
Go back to the storyboard
The above are the steps that involve in creating a wireframe from a storyboard when there is no wireframe in your project. Once you have created a wireframe, you will see something different after step 3. Here is what you will see:
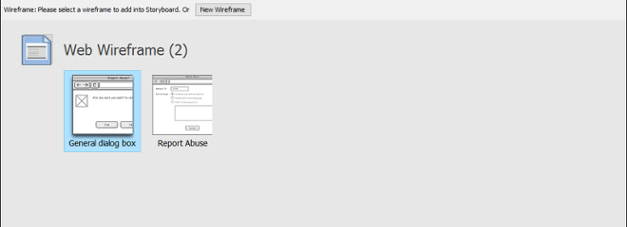 |
| Wireframe selection screen |
If you want to create an entirely new wireframe:
- Click on the New Wireframe button.

To create a new wireframe - The remaining steps are same as those mentioned above, starting from step 3.
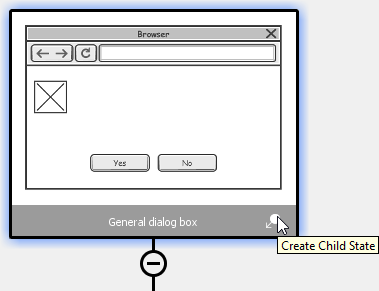
If you want to create a new wireframe and you found that an exising wireframe is more or less the same as what you want to draw, you may create what we called a 'child state' of that existing wireframe.
- Select the wireframe to treat as a base in creating a new wireframe.
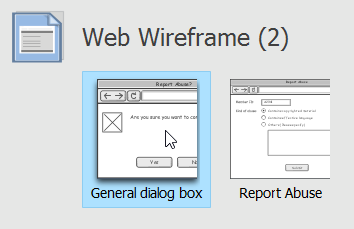
Selecting a wireframe - This shows the available states of the wireframe. Select the state that looks closest to what you want to draw.
Select wireframe state - Click on Create Child State.
Create Child State - Edit the new wireframe (state). When you finish editing, go back to the storyboard by clicking on the Done button on top of the wireframe.
Adding an existing wireframe to a storyboard
Sometimes, you may want to re-use a wireframe created earlier. For example, to reuse a wireframe about account login in storyboards that require user to login to do something.
To add an existing wireframe into a storyboard:
- Open the storyboard that you want to add an existing wireframe into it.
- Click Add Wireframe to Storyboard.
- Click on Select Wireframe Diagrams.

Select an existing wireframe diagram - Double click on the wireframe.
Selecting a wireframe - This shows the available states of the wireframe. Select the state of wireframe to add into your storyboard.
Selecting a wireframe state - Go back to the storyboard by clicking on the Done button on top of the state selection page.

Click Done
Using pointer / finger gesture
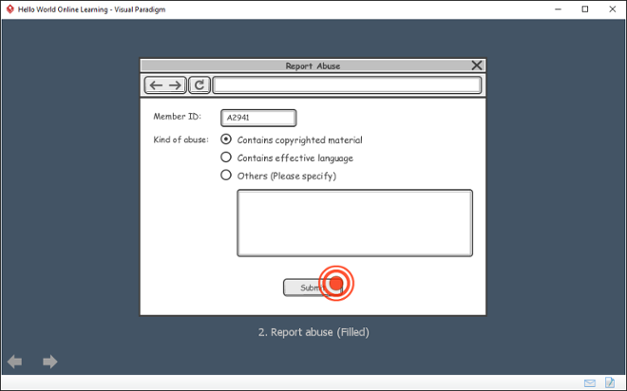
You can indicate in wireframe the position of mouse pointer, or the finger gesture required to execute an action. To do this:
- Open the storyboard that you want to edit.
- There is a button at the bottom right of a wireframe. Click on it and select Mouse Gesture > Pointer/Drag/Finger Gesture from the popup menu. Note that Pointer and Drag are available for Desktop and Web wireframe, while Finger Gesture is available for Android phone, Android tablet, iPad and iPhone wireframes.

Add a pointer to wireframe - Drag on the pointer/drag/finger gesture symbol to reposition it.
Repositioning a pointer
Renaming a storyboard
If you want to change the name of a wireframe storyboard, rename it by performing these steps:
- Open the Storyboard tab of the desired user story.
- Right click on the storyboard to rename and select Rename Storyboard... from the popup menu.
- Click OK to confirm the new name.
Wireframe playback
Showing a screen flow of the system to your customer guarantees your customer knows what will be delivered by the end of the project. Visual Paradigm not only allow you to associate use case scenario with wireframes in illustrating system interations, but also supports playing the wireframes associated with wireframe storyboard. This can be very useful when you need to present the system design ideas to your customers, and to look for their consent.
Playing wireframes
- Open the Storyboard tab of the desired user story.
- Select the storyboard that you want to play.
- Click the Play Storyboard button on the toolbar.
- This opens the wireframe player. The wireframe of the first step is shown in the player.
Playing a wireframe
You can move on to the next wireframe by pressing the Right key, or clicking on the arrow button at the bottom left of the player. Similarly, you can press the Left key or click on the back button at the bottom left of the player to move to the previous wireframe.
 _
_
Move to the next wireframe
Showing Annotations
To keep the wireframe clear and readable, annotations are hidden by default. You may click on the Show Annotations button t the bottom left of the player to have them visible. Let's show the annotations.
 _ _ |
| Show annotations |
Ending the Show
You can end the show anytime by pressing the Esc key. When it arrives the final wireframe, you can also exit by clicking on the Exit button at the bottom left of the player.
 _ _ |
| Exit playback |
Reordering wireframes in a storyboard
You can always reorder the wireframes added to a storyboard by performing these steps:
- Open the Storyboard tab of the desired user story.
- Select the wireframe(s) to reorder. You can perform multiple selection by first pressing Ctrl on a wireframe, and then select the other wireframes one by one.

Select the wireframes to reorder - Drag your selection to the target place.
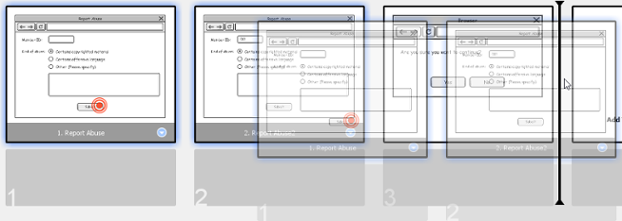
Reordering wireframes - Release the mouse button.
Moving storyboard to another user story / to project
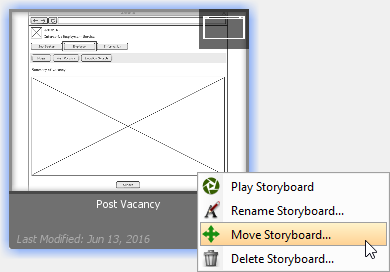
User stories may be combined or removed due to updates of user requests or arrangement of works. Any re-arrangement of user stories may lead to a re-allocation of storyboard from one user story to another. To move a storyboard to another user story or to project:
- Open the Storyboard tab of the desired user story.
- Right cick on the storyboard to move and select Move Storyboard... from the popup menu.
Move storyboard - In the Move Storyboard to User Story window, select the user story to move or, or select Project Storyboards to move to project. Storyboards added to Project Storyboards are accessible by selecting Modeling > Storyboard from the application toolbar.
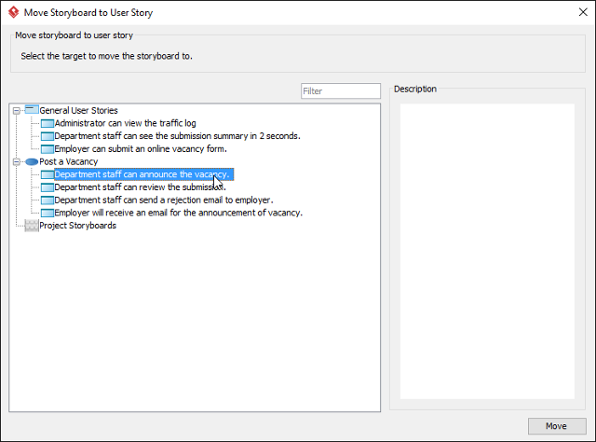
Select a user story - Click Move.
Acquiring storyboard
Besides moving a storyboard from a user story to another, you can acquire a storyboard from an existing storyboard or from project. To do this:
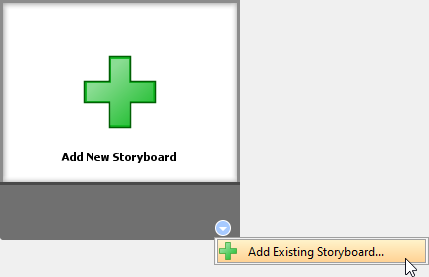
- Open the Storyboard tab of the desired user story.
- Move your mouse pointer over the Add New Storyboard button.
- At the bottom right corner of the button, select Add Existing Storyboard... from the popup menu.
Add existing storyboard - In the Add Existing Storyboard window, select the storyboard you want to move into this user story. You can view the storyboard based on the user stories that currently belong to by selecting User Story for Group by. If the naming of storyboards are clear enough, you may select Storyboard for Group by.
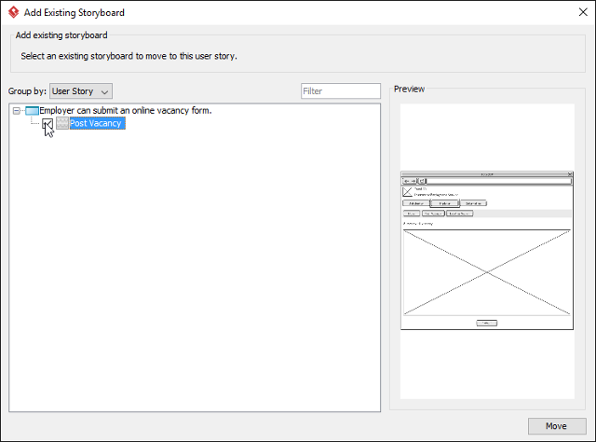
Select storyboard - Click Move.
Related Resources
The following resources may help you to learn more about the topic discussed in this page.
| 13. Wireframe playback | Table of Contents | 15. Adding sub-diagrams and references to user stories |