Business process modelling represents:
- Business activities,
- Information flow and,
- Decision logic in business processes.
With the power of visualization, it is used to communicate information regarding a process and the interaction it includes within / between organizations either among the persons reading a model or the persons who create it.
Steps to create business process
The steps below outline the major steps to take in creating a business process.
- Define the process you are modeling - Define a process in your scope of business operation involved, and what are you trying to achieve
- Identify the starting point of the process
- Identify the different steps in the process.
- Clarify who or what performs each step.
- Decide which type of modeling notation to be use used such as BPMN
Business process diagram for process improvement
To perform business process improvement, perhaps you could perform the additional gap analysis steps:
- Create an As-is Model (the now state)
- Design the to-be Model (the future state)
- Perform the gap analysis
- Formulate improvement actions
Performing business process modeling
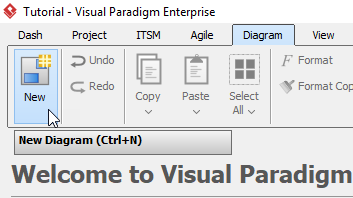
- Select Diagram > New from the toolbar.
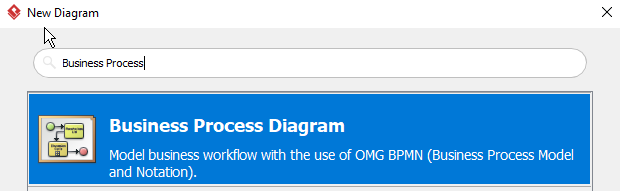
- In the New Diagram window, choose Business Process Diagram, then click Next. You can use the search bar above to filter the result.
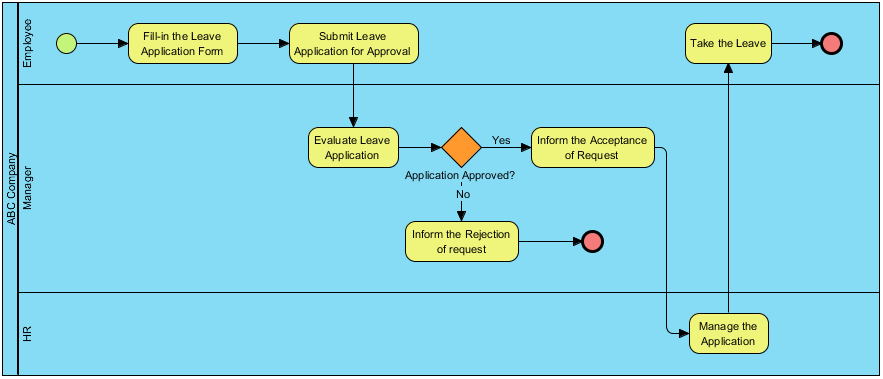
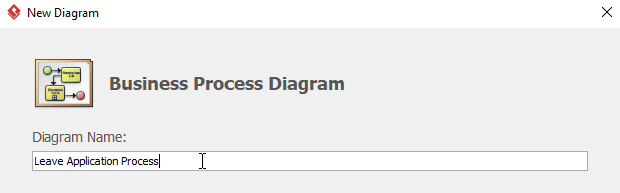
- Name the diagram, then Click OK. On this tutorial, we are naming the diagram Leaving Application Process.
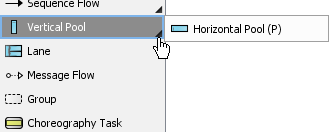
- Create a horizontal pool by first clicking Horizontal Pool, then click on any empty space on the diagram.

If you cannot find Horizontal Pool but Vertical Pool instead, click the small triangle next to Vertical Pool, or press P on your keyboard.
- Rename the pool by double clicking the pool.
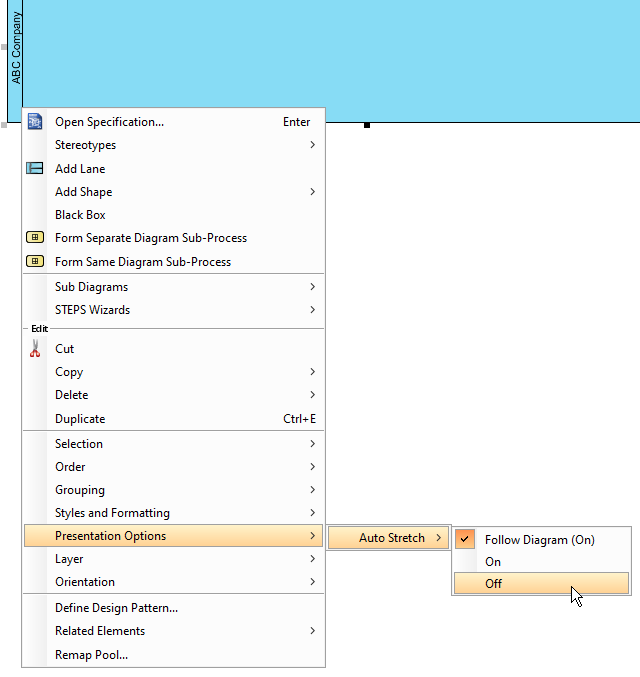
- The Auto Stretch setting of every pool is On by default, which means the length of the pool will stretch along the diagram. However, we don't want this in the tutorial. We can disable Auto Stretch by right clicking ABC Company > Presentation Options > Auto Stretch > Off.
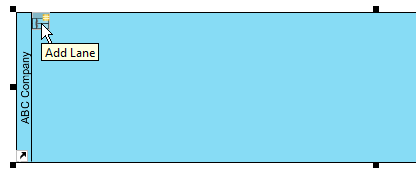
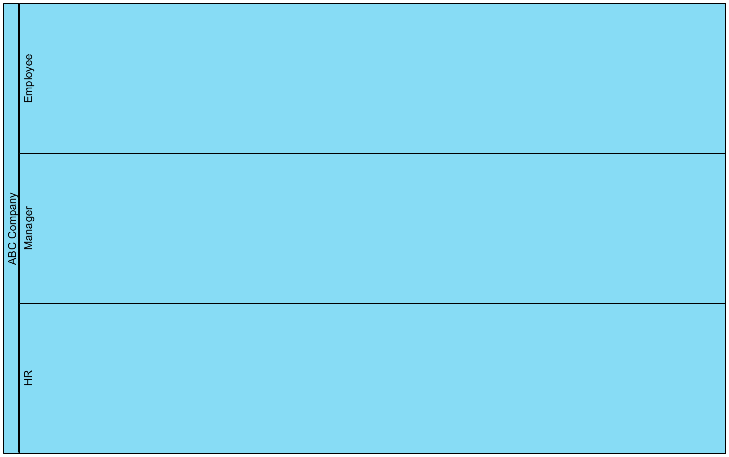
- To create a lane, click ABC Company's empty space, then press the resource button Add Lane. You can rename the lane by double clicking the lane.
- Repeat step 7 for more lanes. You will see something like this after you have created all lanes:
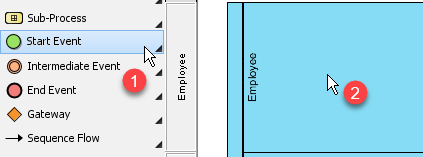
- To create a start event, select Start Event, then click the lane you want the start event to be placed. We will place the start event on the Employee lane in this tutorial.
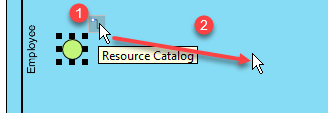
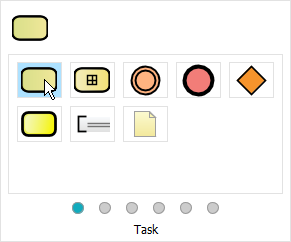
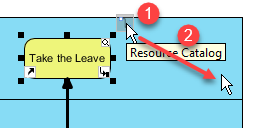
- To create the first task, click the start event, then click and hold the resource button Resource Catalog, drag the cursor to the desire position and release. When you see a popup window appears, click Task on the window.
- Double click the task to rename the task. We are renaming the task we created at step 10 to Fill-in the Leave Application Form in this tutorial.
- Repeat step 10 and 11 for more tasks.
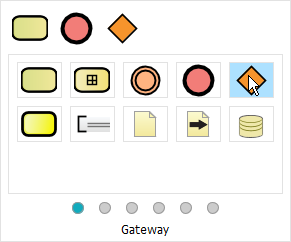
- To create a gateway, first click the task you want to be followed by a gateway, click the resource button Resource Catalog, drag the cursor to the desire position and release. Finally, select Gateway from the popup window. In this tutorial, we will be creating a gate after the task Evaluate Leave Application. You can then rename the gateway using step 11.

- Repeat step 13 for more gateways
- You may want to give some sequence flows a name. You can achieve this by double clicking the sequence flow.
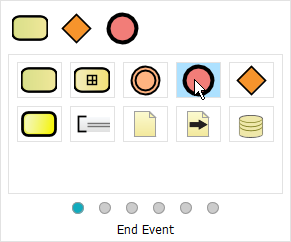
- When all tasks and gateways are created, you can create the end events. To create an end event click the event you would like to end with (Take the Leave in this example), click and hold the resource button Resource Catalog, drag the cursor to the desire position and release, then select End Event from the popup window.
- Create more end events by repeating step 16.
- Once you have finished your diagram, you will see something like this: