Component Diagrams show the types of software components in the system, their interfaces and dependencies. People often use UML Component Diagram in the following scenarios:
- Show the structure of the code itself
- Can be used to hide the specification detail (i.e., information hiding) and focus on the relationship between components
- Model the structure of software releases; show how components integrate with current system design
- Model source code and relationships between files
- Specify the files that are compiled into an executable
How to create Component Diagrams?
The steps below outline the major steps to take in creating a UML Component Diagram.
- Decide on the purpose of the diagram
- Add components to the diagram, grouping them within other components if appropriate
- Add other elements to the diagram, such as classes, objects and interfaces
- Add the dependencies between the elements of the diagram
Creating a Component Diagram
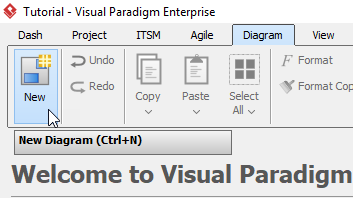
- Click Diagram > New from the toolbar.
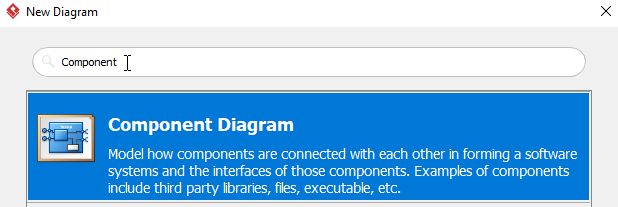
- In the New Diagram window, select Component Diagram, then click Next. You can use the search bar above to filter results.
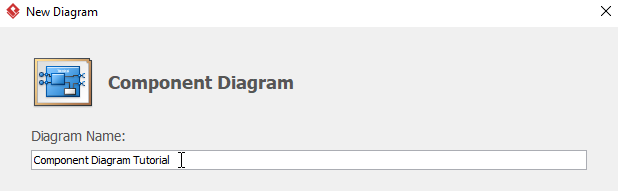
- Name the diagram, then click OK. You will then see a blank diagram. We will name the diagram Component Diagram Tutorial in this tutorial.
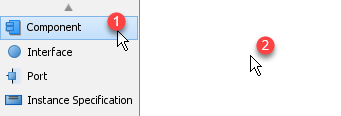
- To create a component, select Component, then click any empty space on the diagram.
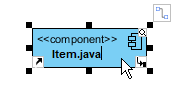
- Rename the component by double clicking the component. In this case, we will be renaming this component Item.java.
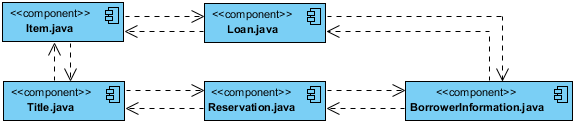
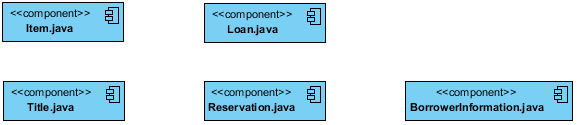
- Repeat step 4 and 5 for more components. You will see something like this after creating all components:
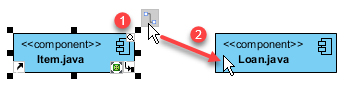
- We can create some dependencies once the components are created. In this example, we are creating a dependency from Item.java to Loan.java. Click Item.java, then click and hold the resource button Resource Catalog, drag the cursor to Loan and release, select Dependency from the popup window. You will now see a dependency from Item.java to Loan.java.
- Repeat step 7 for more dependencies.
- You will see something like this when you finished your diagram: