No matter what kind of software / system your team will build, and which methodology your team will follow, your projects must be driven by a tasks – a considerable number of tasks for UI design, database construction, implementation, testing, deployment, etc.
The effective management of project tasks allows you to:
- Deliver important features earlier through better scheduling of tasks
- Achieve higher productivity through better structuring and grouping of tasks
- Utilize your team’s full potential through a balanced distribution and division of tasks
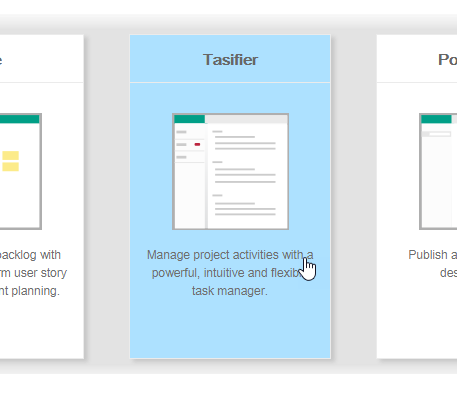
In this quick task management tutorial, you will learn how to manage your project tasks effectively using Tasifier, a task management platform bundled with Visual Paradigm.
Project teams can begin managing project tasks by creating a VP Online workspace. Let’s see how things works.
Setting up VP Online workspace
Tasifier works within VP Online. In order to complete this tutorial, there must be at least one project and one more member. Let’s set things up in this section
Creating VP Online workspace
If you or team are already using VP Online, please skip this section and move on to the next section to create a new project.
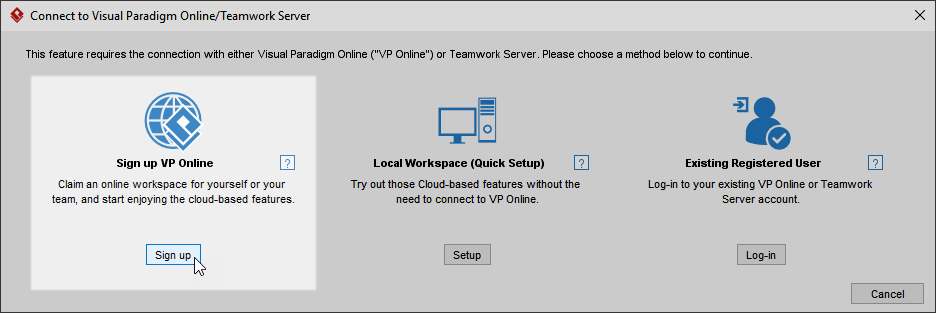
- Select Team > Select Repository from the application toolbar.
- In the popup window, click on Sign up under Sign up VP Online.
- In the Sign up Visual Paradigm Online window, enter your email address, the password and the workspace ID. Usually, the company or team name is entered as workspace id.
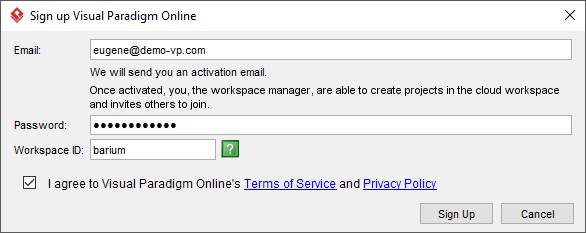
- Click Sign Up. You will receive an account activation email. Follow the instruction in the email to activate your account.
Creating a Member
Once you have confirmed your account, you, the manager of workspace can create project and members in the online workspace.
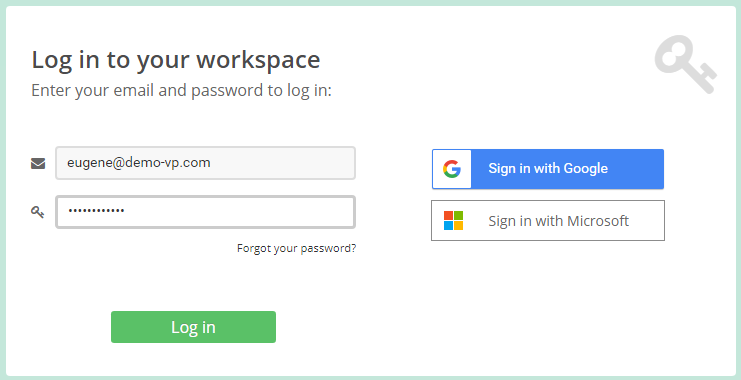
- Visit https://online.visual-paradigm.com/login.jsp to log in to VP Online workspace.
- Enter your email and password (i.e. the information entered in step 3 of the section above) and click Log in.
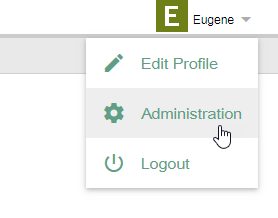
- This opens the dashboard of VP Online. Click on your name at the top right corner and select Administration from the drop-down menu.
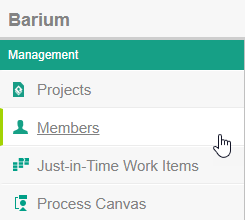
- Click the Members menu on the left.
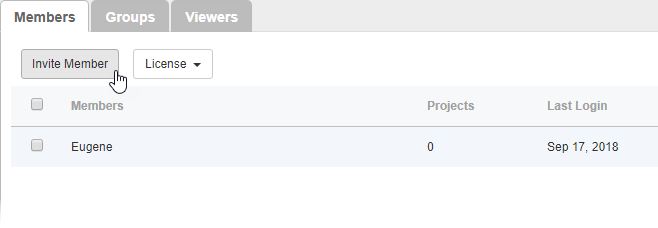
- Click on Invite Member.
- Enter the name and email address of the invitee, in this tutorial, Stephen’s. Of course you don’t need to find someone called Stephen to complete this tutorial. Just enter any email address available would be fine. Just to make sure that the email address is valid and accessible because VP Online will send him/her an invitation email to viewing the diagram shared.
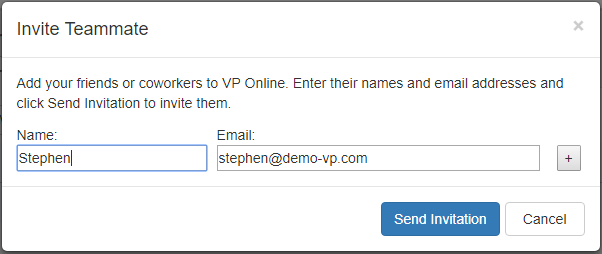
- Click Send Invitation.
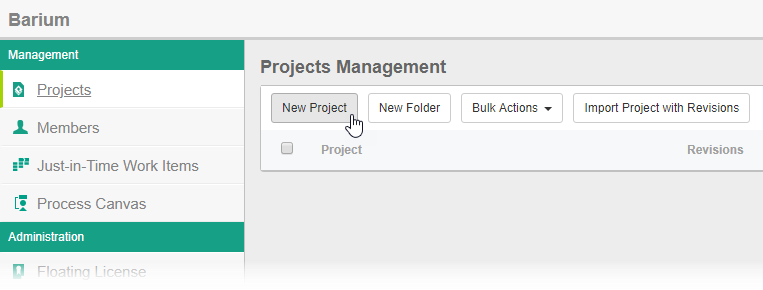
Creating a Project
- Click the Projects menu on the left.
- Click on New Project.
- Enter Tutorial as project name and press + to add you and Stephen (or the name you provided above) into the project.
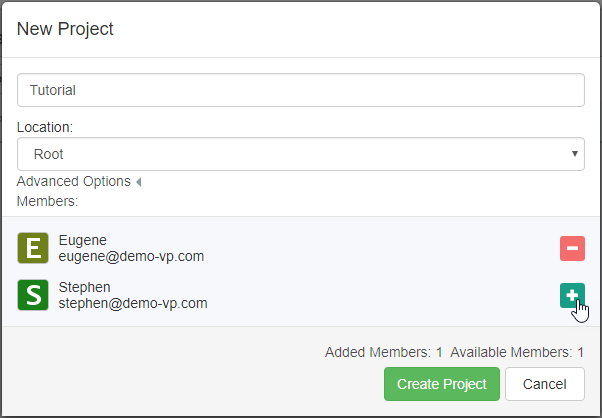
- Click Create Project.
Now, go back to Visual Paradigm.
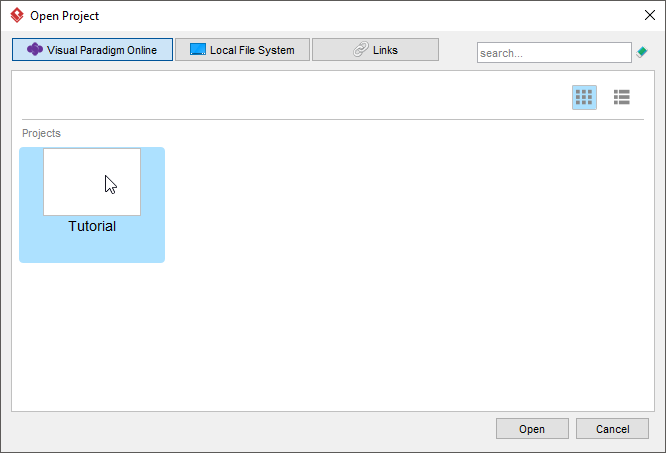
Opening project in Visual Paradigm
You have just created a project in VP Online. Now, open the project in Visual Paradigm. Select Project > Open from the main menu. Select the project Tutorial in the Open Project window and click Open.
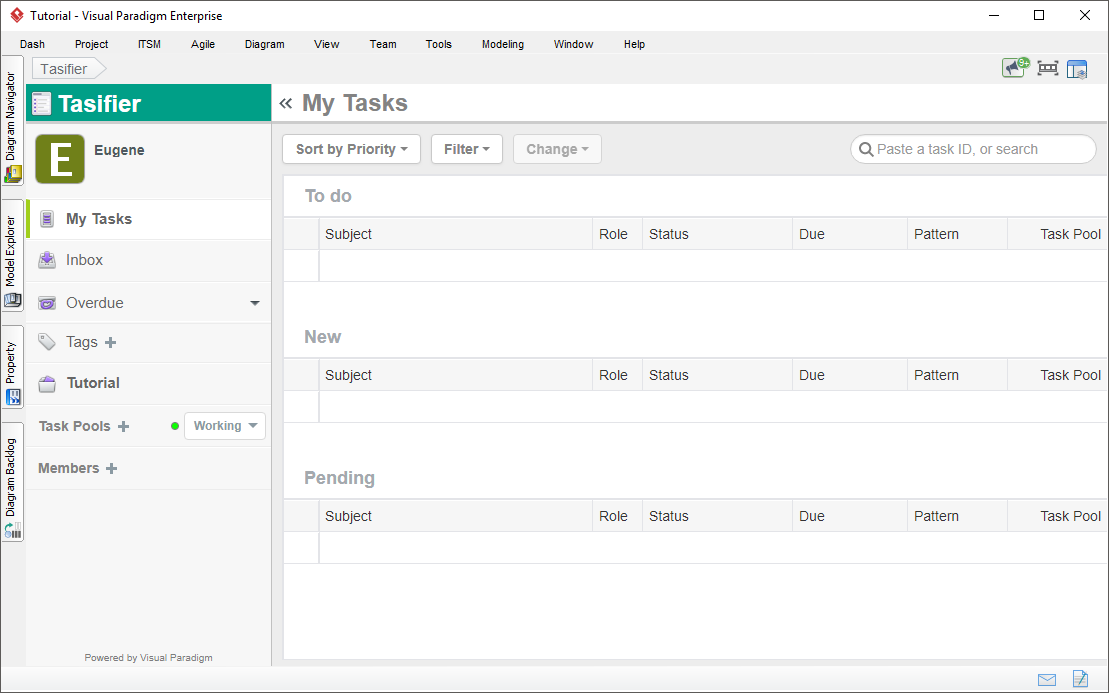
Opening Tasifier
Tasifier, the task management platform is accessible from within Visual Paradigm. To open Tasifier, select Team > Tasifier from the main menu.

This opens Tasifier.
Creating a Task Pool
In Tasifier, you can group similar or inter-related tasks under the same project as a Task Pool. Although tasks can be created directly under a project without being contained by a Task Pool, it’s not recommended.
Follow the steps below to create a Task Pool.
- On the left of Tasifier, click on “+” next to Task Pools.
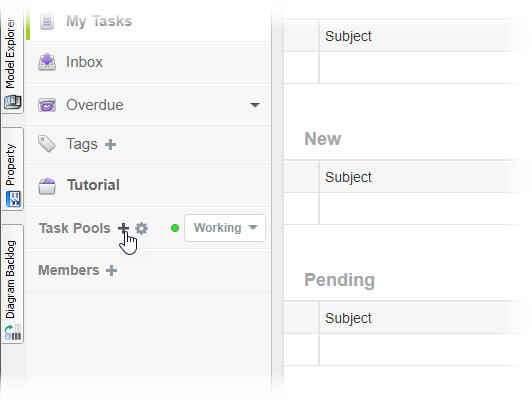
- You are prompted to enter the name of Task Pool. Enter inventory as its name and press Enter to confirm.
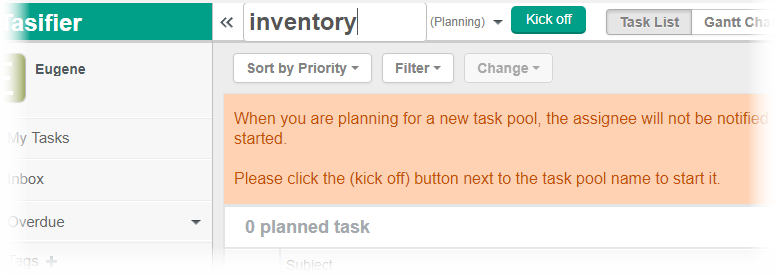
A newly created Task Pool is in Planning state. Carry on to the next section for task planning.
Creating task (Task Planning)
- Click on the empty row and enter the subject of the first task: Support querying stock level.
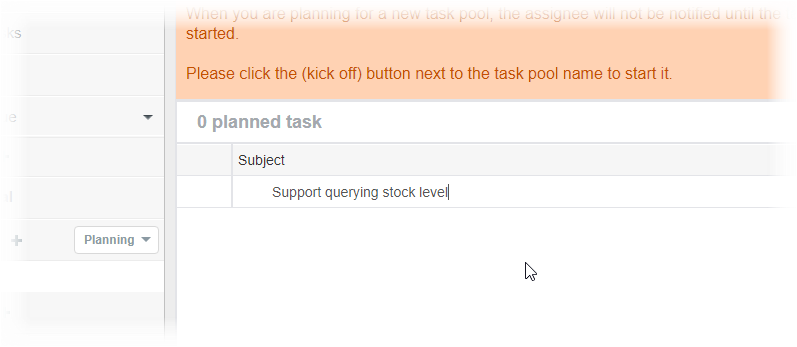
Normally a task subject is a summary of tasks to do under this particular task.
- Press Enter to confirm.
- Click on the task to show its detail.
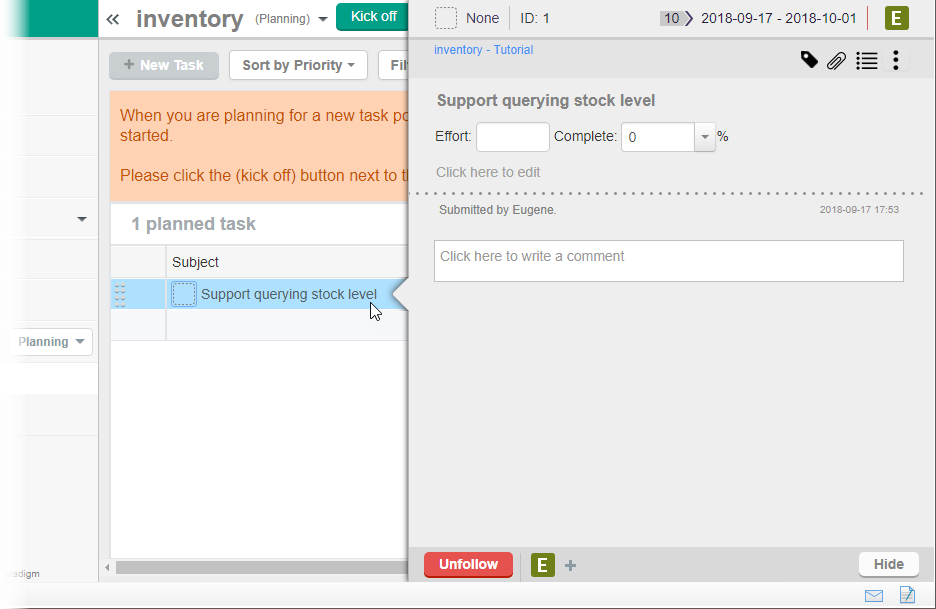
- Click on the description area under the subject to enter the task details.
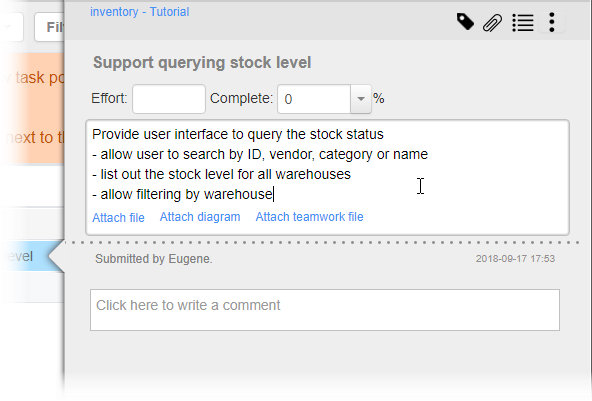
You can add a new line by pressing Enter. To confirm editing, press Ctrl-Enter or click on the region outside the description field.
- Set the deadline of completing this task by setting the due date. Click Due Date near the top right corner of the task and select a date as the due date.

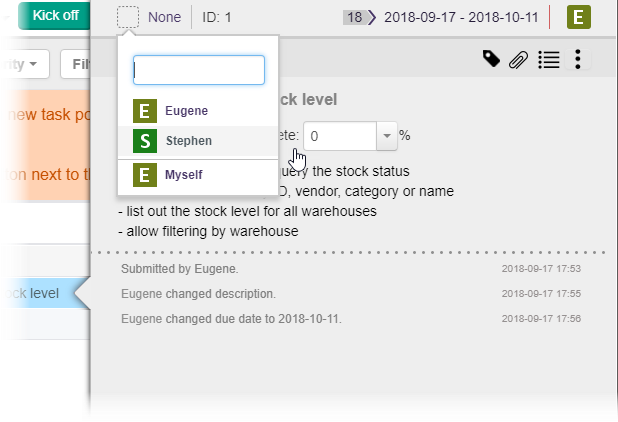
- Assign this task to the responsible person. Click on the icon at the top-left of the task and select Stephen to assign the task to.
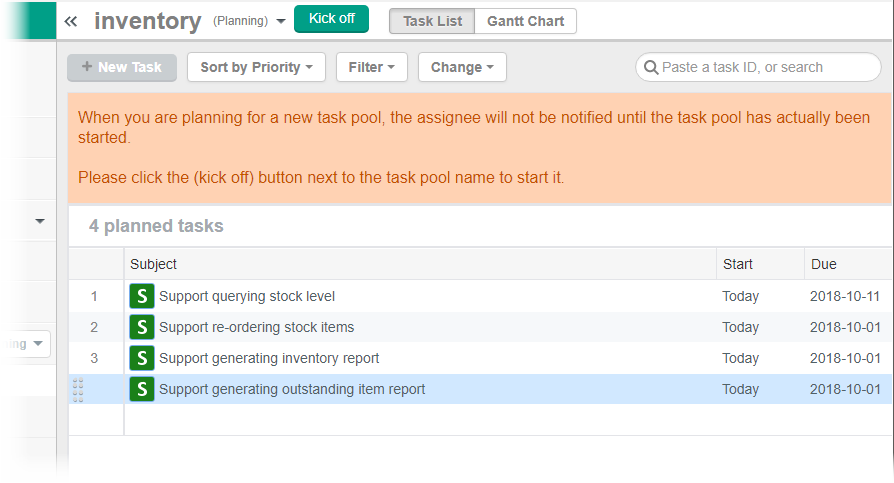
- Repeat the steps above to create few more tasks: Support re-ordering stock items, Support generating inventory report, Support generating outstanding item report.
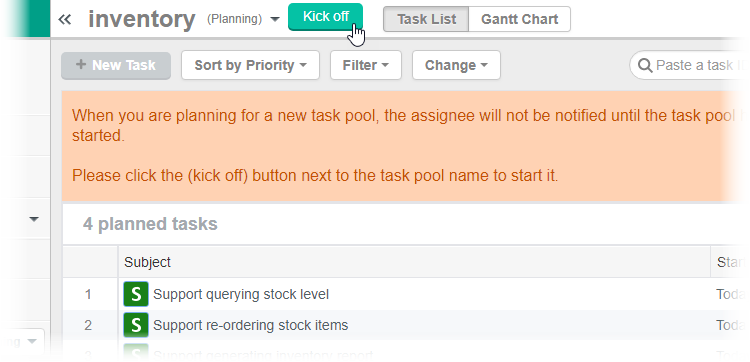
Kicking off a Task Pool
Once task planning is done, kick off the task pool. Members who are assigned tasks will see the assigned tasks listed in their Tasifier page.
To kick off a task pool, click Kick off at near the name of Task Pool.
Working on a Task
This section involves Stephen, the responsible person of the various tasks to work on those tasks. He should have received an invitation email by now. Ask him to check the email box and complete the invitation process first. Then, ask him to visit the following URL:
https://online.visual-paradigm.com/member.jsp
This opens the dashboard of VP Online. Select Tasifier. This opens the web version of Tasifier.
Perform the steps below to simulate working on a task.
- As an assignee of tasks, Stephen can see a number of tasks listed in Tasifier.
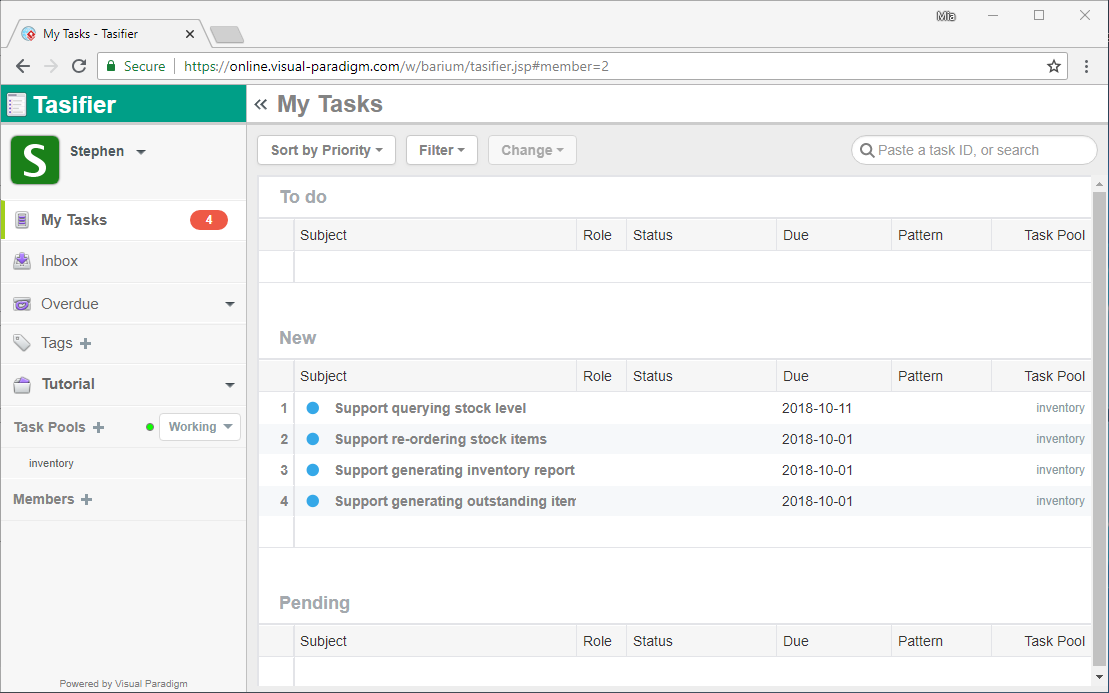
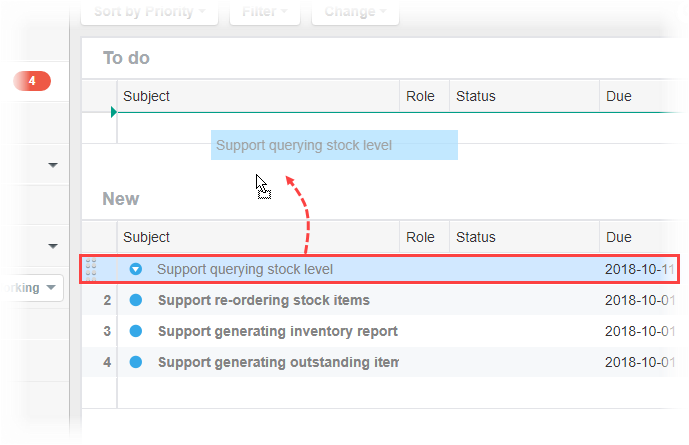
The tasks are listed under the New section by default. He can prioritize his work by moving the tasks to do next to the To do Now, drag the task Support querying stock level from the New list to the To do list.
- Click on the task to open it.
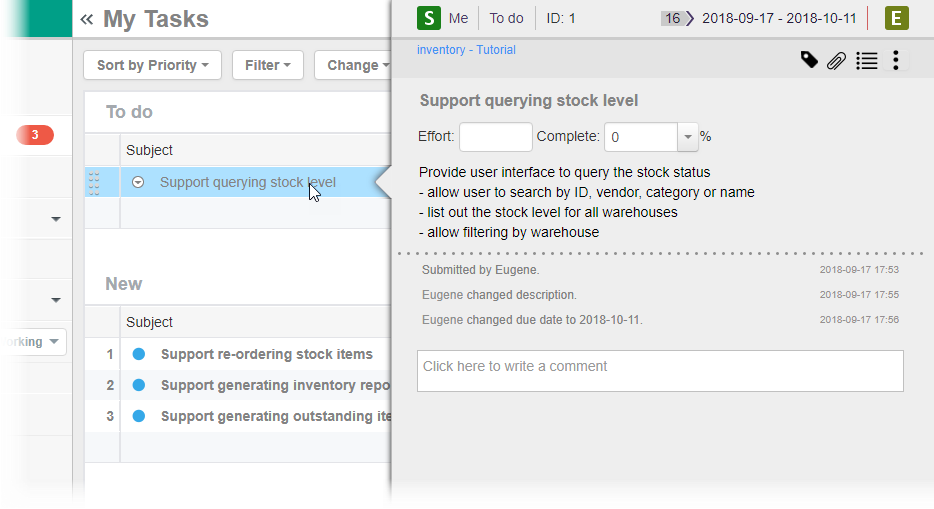
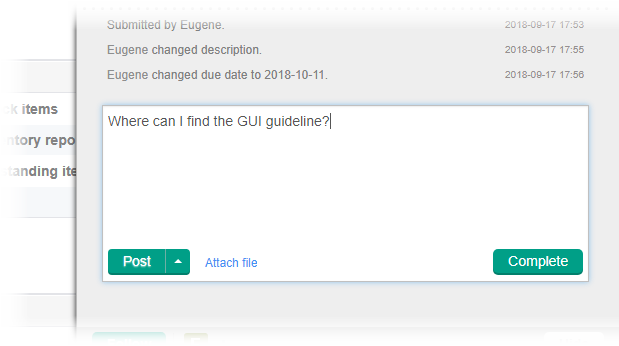
- Let’s say Stephen want to raise a question now. Click on the comment area at the bottom of the task to ask the questions. Type there and if needed, provide supplementary information related to a task by clicking Attach file next to the Post button, and then select the file to attach.
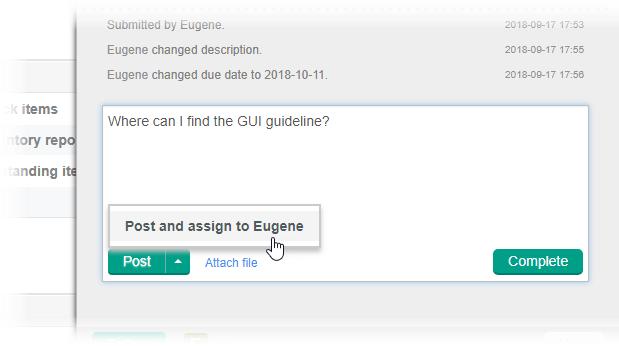
- Click on the tiny triangle button next to Post and select Post and assign to Ronald (Ronald is the person who created this task in previous section).
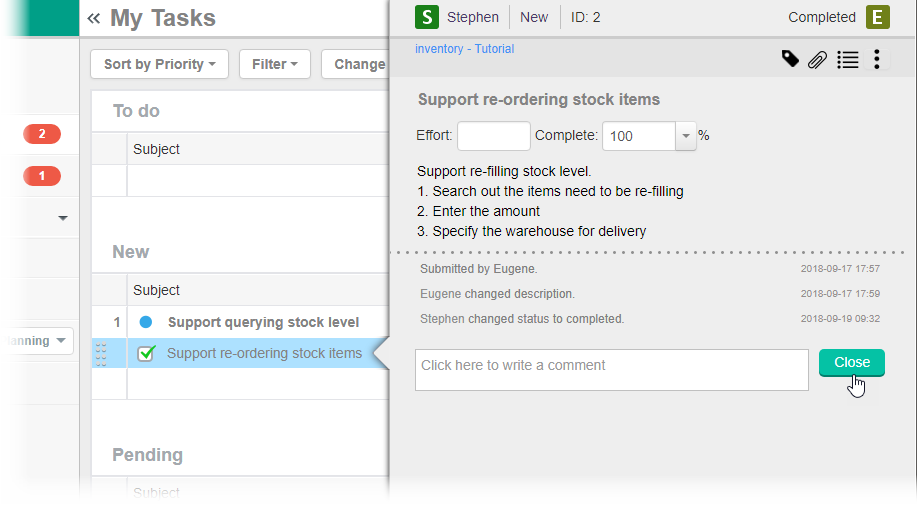
Completing a Task
Let’s say Stephen has just finished the task ‘Support re-ordering stock items’. To report this, simply open the task in Tasifier and click on the Complete button.
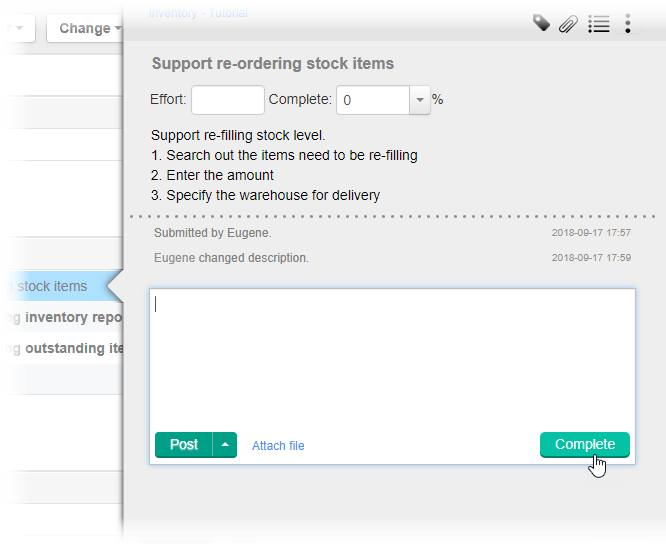
This will automatically move the task to the team member who was set as the verify person of this task.
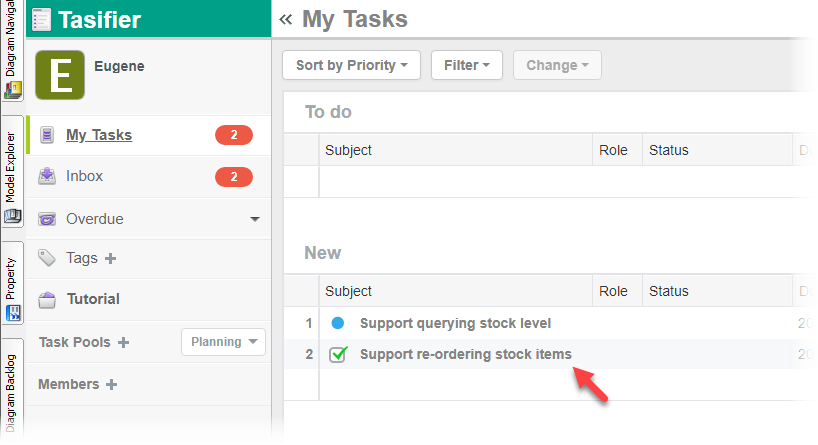
Now, check your task list in Tasifier. You should see the task Stephen just completed.
Open task. Confirm Stephen’s work. If the task is done, click on Close to signify the completion of this task. Click Close now.