Customizing ArchiMate language
The ArchiMate language can be customized for domain-specific purposes. You can add additional attributes to and define specialization of ArchiMate elements and relationships. We will show you how to do this in this article.
Adding attributes to ArchiMate elements and relationships
The ArchiMate language contains only the elements and relationships that are necessary for general architecture modeling. If, for example, you need to perform model-based performance or cost estimation, or to attach additional information to model elements and relationships, you need to customize the language by adding additional attributes.
The steps below shows you how to add additional attributes to Application Component. The same technique can be applied on other model element types.
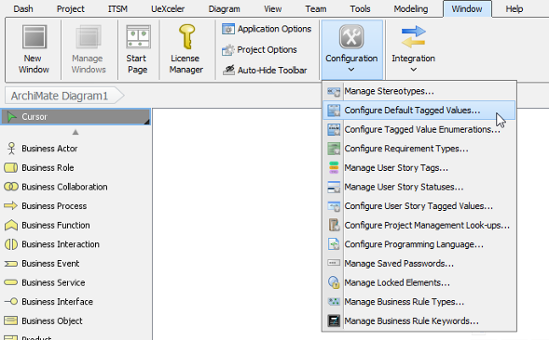
- Select Window > Configuration > Configure Default Tagged Values... from the application toolbar. This shows the Configure Default Tagged Values window.
To configure default tagged values - On the left hand side, find and select the type of ArchiMate element/relationship to add attributes to, in this case, Application Component.
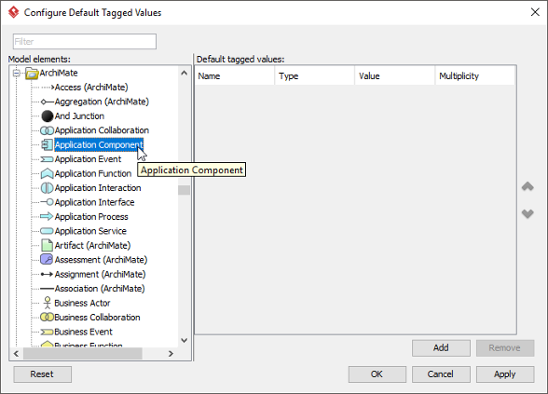
Selecting Application Component for adding attributes - On the right hand side, click Add, and then select the type of attribute to add. This adds a new attribute.
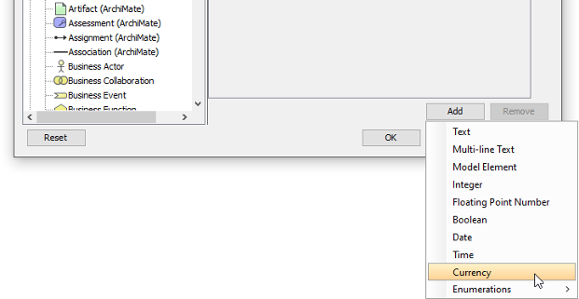
To add a customer attribute to Application Component - Enter the name of attribute and press Enter to confirm.
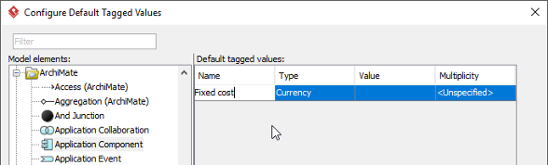
Adding the attribute Fixed Cost - Repeatedly add the other attributes.
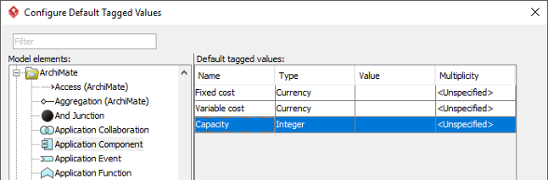
Attributes added - Click OK to confirm.
- The instance of modified ArchiMate element/relationship will have custom attributes attached as tagged values. You can inspect and enter the values in the specification window.
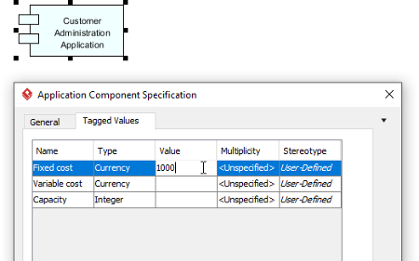
Entering the custom attribute for an Application Component
Specialization of elements and Relationships
To specialize elements and relationships are to define new elements or relationships based on the existing ones. Specialized ArchiMate elements inherit the properties of their generalized form. A specialized elements resemble a stereotype as it is used in UML. In other words, a specialized element can be denoted with the stereotype notation, which consists of a pair of angled brackets surrounding the name of stereotype. Finally, for a specialized concept, certain attributes may be predefined as tagged values.
Defining specialized element
Follow the steps below to define specialized elements readily by used in your model.
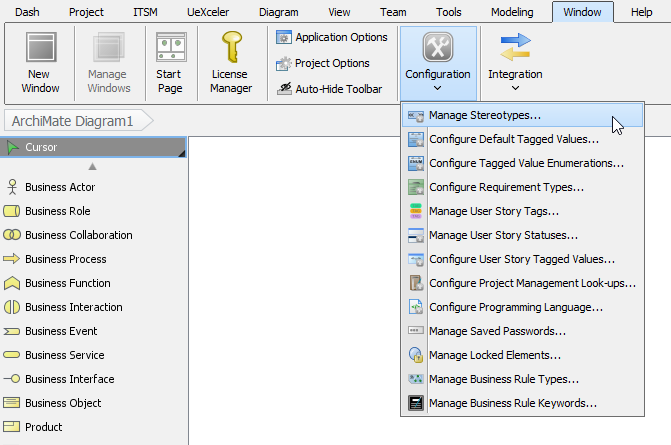
- Select Window > Configuration > Manage Stereotypes... from the application toolbar. This shows the Manage Stereotypes window.
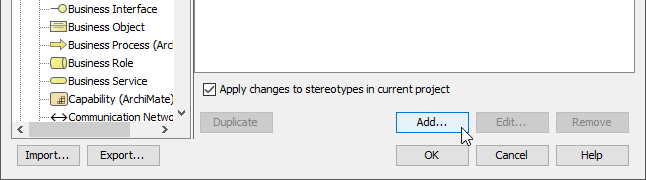
To manage stereotypes - On the left hand side, select the kind of ArchiMate element or relationship that you want to specialize.
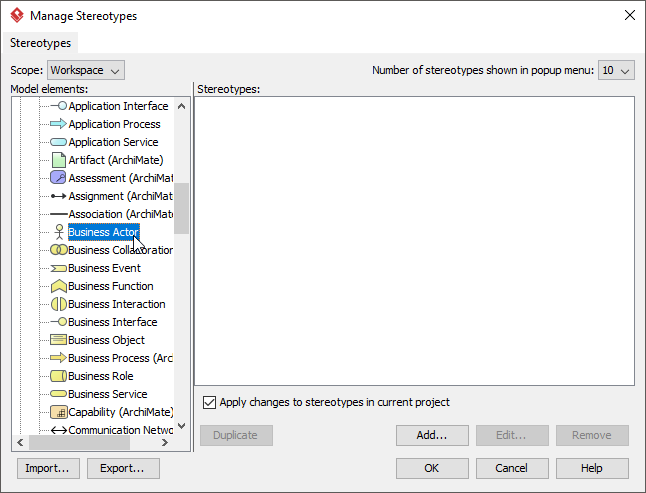
Selecting ArchiMate Business Actor - On the right, click Add... to create a stereotype.
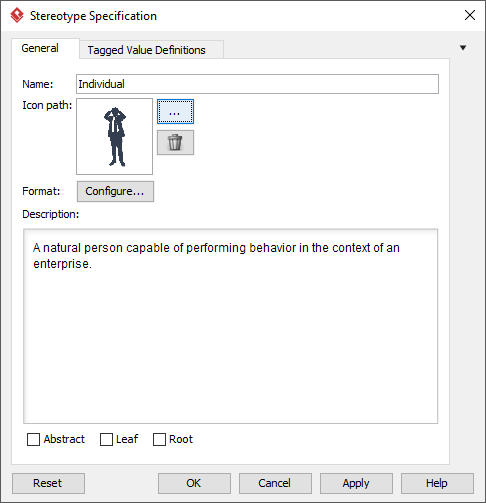
To add a stereotype - Enter the name and the description of the stereotype. If you like you may provide an icon as well. Element instasnces can be optionally presented as the icon. Besides, you may attach custom attributes to the stereotype under the Tagged Value Definitions tab.
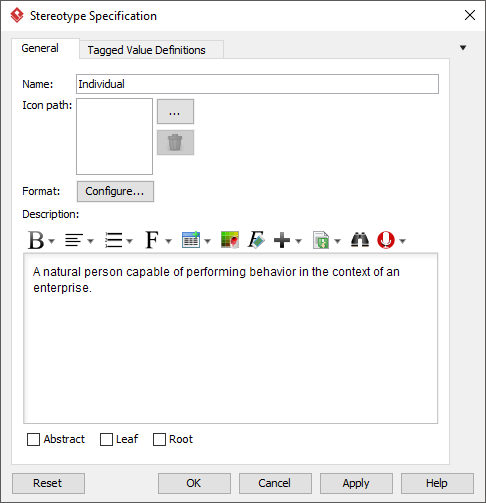
Entering the name and description of stereotype - Click OK to confirm and return to the Manage Stereotype window.
- Click OK again to confirm and close the Manage Stereotype window.
Specializing an element
Follow the steps below to set an existing ArchiMate element to be in specialized form.
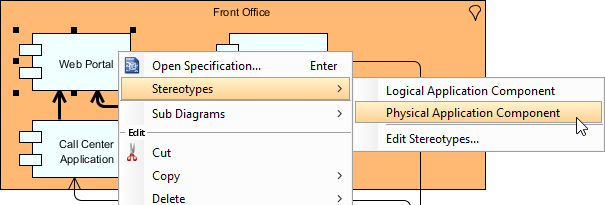
- Right click on the element that you want to set it to be in specialized form. Select Stereotypes > %STEREOTYPE% from the popup menu.
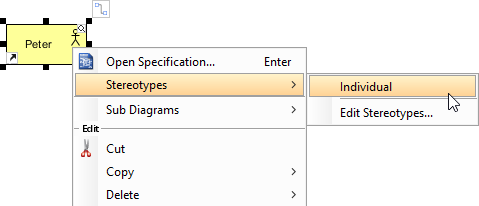
To assign a stereotype to an ArchiMate Business Actor
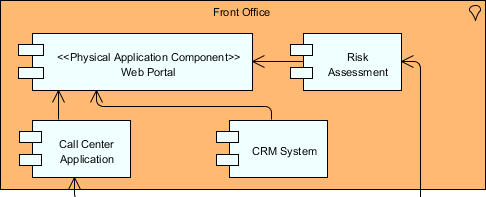
The stereotype <<..>> is added to the top of the shape.

Specialized ArchiMate Actor is created
Customizing the diagram toolbar for easy creation of specialized element
By default, diagram toolbar lists only the generalized elements. To facilitate modeling with specialized elements, you can customize the diagram toolbar to list also the specialized elements.
- Right click on the diagram toolbar in the ArchiMate diagram and select Configure Buttons... from the popup menu. This shows the Configure Buttons window.
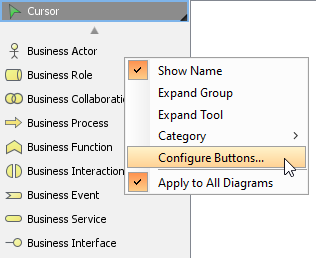
To configure diagram toolbar's buttons - Select the stereotype on the left and the click > to add it to pane on the right.

To add the stereotyped form of Business Actor into diagram toolbar - Click OK.
- You can now create the specialized ArchiMate element via the diagram toolbar. Select it.
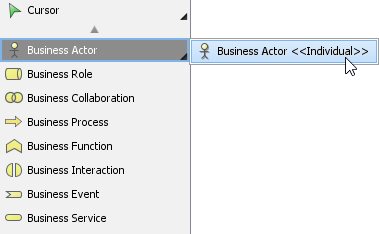
To create an specialized ArchiMate Actor from diagram toolbar - Click on the diagram to create a specialized element. Enter the name and press Enter to confirm

ArchiMate element created from diagram toolbar
Customized symbol
To present a specialized ArchiMate shape with customized symbol, follow the steps below.
Firstly, make sure you have provided an icon in defining stereotype, like this:
 |
| Icon provided when defining a stereotype |
To make a specialized element show as that icon image, right click on the specialized element and select Presentation Options > Stereotype Icon from the popup menu.
| To show a Business Actor as stereotype icon |
The element is presented as the icon image.
| A Business Actor presented as an icon image |
Using ArchiMate's examples of specialization
Visual Paradigm provide predefined specializations of the ArchiMate concepts and relationships according to Chapter 15 (Language Customization Mechanisms) of the ArchiMate 3.0 Specification. To use it, right click on an ArchiMate element and select Stereotypes > %STEREOTYPE% from the popup menu.
 |
| To use stereotype |
The figure below shows the result.
 |
| Result of apply ArchiMate's example of specialization on an Application Component |
Related Resources
The following resources may help you to learn more about the topic discussed in this page.
- What's New in ArchiMate 3? - An overview of changes in ArchiMate 3.0
- Full ArchiMate Viewpoints Guide (Examples Included) - A 'handbook' of ArchiMate Viewpoints, which lists and explains all to 23 example ArchiMate Viewpoints in detail
- ArchiMate 3.0.1 specification
- Learn more about Visual Paradigm's ArchiMate support
- Visual Paradigm on YouTube
| 5. Import/Export ArchiMate Model Exchange File into Visual Paradigm | Table of Contents | Chapter 2. ArchiMate Viewpoints |