How to Prioritize Tasks in Tasifier?
No wonder that we need to manage countless number of work every day. Without a thoughtful planning, we may frequently come across with the risk of deadline overruns or even we can meet the deadline, we may need to sacrifice the quality of work. With Tasifier, we can set a due date to every task and put them into To-do list or Pending list separately. While tasks in the former list need to be done shortly, tasks in the latter list can be processed later. Since every time we focus merely on a small amount of tasks on the To-do list, our order of work become organized and this greatly reduce the chance of deadline overdue. In the following tutorial, we will teach you the way to prioritize your work in Tasifier.
Arrange Your Tasks with Priority Lists
There are three lists in the Main Pane.
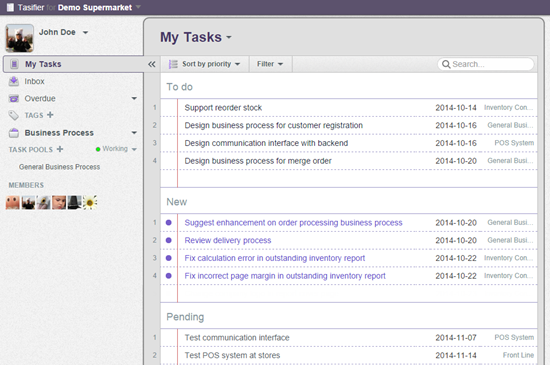
Firstly, the New list is for tasks you have recently received (for instance, when your team member just assigned a task to you, or when an assignee just finished a task and it needs to be verified, the task will appear on the New list of an assignee or a verifier respectively and automatically). Secondly, the To do list is for tasks that should be dealt with shortly. Finally, the Pending list is for tasks that need to be tackled later. When a task appears on the New list, you can first click the task to look for more information. Then, you can decide whether to move it to the To do list (if you think the task is urgent) or to the Pending list (if you think the task can be managed later). To do this:
- Drag a task from the New list and drop it on the To do list or the Pending list, depending on the level of urgency. A pink line appears to indicate the position where the task will be located upon dropping. OR

-
Click the Down arrow button on the left of the task, and choose Move to To do or Move to Pending to move the tasks accordingly.

Apart from moving tasks one by one, you can also perform a group move. To do this:- Select a task from the task list and then press and hold the Shift button to select multiple tasks.

- Drag the tasks and drop them to another list.
Moreover, you can prioritize your tasks within each list by the drag-and-drop action as well. - Select a task from the task list and then press and hold the Shift button to select multiple tasks.
Set the Due Date of a Task
Every task has a due date, the date by which you have to complete the task. In Tasifier, you can set a due date for every task. To do this:
- Click on a task to show the Task Pane.

- Click Due Date near the top right corner of the Task Pane.

-
Select a due date from the calendar or simply type the due date in the Due Date field.

The due date will then be shown next to the task in the task list. With the due date of all the tasks being listed, you can prioritize your work order based on it.
Reminder
When you have a task that needs to be completed much later (e.g., 30 days) and you only need one day to accomplish it, you can set a reminder in Tasifier, and you will be notified just one day before the deadline. In this way, you no longer overlook any task before the deadline. To do this:
- Click on a task to show the Task Pane.

-
Enter the number of days that you want to be reminded before the deadline.

Once you set a reminder for a task, an alarm clock icon will be shown next to the due date of the task in the task list.
Classify Tasks with Tags
To categorize tasks, you can create different tags. For example, you can categorize tasks by their urgency, source, state, etc. This also helps in prioritizing your tasks when you need to perform a certain type of tasks (tasks with the same tag) first. To create a tag and assign it to a task:
- Click on the Plus button next to the TAGS caption in the Left Pane.

- Enter the name of the tag in the Main Pane and press Enter to confirm.

- Specifying the tag with a particular color can make it more visually unique. Colored tags will appear in the Task Pane when viewing a task. Providing an appropriate color to a tag can help your team members to realize the nature or state of the task easier. Click on the down arrow next to the tag name to popup the Tag Color pane.

- Select a color.
- Open the Task Pane of the task to edit.
- Between the task description and the comment log, you can see a tag icon. Click on the Tag button on the top-right corner.

- This shows a drop-down menu for tag selection. Click inside the check-box of the tag to add it to the task. You can add multiple tags to the task.

-
Click Apply. The tag is added to the task, and you can view it under the task name in the Task Pane and next to the task in the task list, which helps you to justify which tasks to go first.

Repeat the above steps to create tags and assign them to other tasks.
Following a Task
If you are not involved in a task but you want to be updated on the task status, you can follow a task. This way, you will be notified by receiving a message in your inbox when someone leaves a comment or has completed that particular task.
- Open the details of the task in the Task Pane.
- Click Follow at the bottom of the Task Pane.

-
The profile photos of followers are listed next to the Follow button. Followers will be informed about comments and changes.

Apart from following the task yourself, you can also make your teammates follow a task. This is needed when you think that they should be informed when there is an update to the task. For example, a manager may not be the one who does the task, but he needs to monitor the progress. To do this:- Click on the add button next to the Follow button or next to the list of followers.

- Select the member(s) that you want to follow the task.

Followers will receive an Inbox message when their followed task is updated.
- Click on the add button next to the Follow button or next to the list of followers.
Watch This Tutorial on YouTube
Here is the video version of this tutorial.