How to Generate Java from UML Class Diagram in NetBeans?
You can perform round-trip engineering in NetBeans, to keep Java source code and class model in sync. In this tutorial, we will see how to create a class model in NetBeans and eventually generating source code from model.
- Create a Java project Express Courier in NetBeans.

- Right-click on the project node in Projects window and select Open Visual Paradigm from the popup menu.

- You may be prompted to specify the location of your Visual Paradigm project. In this case, simply select Create in default path and click OK to proceed.

- In Diagram Navigator, right-click on Class Diagram and select New Class Diagram from the popup menu.

- A new diagram is created. You asked to enter a package header on top of the diagram. Enter myapp and press Enter.

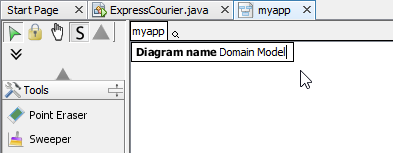
- You are asked to provide the diagram name. Enter Domain Model and press Enter.
- Click on the down arrow button near the shape selection Class in diagram toolbar, and select Interface.

- Click on the diagram to create an interface class and name it as IMailDelivery.

- Create operations in IMailDelivery. Right-click on the class IMailDelivery and select Add > Operation from the popup menu.

- Enter setState(state : char) : void to create a public operation stateState with parameter state and return void.

- Press Enter to create another operation. Name it printShipmentInfo() : void. Click on diagram to confirm editing.
- We need to create a class for local delivery which inherits IMailDelivery. Move the mouse pointer over interface IMailDelivery, press on the Resource Catalog icon and drag downwards.

- Release the mouse button. Select Realization -> Class in Resource Catalog.

- Name the class LocalDelivery and press Enter to confirm.

- As the LocalDelivery class is implementing the interface IMailDelivery, we need to implement the operations defined in IMailDelivery. Right-click on class LocalDelivery and select Related Element > Realize all Interfaces from the popup menu.

- You can see that operations setState and printShipmentInfo are both inherited.

- It is time to add attributes to classes. Right-click on class LocalDelivery and select Add > Attribute from the popup menu.
- Enter state : char to name the attribute as state, and set the type as char.

- Press Enter to proceed to the next attribute. Enter postage : double as attribute name and type.
- Again, press Enter and create attribute shipmentNum : int.

- We need to have two constants for representing states. Press Enter to continue creating attribute. Name the attribute STATE_INIT : char = 'a'. This means to create an attribute named STATE_INIT, which is in char type and have 'a' as default value. Press Enter to create another constant STATE_DELIVERED : char = 'b'. Up to now, the class should look like:

- In order to declare both STATE_ attribute as constants, select STATE_INIT, press the Ctrl key and select STATE_DELIVERED to make a multiple selection. Right-click on them and select Model Element Propertes > Scope > classifier from the popup menu. By doing so, both attributes will be static (in code level) and are underlined.

- Again, right-click on the two attributes and select Code Detail > final from the popup menu. Click on the diagram to confirm editing. The class should now become:

- We need to create a new class Mail with association from class LocalDelivery. Move the mouse pointer to the class LocalDelivery. Press on the Resource Catalog icon and drag it out.

- Select Aggregation -> Class in Resource Catalog.

- Drag to the right of the class LocalDelivery and release the mouse button. Name the new class Mail.

-
Follow the previous steps to create attributes in class Mail.
Class Attributes Operations Mail fromPerson : String
fromContact : String
toPerson : String
toContact : String
mailType : int- - We need to describe the attribute mailType by listing the possible values. Select mailType.
-
Activate the Description pane. If you cannot find it on the screen, or if you had closed that, open it via the View menu. In the Description pane, enter the following:
Possible types:
1 - Flat
2 - Letter
3 - Postcard
4 - Parcel
The description for classes, attributes, operations and parameters will become comments in source code to be generated. - Up to now, the diagram should look like:

- Save your work via the File menu.
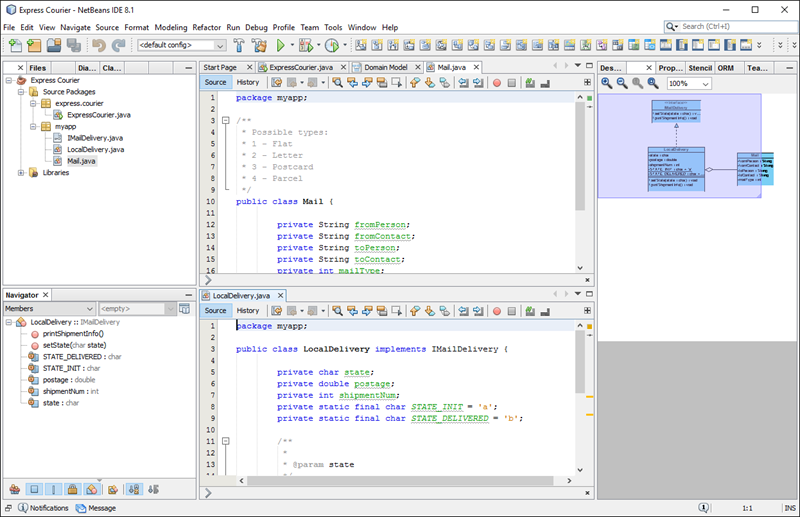
- Now comes the code generation. Select the menu Update Code on Diagram Navigator.

- Check the Projects window. You should see a list of generated file. You can open them to fill in the code body.
- This is the end of the tutorial. Instead of closing NetBeans now, you may try something more by editing the code like to add, rename or delete class, attributes and operations, and click the Update UML Model button on toolbar, and observe the changes that will make in the class model. Enjoy!