TOGAF ADM Software: Act and Generate ADM Deliverables
Enterprise Architecture is essential to every business, yet it's not easy to master. Have you ever thought that you would be able to learn Enterprise Architecture solely by yourself? Visual Paradigm is here to help. Equipped with an intuitive TOGAF ADM process navigator, to develop Enterprise Architecture with Visual Paradigm is just like having a tutor sitting next to you, guiding you through the instructions, taking you through the ADM examples. All you need to do is to follow the on-screen instructions, fill-in some forms, draw some ArchiMate diagrams (3.0), and that's it, the deliverables will be there for retrieval.
Visual Paradigm can make you an enterprise architect in no time at all—and with no training, as the actionable guide-through process comes with instructions, tips, samples, and a case study. Read through this tutorial, relax, and see how the best TOGAF software can help you perform TOGAF activities and produce TOGAF deliverables with ease.
What is TOGAF ADM?
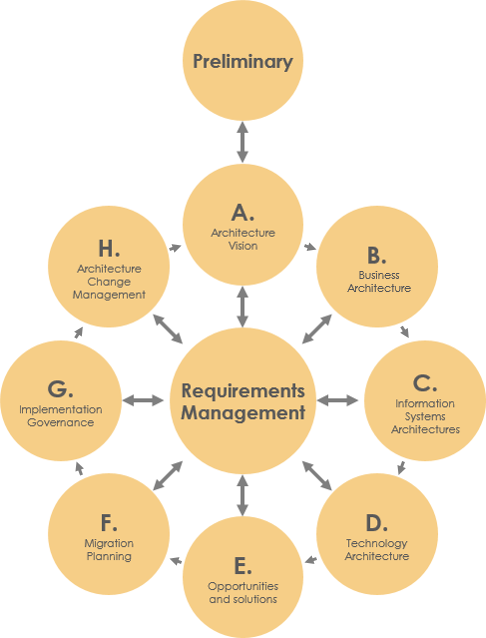
TOGAF is the short form of The Open Group Architecture Framework. TOGAF provides a detailed method and a set of supporting tools for developing an enterprise architecture. TOGAF ADM, short for TOGAF Architecture Development Method, is the architecture method suggested by TOGAF. It is a method for developing and managing the lifecycle of an enterprise architecture and forms the core of TOGAF. When we talk about TOGAF ADM or simply ADM, we refer to the ADM cycle below:
What Does Visual Paradigm Offer?
TOGAF ADM is the process of developing an enterprise architecture, while Visual Paradigm features a process navigator that guides you through the execution and completion of TOGAF ADM. Broadly speaking, Visual Paradigm features/facilitates the following:
- An ADM process navigator that guides you through the development of an enterprise architecture with TOGAF ADM, activity by activity and step by step
- Guides you through the creation of deliverables and artifacts with clear instructions
- Generates deliverables upon the completion of an ADM phase
- Automatically archives deliverables in an Architecture Repository
- Helps you understand TOGAF by providing you with samples
- Provides the tools and diagrams you need for analysis and documentation, which includes the ArchiMate 3 diagram tool and viewpoints (The Open Group certified), Implementation Plan Diagram, Migration Roadmap, Maturity Analysis, PERT Chart, RACI Chart, Implementation Factor Assessment & Deduction Matrix, Consolidated Gaps, Solutions, & Dependencies Matrix, etc.
Preparation
You need a project to work on. To avoid messing up your production data, create a new project in Visual Paradigm first. You can create a new project by selecting Project > New from the application toolbar.
Opening the TOGAF ADM Process Navigator
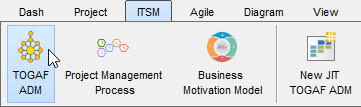
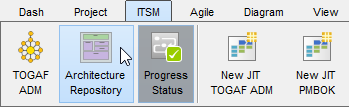
You can access the ADM process navigator anytime throughout the ADM cycle by selecting ITSM > TOGAF ADM from the application toolbar.
You should see the screen below. You can double-click on a phase to view its activities.
Working on the TOGAF ADM Preliminary Phase
Let's start working on the first TOGAF ADM phase, the preliminary phase.
- Double-click on Preliminary Phase in the ADM cycle to open it.

This opens a process diagram that contains the activities required under this phase. The figure below shows the content of the Preliminary phase.
- Each of the TOGAF ADM phases requires you to perform some activities to create deliverables. In the process diagram, the activities required to be performed are presented as a series of connected activity shapes. The arrow connectors represent the flow. It is important to follow the flow in performing the activities in order to properly complete the phase.
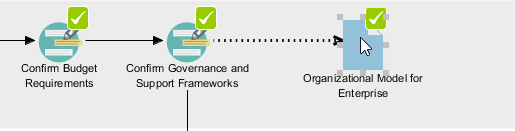
Now, perform the activity Scope the Enterprise Organizations Impacted by double-clicking on it.
- The following screen is presented. Each activity is finished by completing the steps within it, which are listed under the Overview section. The figure above shows an activity that contains two steps.

The table below provides a brief description of the various parts of this screen. We will go over them in the remaining part of this TOGAF tutorial.Part Description Overview The steps required to be completed under this activity. The step in bold indicates the current step that you need to perform. Once you've completed a step, click Complete Step at the bottom right to proceed to the next step. Instruction Click to expand the Instruction pane, which shows the information you need to know about the step: what you need to do, what the purpose is, and what will be achieved. View Sample Click to expand the View Sample pane, which displays sample(s) associated with this step. For instance, if the step requires you to draw a specific type of diagram that you are not familiar with, you can view the sample to get an idea of how the diagram should look. Perform Action The action you need to take to complete this step. There may be one action or more. If you want to insert your own text or diagrams in addition to what we recommend, you can click the Custom Artifacts button to add them manually. In this case, you are asked to write a project background and draw a diagram to depict it. These are the actions to take in step 1. In step 2, there will be another set of required actions. Activity Steps Indicates the progress and completeness of this activity. - To help you successfully perform the required actions, we provide you with instructions and examples for all the steps. It is recommended to read through them before you perform any action. Expand the Instruction section to read it.

- Similarly, expand the View Sample section to read the sample provided. The sample for this step is an ArchiMate Diagram. You should be able to create your own ArchiMate diagram by reading through the instructions and samples provided in this step.

- When you are ready, click on the action button Impacted Organization Units listed in the Perform Action section. Note that it is not uncommon for a step to contain multiple actions. You must complete all listed actions.

Note: Next to the action button, there is a Custom Artifacts button for you to include optional diagrams or textual data in the step, which will be included in the deliverable to be produced. - You are presented with a new, empty ArchiMate diagram. This step requires you to use the legend at the bottom-right of the diagram to draw an ArchiMate diagram that shows the impacted units. Let's draw a Location first. Select Location in the legend.

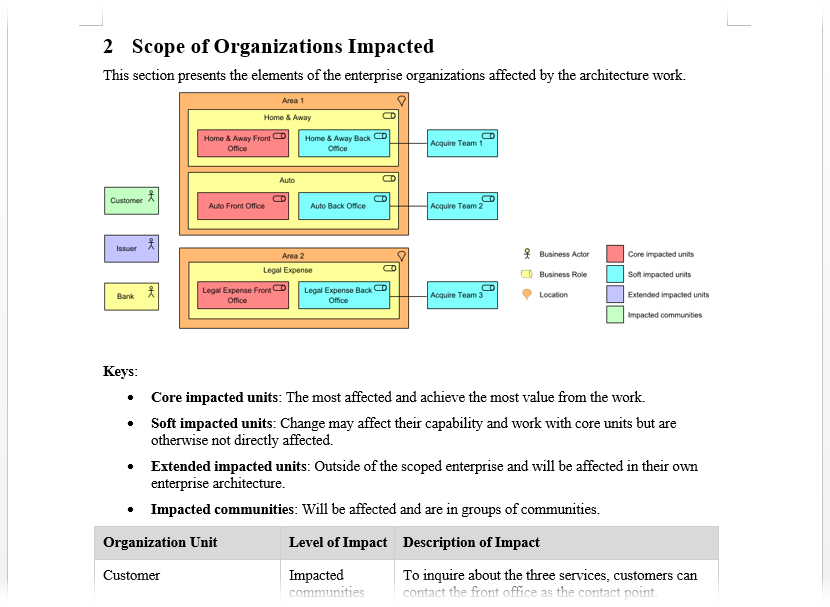
- Draw a Location in the diagram and name it Area 1.

- Apply the same technique to draw a diagram that looks like this:

- According to the instructions, we also need to indicate the level of impact on individual units. Let's indicate the units with Core impact first. To do this, click on Core impacted units in the legend and click once on the unit with core impact.

- Indicate the level of impact on other units. The completed diagram should look like this:

- You have finished drawing this diagram. Go back to the activity screen by clicking on the breadcrumb.

- You've completed this step. Click on Complete Step at the bottom-right.

- You are brought to step 2.

Step 2 requires describing the impacts in detail. Click on the action item Description of Impacts under the Perform Action section.
- Complete this step by filling in the form.

You may use the sample content below:Organization Unit Level of Impact Description of Impact Customer Impacted communities To inquire about the three services, customers can contact the front office as the contact point. Issuer Extended impacted units While the three back-end officers will unify into one contact point, the informational exchange between the issuer and the offices will be done through existing channels. Bank The change in the investment management function may affect communication with the bank. Home & Away N/A Home & Away Front Office Core impacted units Enterprise-wide CRM automation in the front office, which may affect the usage experience of front-office staff. Home & Away Back Office Soft impacted units Introduction of an integrated back-office suite that may affect the usage experience of the back-office staff. Auto N/A Auto Front Office Core impacted units ArchiSurance is going to provide a one-stop-shop solution for its customers by unifying the three front offices into a single point of contact for all three major types of products and services. Auto Back Office Soft impacted units Introduction of an integrated back-office suite that may affect the usage experience of the back-office staff. Legal Expense N/A Legal Expense Front Office Core impacted units Enterprise-wide CRM automation in the front office, which may affect the usage experience of front-office staff. Legal Expense Back Office Soft impacted units Introduction of an integrated back-office suite that may affect the usage experience of the back-office staff. Acquire Team 1 Soft impacted units N/A Acquire Team 2 Soft impacted units N/A Acquire Team 3 Soft impacted units N/A Area 1 N/A Area 2 N/A - Go back to the activity page through the breadcrumb.
- Click Complete Step at the bottom-right.

- The steps under this activity are all done. You may move on to the next activity by clicking Next Activity under the Activity Steps section, but let's try something different. Click on Phase Pane under Activity Steps.

You are brought to the process diagram of the preliminary phase. You can see a check mark next to the activity Scope the Enterprise Organizations Impacted, indicating its completion.
- Now, let's perform the next activity. Double-click on the activity Perform Enterprise Architecture Maturity Assessment to open it.

- Click on the action item Architecture Maturity Assessment.

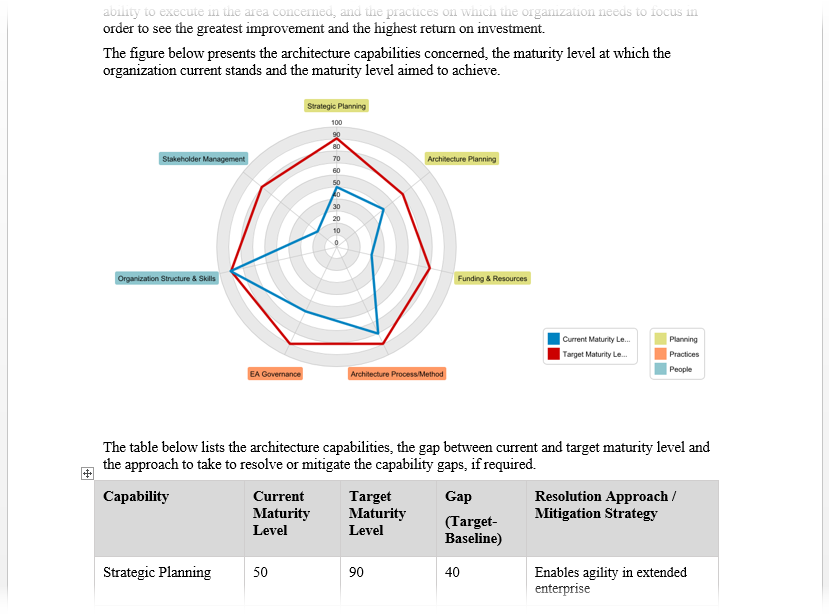
- This activity requires you to perform a maturity analysis. Apply the techniques you learned so far to draw the chart below for step 1. You can rename a maturity factor (i.e., Goal, Organization, Strategy) by double-clicking on it and entering a new name, and add a new factor by right-clicking on the chart and selecting Add Variable from the popup menu.

- Go back to the activity page through the breadcrumb.
- Click Complete Step at the bottom-right.
- Step two requires reviewing the maturity gaps. Click on the action Maturity Gaps and Resolutions, take a look, and go back to the activity page.
- Click Complete Step at the bottom-right. You should now have a basic idea of how to use Visual Paradigm to develop an enterprise architecture. We will stop here.
Generating an ADM Deliverable
Once you've completed all the activities in a (deliverable) lane, you can generate the deliverable. To generate a TOGAF ADM deliverable is simple; you just need to double-click on the document shape on the right-hand side of the lane.
Then, provide a file name and confirm. A document is generated with the information you entered. The figures below show how a generated deliverable looks. Basically, it consists of the diagrams and forms you developed and filled in, and the pre-filled content. The first figure shows the ArchiMate Diagram you drew:
And here is the architecture maturity model developed using a radar chart:
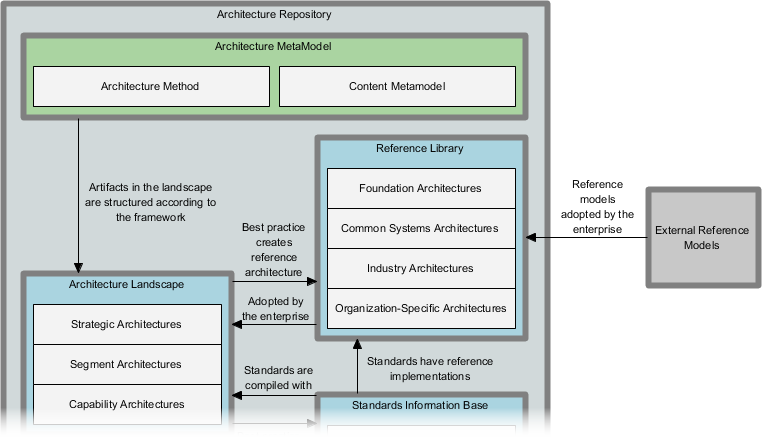
Using the Architecture Repository
The Architecture Repository is a holding area for all architectural assets within an enterprise. Every time you generate a deliverable, a copy will be archived automatically in the Architecture Repository. To open the Architecture Repository, select ITSM > Architecture Repository from the application toolbar.
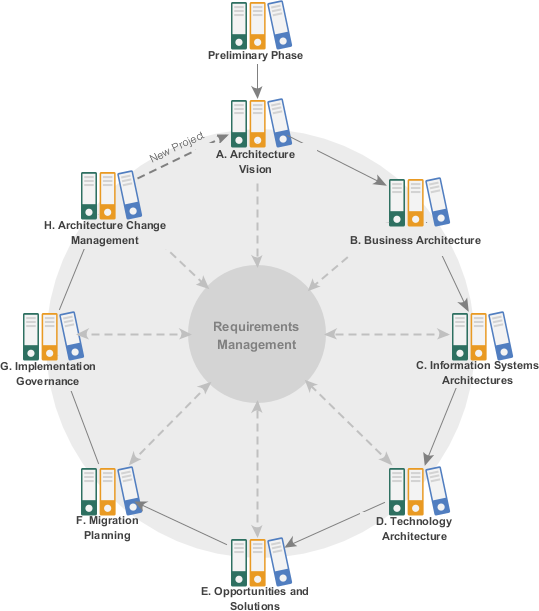
The figure below shows how the Architecture Repository looks. When all the activities associated with a TOGAF ADM deliverable are done, a deliverable (a document) will be automatically generated and archived in the drawer named Organization-Specific Architectures. You may double-click on Organization-Specific Architectures to open the drawer and retrieve the deliverable.
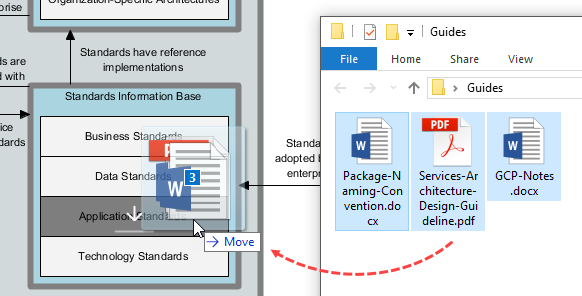
The Architecture Repository also allows you to store and manage your own files. To do this, simply drag the files you need to store into the Architecture Repository and drop them under the target drawer.