How to Insert Sample Records into ERD?
Visual Paradigm allows you to design your database with entity relationship diagram (ERD), and finally generate the design to database as database schema. On top of the schema that will be generated, you can also specify default data to insert into database upon database generation. In this tutorial, we will draw a simple ERD with three entities, specify default data and generate database.
You are expected to have a fundamental knowledge on database modeling with ERD and database engineering.
Setting Up Your Database
MySQL will be used as database software throughout this tutorial. You can, however, use any other types of database products that we support. If you are familiar with the database software you are using, it won't be hard for you to complete this tutorial.
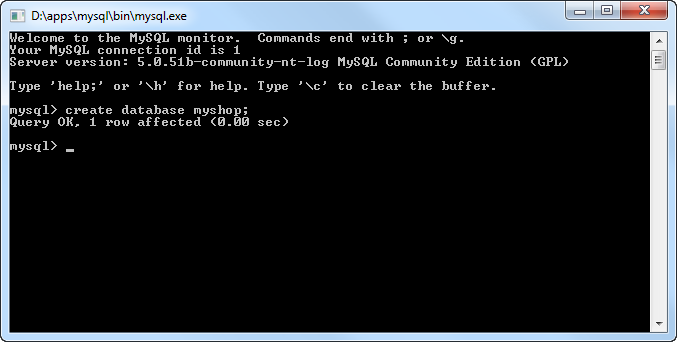
Create a database and name it myshop in advance.
Creating a New Project
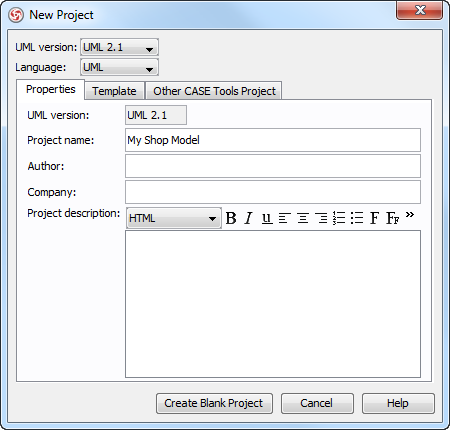
Create a new project by selecting Project > New from the application toolbar. In the New Project window, enter My Shop Model as the project name and click Create Blank Project.
Configuring Your Database
- Select Tools > Object-Relational Mapping (ORM) > Database Configuration... from the main menu.
- In the Database Configuration dialog box, check MySQL to select it as the database software.

- In the Database Setting panel, click the upside-down arrow button next to the Driver file field. If your database provider does not support downloading driver files, scroll down to Database Driver Description to deal with the problem.

- Fill in the connection information to connect to the database. Enter myshop as the database name. Select InnoDB as the engine to keep the relationships among entities when generating the database. Click on Test Connection to verify the connection. Click OK to close the configuration dialog box.

Drawing an ERD
- Create an ERD. Right-click on Entity Relationship Diagram in Diagram Navigator and select New Entity Relationship Diagram from the pop-up menu.

- Immediately, name the diagram MyShop ERD at the top left corner. Keep Physical Model selected at the top right corner.

- Next, create an entity. Click on Entity on the diagram toolbar and drag to the diagram. Name it PurchaseOrder and press Enter to confirm.

- A purchase order consists of many products, while a product can appear in many purchase orders. This is a typical example of a many-to-many relationship. Now, create the product entity. Move the mouse pointer to the entity PurchaseOrder, click on the resource icon Many-to-Many Relationship -> Entity, drag it out, and then release the mouse button to confirm. Name the entity Product.

- Add columns to the entities. Right-click on PurchaseOrder and select New Column from the pop-up menu. Enter +id : int as the name (note: The plus sign indicates that this is a Primary Key column). Press Enter.

-
Entity Column PurchaseOrder +id : int(10),
staff : varchar(255)Product qty : int(11) PurchaseOrder_Product +id : int(10),
name : varchar(255)
The result of the diagram is shown below:
Entering Default Data
- Select PurchaseOrder. You can see the table record editor appears at the bottom of the diagram listing the columns for you to add default data. If you do not see the editor, right-click on the ERD's background and select Show Table Record Editor from the pop-up menu.

- Double-click on the id cell and enter 1. Then, double-click on the staff cell and enter Mary. Press Enter.

-
Follow the table below to add records to the PurchaseOrder entity.
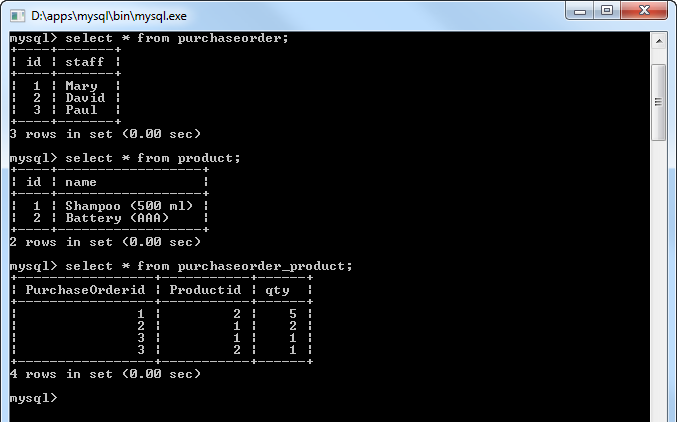
Id (PK) staff 1 Mary 2 David 3 Paul -
Repeat the previous steps to add records to the Product entity. Here are the records to add:
Id (PK) name 1 Shampoo (500 ml) 2 Battery (AAA) - Select the PurchaseOrder_Product entity.
- In the editor, select 1 in PurchaseOrderid and 2 in Productid, and then enter 5 in qty.

-
Add records to the PurchaseOrder_Product entity. Here are the records to add:
PurchaseOrderid (PK+FK) Productid (PK+FK) qty 1 2 5 2 1 2 3 1 1 3 2 1
Generating Database
- Select Tools > Object-Relational Mapping (ORM) > Generate Database... from the main menu.
- In the Database Code Generation dialog box, check Export to database and Generate sample data. If you do not select them, both the database and sample data will not be created in the database.

- Click the OK button to start generation.
Checking Your Database
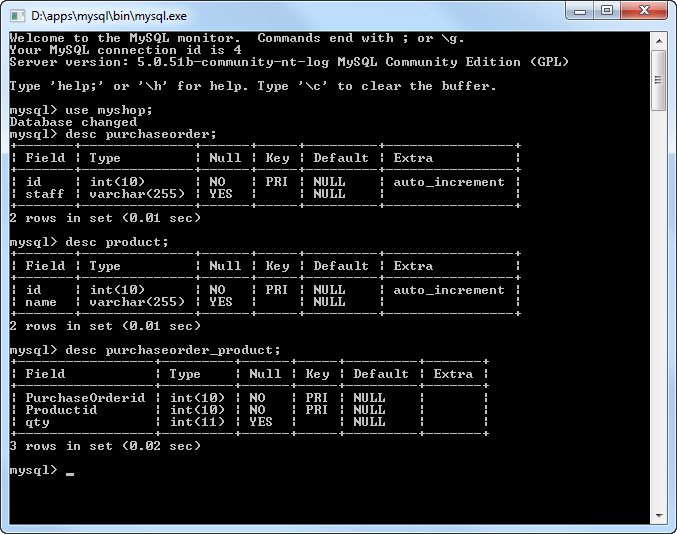
You can now check your database to see if the schema and default data are both generated. Here is a screenshot captured under MySQL, for checking the generated schema.
This is another screen that shows the default records added to the database.