How to Attach File Reference to Model?
When doing visual modeling, each kind of model element carry its own specific type of model information. Sometimes the model specific information is insufficient to explain all the ideas of your design.
In Visual Paradigm, you can add supplementary details to your model elements by creating references to other diagrams or resources. In this tutorial, you will learn how to create references between model elements and diagrams, as well as from model elements to a particular shape in a diagram or even to another model element.
Adding References
You can create references to diagrams, shapes within a particular diagram, or even to a model element. To create a reference:
Diagram Reference
- Click on the model element to bring up the resource-centric interface.

- Click on the Reference resource icon at the bottom left corner of the model element.

- Select Add Diagram...

- Select the diagram(s) in the Select Diagram window, and press OK to confirm, then press OK again to close the specification window.

Shape Reference
- Similar to adding a diagram as a reference, click on the Reference resource icon.
- Select Add Shape...

- Select the shape(s) in the Select Shape window by expanding the diagrams, and press OK to confirm, then press OK again to close the specification window.

Model Element Reference
- Similar to the above, click on the Reference resource icon.
- Select Add Model Element...

-
Select the model element(s) in the Select Model window, and press OK to confirm, then press OK again to close the specification window.

Now the selected diagram(s) are added as references to the model element you are working on. Besides adding diagrams, shapes, or model elements as references, you can also make references to external resources such as files or folders from your file system, or URLs to external webpages.
Navigation with Referenced Diagrams and Elements
You can easily navigate from a model element to its referenced diagram/shape/model element. To navigate to the diagram or elements:
- Click on the Reference resource icon.
-
Select the reference target from the popup menu to jump to it.

If you are referencing a model element and it does not appear on any diagram, then the specification window of that model element will be opened to display its details.
Navigate Back from Referenced Diagram or Element
From the referenced diagram or element, you can use the Referenced by feature to jump back to the source element.
- Click on the Reference resource icon and select Referenced by...

-
Select the element in the Referenced by window, and press Open to jump back to the source element.

For referenced diagrams, you can click the reference icon at the diagram toolbar to go back to the source element.
References and Model Structure
References are only logical relationships that do not affect the structure of your model.
Knowing Which Model Element Has a Reference
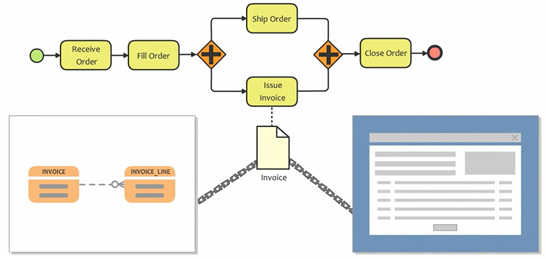
Since a reference is only a logical relationship and will not affect model structure, it could be difficult to determine the reference relationship, especially when your model is large. To overcome this problem, you can turn on the Model Indicator by selecting View > Model Indicator from the application toolbar. The following diagram shows you how the shape will look with the model indicator visible.
Please note that the resource icon will be shown only if the model element has a reference to other elements. Elements being referenced by others will not have the icon showing even if the indicator is turned on.
Publish Project to HTML with Navigation Retained
This kind of navigation is not limited to within the application. You can also have it inside the published HTML website. To publish your project into an HTML website:
- Save your project by selecting Project > Save from the application toolbar.
- Select Tools > Publish Project from the application toolbar.
- Enter the output location for the publisher in the Output directory field, and press OK to start publishing.

- Press OK when publishing is completed. This will automatically launch the browser showing the published content.
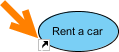
- Select the Use Case Diagram Car rental from the list.

- Click on the Reference resource icon on the diagram, and a popup menu will show up for you to jump to the referenced diagram or element.

Watch This Tutorial on YouTube
Here is the video version of this tutorial.