Listing Model Elements with Grid
Visual Paradigm Model Element Grid is a tool that allows the listing of model elements like requirements, business rules or glossary terms. You can customize the information being shown inside the grid say, to add a column for an extra property.
In this tutorial, you will learn how to create a grid for a specific model element type and how to create new elements within this grid. After learning these basic techniques, you will learn how to add extra property columns to a grid to make it more informative and how to select desirable model elements to be listed in the grid using the search function, focusing only on the target model element. Last but not least, you will learn how to export the final result as a document.
Creating a Grid Diagram
- Download Online-TV-Broadcast.vpp. You can also find this file at the bottom of this tutorial.
- Open the downloaded .vpp file in Visual Paradigm. To open a project, select Project > Open from the application toolbar.
- To create a grid diagram, select Diagram > New from the toolbar.
- In the New Diagram window, select Grid and then click Next.

- Enter Use Case Grid as the name of the grid. Click OK to continue.

- The grid is created. Select your target model element type from the Model Element drop-down menu. In this tutorial, select Use Case.

Creating Elements in a Grid
- You can create your target model element in the grid according to the model element type you selected in the Model Element drop-down menu. In this tutorial, you have selected Use Case as the model element, so click the New Use Case button.

- Enter the name for the newly created model element by double-clicking on it. In this tutorial, enter Manage bulletin board. Press Enter to confirm.

Adding Extra Property Columns to a Grid
- You can add extra property columns to a grid by clicking the Configure Columns... button.

- In the Configure Columns window, select the properties that you want to present in the grid. In this tutorial, select ID and Primary Actors. You can press the Ctrl key to perform a multiple selection.

- Click > to add the selected properties. Click OK when done.

- As a result, the ID and Primary Actors columns are presented in the grid.

Filtering Elements
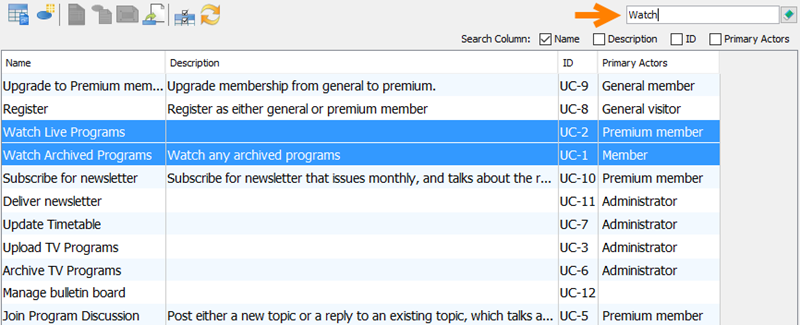
You can search your target model element quickly using the filter. Type Watch in the search field. All related elements will then be highlighted.
Creating a Document of the Grid
- Select Tools > Doc. Composer from the application toolbar.
- Choose Build Doc from Scratch.

- Drag the grid to the document. You will then see the grid presented in the document.
